I have no idea how it happened, but Cathy became the garlic bread Queen, and is now world famous for her incredible bread. It is, of course, a required accoutrement to the Saturday night Chicken Parm feast, as well as the common Wednesday night Hot Italian Sausage meal, and is often requested by guests no matter what else might be on the menu (oatmeal, bologna sandwiches . . .!) I think the secret must lie in the loving, for there surely seems no magic in the ingredients . . .
here's what you'll need . . .
fresh garlic
sub rolls
butter (and maybe some of that ‘fake butter’ stuff too)
Here's how you do it.
About an hour before the bread will go under the broiler, get your butter out to warm up. Cathy claims the bread will be ugly if the butter is cold!
While the butter is warming, peel and trim the garlic. How much garlic, you ask? Well, once, long ago, we both said, "Hey, no such thing as too much garlic!" Then Cathy proved us wrong. Oh, that was a batch . . .
So now, we just frighten everyone by using 1 clove of garlic per serving of bread! And a serving of bread is defined as ½ of a 6" sub roll. A typical diner will eat two servings of bread. So, count your diners; count one sub roll each; multiply by two; and count out that many cloves of garlic.
Now, a 'clove' is a seriously variable quantity, ranging from a niblet to a golf ball! When doing garlic bread, a clove should be about the size of the end joint of your thumb. If all you've got are little things, then set two or three of them together until they look about the size of a 'proper' clove, and then just call that 'one.'

And, yes, there's some grunge on a couple of these cloves. But if you just trim it off until you get down to nice clean garlic, all will be well, 'Course, you may have to peel another clove or two . . .
Speaking of peeling . . . If you have to do more than two or three cloves, get yourself one of these things . . .

This happens to be a "Ben Omessi's Original e-z-roll Garlic Peeler" by Selandia of Spokane Washington. A Google search will turn up plenty of hits, or, if you're a card carrying cheap yankee, head down to your local hardware store and check out their supply of rubber hoses . . . Whether you get one of the originals, an imitator, or make your own, peeling garlic will become so simple you'll start putting it on your breakfast cereal!
Once you have the garlic properly measured, peeled and trimmed (slice off the hard little stem end, and maybe the tip at the other end if it it's starting to sprout a new hand of garlic!), whack each clove up into a few pieces and toss them into your handy-dandy little chopper gizmo. Unless you're doing this for about 200 people, a full sized food processor is just too big. We use a little Black & Decker 2-cup chopper that does a marvelous job for up to about 6 servings. If we ever need to do more, we'll just do two batches!

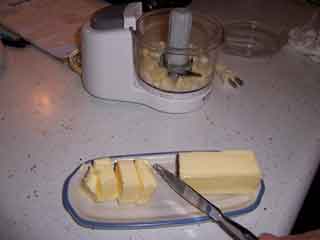
Now whirl up the garlic. Pulse it at first until little bits start to stick to the top of the chopper, then whiz away until the blade spins freely. Next, add the butter. How much butter, you ask? Well . . . Ok, no, I won't tell any more stories. Use a pat of butter about ½" thick for each serving of bread, and then maybe one or two extra 'for the batch.' Toss it into the chopper, and whirl some more. Don't turn it into soup! Just a nice creamy mixture.
And since I've reached the 'lower your cholesterol!' age, we've started doing half butter and half 'other stuff.' In our case, we find 'Smart Balance' a pretty good choice for the other stuff, but your mileage may vary . . .

Now, if you don't have an electric thingy to mince and mix in, you can do the whole process by hand. Just mince half the garlic almost to juice, and leave the other half noticeably chunky, maybe a tad finer than coarse kosher salt. And you may want to let the butter sit out for two hours. Again, you don't want soup, but whisking by hand is a lot easier if the butter is definitely Soft. So put the seriously minced garlic in the bottom of a bowl, add the butter and then put the rest of the garlic on top. Get out the whisk, and beat until your arm hurts (or until it's done - you know, the 'nice creamy mixture' mentioned above).
When the garlic butter is perfect, spread it on the bread, which you have sliced in half lengthwise (being very careful to get each half exactly the same height!). Try to get about the same amount of garlic butter on each piece, though that is a trick that probably only comes with practice. So when you first start, skimp on each piece - you can always add more, but it's a real pain to try to scrape it off to redistribute.

Spread the loaves out on heavy duty foil and stick 'em under a red hot broiler,

turning the entire batch every 30 seconds or so (once they start to cook at all)

until they are a perfect golden brown all over. (And, yes, you can yank them out one at a time as they get to that perfect stage!)

When they're done to your liking, pile 'em on a plate, tent the plate with the foil, haul it off to the table, and prepare for world fame!
(No, I did not take a photo of the finished bread - it was time to eat!!!)
No comments:
Post a Comment