Somewhere along the line, some restaurateur figured out that flour was cheaper than milk and seafood, and thus was born the stand-your-spoon-up-in-it sludge that now passes for ‘chowdah.’ It isn’t. Please. Leave the flour, cornstarch, arrowroot, agar, or other thickening agents out. Chowder is a milk soup. It’s thin.
But just because chowdah is a milk soup doesn’t mean that milk has to be the only liquid in the pot! So, hey, ‘gear up’ as Jethro might say and let’s build a half gallon of not-quite-classic seafood chowdah.
Here’s what you’ll need:
1 small to medium yellow onion
1 rib celery
1 carrot
2 (or so) potatoes
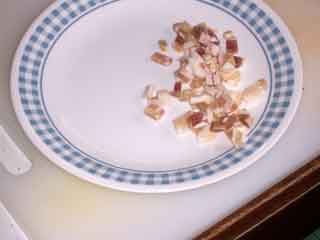
lean salt pork, cut into 1/8” dice (maybe ¼ to 1/3 cup, 3 or maybe 4 slices, err on the extra side – you can always store extras for use in other things)
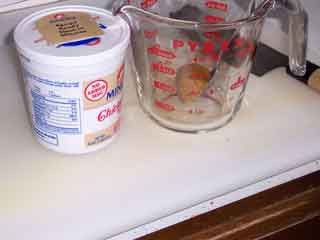
2 cups chicken stock
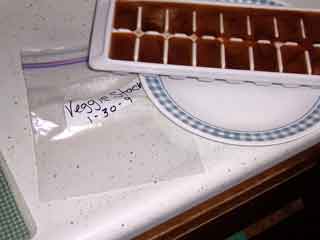
1 – 2 cups vegetable stock
1/3 to ½ cup sherry (cream, dry, whatever’s cheap and on hand)
½ gallon milk
( ½ cup or more cream or half & half, optional)
butter and/or olive oil
seafood (what you got . . . clams, scallops, shrimp, white fish, red fish, crab, lobster, calamari – but only if you quick-cook it properly and then chop it before putting it into the chowdah!)
¼ cup chopped fresh parsley or 1 Tbsp. dried flakes (curly parsley, not cilantro)
salt and Tellicherry (maybe a few flakes of dried red pepper flakes – you know,
pizza pepper)
Here’s how you do it:
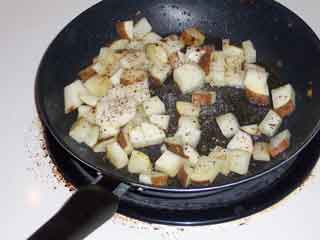
Start with the salt pork. Cut it up into tiny little cubes and toss it into your chowdah pot over medium heat. Put a teaspoon of olive oil in the pan if it’s prone to sticking add a few (1/3 tsp?) flakes of red pepper, and stir everything around to coat the pork.

As soon as the pork begins to sizzle and spit, turn the heat down to low and slow. You want to render the fat while you brown the ‘cracklins’ and you do not want to create any nitrosamines in the process.
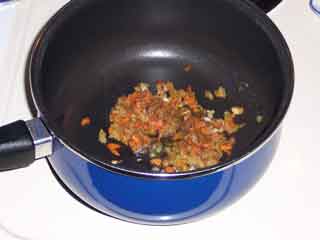
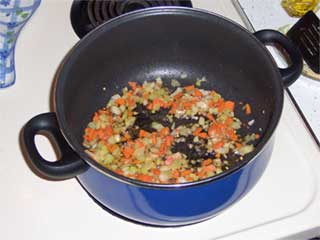
While your cracklins become perfect, prepare a classic mirepoix – onions, carrot, and celery, chopped fine but not quite minced. Use about 1/3 of each vegetable for the mirepoix. Cut the rest of each into soup-sized chunks and save it to add later.
When the pork is rendered and browned, remove it to a plate and drain it on a paper towel (or brown bag or . . .). Crank the heat back up under the pot and cook the mirepoix. OK, OK, if your cardiologist is watching or your pork was particularly generous, you can drain out some of the pork fat before you cook the mirepoix. Or if you want to introduce some extra special flavor into your soup, drain some of the pork fat but replace it with an equal amount of butter. Whatever your fat choice(s), cook the mirepoix for at least 5 minutes over pretty good heat, stirring constantly. You want the heat to bring out the flavors of the veggies, but you don’t want anything to brown. So keep it movin’! After 5 minutes, add the parsley and then turn the heat back down to that low and slow spot. Continue to ‘stew’ the mirepoix for another 12-15 minutes. This stage is to thoroughly tenderize the veggies.
In this case, I had a ‘broken’ potato, so rather than keep it damp until later, I just tossed it in with the mirepoix here.
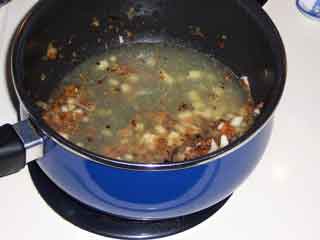
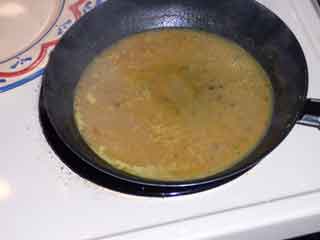
When the veggies are totally tender, crank the heat back up to medium, count to 23 (or wait for some indication that the heat is back) and pour in a goodly slug or two of sherry. You can use white wine if you prefer, but I like the woodsy richness that the sherry imparts. Let it bubble and sizzle until the volume of sherry is reduced by at least half; then pour in one cup of chicken stock.

Allow the pot to come up to a serious simmer and let it cook until the chicken stock is reduced by at least half.

Now in case you haven’t noticed, you’ve just created a wondrous, rich flavorful soup/sauce base that you can and should use whenever you make any kind of soup or sauce. The basic steps are the same: cook up a mirepoix (or something similar – replace the carrot with bell peppers and/or add some garlic and/or toss in some herbs and/or . . .), then simmer in liquid(s) to make your flavor base. It’s a classic technique you can use all the time.
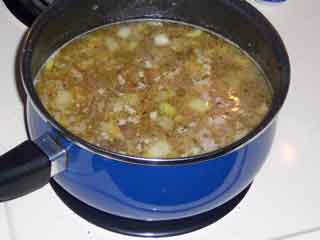
Once the liquid in your pot has reduced by half, add the rest of the chicken stock and all of the veggie stock. Bring it up to a good simmer and let it cook for 10 minutes or so.

Then add in the rest of the chopped up vegetables. While they’re getting warm, cube up the potatoes. I always leave the skins on, but you can peel them if you must. Do trim away any nasty bits, and try to get your cube size small enough to allow a piece of potato to share the spoon with something else when you’re eating.
When the pot is bubbling again, toss in the potatoes. Let them cook for at least 15 minutes. Then, sample a bit of broth and half a piece of potato. If you need to add salt, now is the time. And even if no salt is required, now is the time to add a few (4 – 6) grinds of fresh Tellicherry.
At this point, it’s fish time. Whatever you’ve got, toss it in. In general, you can cook the fish in the stock. But for calamari, clams, crab and lobster, pre-cooking is best; that way, you can easily consol the tenderness of the seafood. Once cooked to perfection, all kinds of fish will survive quite nicely in a slow cooked soup. Shrimp, white fish and red fish seem quite happy cooking directly in the chowdah.

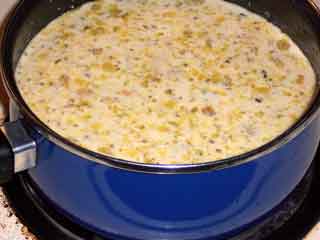
As soon as the fish are in, add the milk (and cream if you are using it). As always, if you think of it, get the milk and cream out long enough in advance to reach room temperature before you pour them in, or don’t. . . But whatever you do, pay attention to your pot! If the milk boils over, and you’re not right there, you’ll likely make friends with your local fire department.

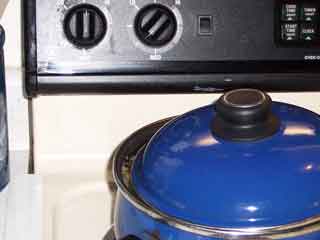
Once the fish and milk are in the pot, add about half the cracklins back to the pot (save some to sprinkle on at the table). Then, it’s time to wait. The chowdah should come to a serious simmer, with some milk curd/crust/solids forming on top. Stir them all back in and lower the heat to a bare simmer and let your chowdah develop for at least an hour.

After that, well, simply enjoy . . .