Saturday, August 28, 2004

Ingredient: Louisiana Hot Sauce

Go out and buy some of this. No, I won't get a cut (unless it shows up in the sidebar), but it is, in my estimation, an important seasoning in any well stocked kitchen.

There are certainly 1000s of hot sauces out there, and tastes vary widely. I've experimented with at least dozens of different brands and styles. Now, I keep 3 in my house. Tabasco, SriRacha, and this one.

Louisiana Hot Sauce

This particular brand is not for raising a sweat or establishing bragging rights; it's for flavor. You can pour quarts of this stuff into, under, over, and on almost anything, and the result will be at least delicious, perhaps, sublime.

If you come back and keep reading this blog, you'll find it mentioned in a number of dishes.

Tonight, for example, summer returned to New England with a vengeance. Dinner needed to be quick and simple and cooked outside. What to do? Douse a couple of bony breasts of chicken with Louisiana Hot Sauce, let 'em sit in the fridge for an hour or two, and onto the grill. A quick salad, maybe some sliced Italian bread, and voila, a feast!

Hot Sauce grilled chicken

Try it . . .

the vagaries of online life . . .

Hi all. Would have had food yesterday. But my cable company cum ISP decided to play with the big kids and host their own service. The network cutover was, well let me put this as delicately as possible, a disaster. It was supposed to be completed overnight on Wednesday. I'm semi-functional today. In between, I can only give thanks to all the poor beleagured support folks who had to deal with the likes of me. I hope a suit or two joins the unemployed!

So how about a quickie . . .

Tuesday, August 24, 2004

Recipe: Cathy's World Famous Garlic Bread

Sheesh. Ya blink and a week goes by . . . To reward you for your patience, how about some food!

I have no idea how it happened, but Cathy became the garlic bread Queen, and is now world famous for her incredible bread. It is, of course, a required accoutrement to the Saturday night Chicken Parm feast, as well as the common Wednesday night Hot Italian Sausage meal, and is often requested by guests no matter what else might be on the menu (oatmeal, bologna sandwiches . . .!) I think the secret must lie in the loving, for there surely seems no magic in the ingredients . . .

here's what you'll need . . .

fresh garlic
sub rolls
butter (and maybe some of that ‘fake butter’ stuff too)

Here's how you do it.
About an hour before the bread will go under the broiler, get your butter out to warm up. Cathy claims the bread will be ugly if the butter is cold!

While the butter is warming, peel and trim the garlic. How much garlic, you ask? Well, once, long ago, we both said, "Hey, no such thing as too much garlic!" Then Cathy proved us wrong. Oh, that was a batch . . .

So now, we just frighten everyone by using 1 clove of garlic per serving of bread! And a serving of bread is defined as ½ of a 6" sub roll. A typical diner will eat two servings of bread. So, count your diners; count one sub roll each; multiply by two; and count out that many cloves of garlic.

Now, a 'clove' is a seriously variable quantity, ranging from a niblet to a golf ball! When doing garlic bread, a clove should be about the size of the end joint of your thumb. If all you've got are little things, then set two or three of them together until they look about the size of a 'proper' clove, and then just call that 'one.'

count the cloves

And, yes, there's some grunge on a couple of these cloves. But if you just trim it off until you get down to nice clean garlic, all will be well, 'Course, you may have to peel another clove or two . . .

Speaking of peeling . . . If you have to do more than two or three cloves, get yourself one of these things . . .

garlic peeler

This happens to be a "Ben Omessi's Original e-z-roll Garlic Peeler" by Selandia of Spokane Washington. A Google search will turn up plenty of hits, or, if you're a card carrying cheap yankee, head down to your local hardware store and check out their supply of rubber hoses . . . Whether you get one of the originals, an imitator, or make your own, peeling garlic will become so simple you'll start putting it on your breakfast cereal!

Once you have the garlic properly measured, peeled and trimmed (slice off the hard little stem end, and maybe the tip at the other end if it it's starting to sprout a new hand of garlic!), whack each clove up into a few pieces and toss them into your handy-dandy little chopper gizmo. Unless you're doing this for about 200 people, a full sized food processor is just too big. We use a little Black & Decker 2-cup chopper that does a marvelous job for up to about 6 servings. If we ever need to do more, we'll just do two batches!

chopper whizmo

Now whirl up the garlic. Pulse it at first until little bits start to stick to the top of the chopper, then whiz away until the blade spins freely. Next, add the butter. How much butter, you ask? Well . . . Ok, no, I won't tell any more stories. Use a pat of butter about ½" thick for each serving of bread, and then maybe one or two extra 'for the batch.' Toss it into the chopper, and whirl some more. Don't turn it into soup! Just a nice creamy mixture.

how much butter?

And since I've reached the 'lower your cholesterol!' age, we've started doing half butter and half 'other stuff.' In our case, we find 'Smart Balance' a pretty good choice for the other stuff, but your mileage may vary . . .

and the other stuff

Now, if you don't have an electric thingy to mince and mix in, you can do the whole process by hand. Just mince half the garlic almost to juice, and leave the other half noticeably chunky, maybe a tad finer than coarse kosher salt. And you may want to let the butter sit out for two hours. Again, you don't want soup, but whisking by hand is a lot easier if the butter is definitely Soft. So put the seriously minced garlic in the bottom of a bowl, add the butter and then put the rest of the garlic on top. Get out the whisk, and beat until your arm hurts (or until it's done - you know, the 'nice creamy mixture' mentioned above).

When the garlic butter is perfect, spread it on the bread, which you have sliced in half lengthwise (being very careful to get each half exactly the same height!). Try to get about the same amount of garlic butter on each piece, though that is a trick that probably only comes with practice. So when you first start, skimp on each piece - you can always add more, but it's a real pain to try to scrape it off to redistribute.

spread the bread

Spread the loaves out on heavy duty foil and stick 'em under a red hot broiler,

under the broiler

turning the entire batch every 30 seconds or so (once they start to cook at all)

turn till you burn

until they are a perfect golden brown all over. (And, yes, you can yank them out one at a time as they get to that perfect stage!)

yank 'em when done

When they're done to your liking, pile 'em on a plate, tent the plate with the foil, haul it off to the table, and prepare for world fame!

(No, I did not take a photo of the finished bread - it was time to eat!!!)

Wednesday, August 18, 2004

And the outcome was . . .

Extra special goodly wondrous! Give it a try . . .

We had a bunch of aging broccoli, so that became the main veggie, and we always have carrots, peppers and onions on hand.

Veggie medley

The chicken sat up on the warming rack of the gas grill (oh, how I miss my Webber kettle, but then that’s another story . . .) over very low heat for about 90 minutes (cover closed – no flare ups, no smoke). About ½ of the remains of the marinade was drizzled over the top after about 35 minutes and the rest after about an hour.

Chicken on the grill

And then we ate! (A little share-a-salad in the center with crumbled feta to make it fun!)

On the table

Mmmmmmm . . .

Tuesday, August 17, 2004

Recipe: 11 secret herbs and spices

So how did he know? Harlan, that is. The erstwhile Colonel. That 11 was the magic number. 'Cause it is, you know.

A couple of years ago, after the Food Network finally made it to our cable system and I learned who this Emeril person was, I started experimenting with dry spice rubs for beef, pork and chicken. And without pre-planning anything, I just started pulling stuff off the spice rack (well, shelf; well, ok, shelves, in the pantry - hey! Cathy has 37 pairs of shoes; I can have a few strange spices!) to try my hand. I ended up with 11 ingredients. A few months later, I tried another one. Yup. 11 ingredients. And the third time it came out that way, I noticed.

Self, I said (Thank you, Emeril, for that and your Essence recipe – even though it is only 8 ingredients! - and for a lot of fun also), there seems to be a theme here. And since then, whenever I put together some complex brew or mixture, I start counting. If I get to 8 or 9, I step back and ask, Hmmm, can I find a couple more? Usually I can . . .

Now that's not to say that 'Keep it simple, Souschef' isn't a good way to go. Probably 70 - 80% of the time, choosing a 'signature' flavor and using other ingredients to support, highlight or enhance that one main theme is the best approach. But now and then, go crazy; count to 11!

Today, we're going to throw a couple of bony chicken breasts on the grill for dinner (with some rice and a sautéed vegetable medley of some sort - whatever needs using up in the fridge). And since I have a terrible time leaving well enough alone, I decided to concoct a marinade for the chicken. Yup. 11 (if you count lemon and lime as separate ingredients). Don't know how it will turn out, but here's what ended up in it.

1/3 tsp. cumin, ground
1/3 tsp. galangal powder (ok, weird one; adds nice heat without a lot of its own flavor)
¼ tsp. cinnamon, ground (Try it! You'll like it! . . .)
12 -14 grinds black pepper, fresh coarse ground Tellicherry, of course! (Yeah, yeah, yeah, we’ll talk about pepper one day!)
½ tsp. garlic, granulated or powder if that's all you've got
1/3 tsp. cilantro, dried flakes
2 - 3 tbsp. fish sauce, Tiparos, of course (if you don’t have any, get some; but for now, just add some salt – ½ tsp. or so)
3 - 4 tbsp. white wine, dry, cheap, Chablis, Chardonnay, . . .
1 - 2 tbsp. lemon juice, about 1/3 of a lemon
2 - 3 tbsp. lime juice, about ½ of a lime
2 - 3 tbsp. sesame oil
(All measurements are fictional; I judge by eye, and pinch, and palm, pure guess; you’re on your own!)

Put all the dry stuff in a glass pie plate (or something similar) and flip, swirl, twirl together with a fork. Add the fish sauce, wine, and citrus (toss the rinds in, too if you have room - and if you remembered to wash the fruit before you squeezed), and, again, fork it into a frenzy. Squirt the sesame oil onto the chicken (both sides, now!), rub it in, and dredge, dip, slosh, and otherwise thoroughly coat the chicken with the marinade.

Put the pie plate in the fridge for a couple of hours and then grill the chicken. Or, at least, that's what I'm planning at the moment. Use the rest of the marinade to drizzle on the chicken from time to time, and hey, I'll let you know tomorrow how it all turns out!

Friday, August 13, 2004

the pace of change . . .

So.

It looks like this is going to grow at a 'measured' pace. Sometimes life intervenes.

This week has been spent crawling around on hands and knees in 'the computer room' trying to replace a hard drive and salvage all the data and applications from the old one. Task complete, but there's no energy left for culinary creations (of the blog sort - we're still eating well!).

More anon . . .


Monday, August 09, 2004

Recipe: Oven baked simple subs

Whenever we have guests, Cathy is forever buying cold cuts – “so they can have sandwiches for lunch.” Of course, ‘they’ never do. And we have lunch maybe twice a month. Eventually, after throwing out half a zillion dollars worth of slimy ham and fuzzy roast beef and blue Swiss cheese, light dawned. Freeze the stuff!

So I did.

But eventually, the freezer fills up, and then what do you do? Well, you make simple subs, that’s what . . .

Here’s what you’ll need:
For each sub

2 thin (near shaved) slices deli ham (Polish is our favorite)

2 (as above) slices deli Roast Beef (our favorite is Italian)

1 ‘stick’ Gruyere or provolone or jack or . . . cheese (¼” x 3” or so)

1 full slice deli Swiss (thin, not those slabs that come pre-cut)

1 slice mozzarella (~ 1 oz.)

1 – 2 pepperoncini

lettuce

tomatoes

onion

ripe olives

green bell pepper

mustard (or mayo or spiced oil or . . .)

6” sub roll

whole celery seed

cookie sheet

Here’s how you do it . . .

Preheat the oven to 450 ˚F

Start with the sub rolls, so they have time to ‘stale up’ a bit while you prepare everything else. Set the sub rolls out on your cookie sheet (or sheet pan or slab of aluminum foil or . . . you’ll want something underneath the subs when they go into the oven to protect against spills). If you get your sub rolls, as we do, in a package of 6 (or so), they come stuck together side to side. It’s one of those flat sides you’ll want for the bottom and top of your sandwich. The flattest side goes on the bottom – so the sub will stand up by itself on the pan. So choose a bottom side down for each sub.

Now, Take your favorite serrated edge bread knife and cut a little ½” deep by 1” wide, shallow sided trough down the center of the roll. Don’t go all the way out to either end – leave about ½” to ¾” at the ends of the roll. You just sort of saw very gently, with the knife at a shallow angle, as if you were slicing the seeds out of half a cucumber. Down one side then up the other, until you can lift off the narrow wedge of bread. (Have a snack, feed it to the birds, or save it for breadcrumbs . . .) Then, vertically slit the center of the trough from end to end, down to about 1/3” from the bottom of the roll. You want to make a slit you can stuff with all the stuff, without allowing the sub to lose its bottom or split side to side.

Now that the hard part is over, hey, the rest is a piece of cake . . .

Puncture your pepperoncini(s) to let the liquid drain out, then slice off (or pull off and munch or . . .) the stem end. Get your knuckles bent under and chiffonade the pepper(s) into glorious little rings. That just means slice paper thin.

Lay out the slices of ham and roast beef, and place a little row of pepperoncini along one edge of each. Pick the edge you will roll from, so the peppers end up in the center of the meat. If you only want to use one slice of each meat per sandwich, roll them along the long edge, so the final roll of meat is as long as possible. If you’ll be using several rolls per sub, roll each one for the shortest length. Either way, when you chomp a roll of meat, you should find some pepperoncini in the center. Set aside.

Break off a hunk of lettuce large enough to supply the number of subs you’re trying to make. ¼ head of iceberg will feed 4 – 8 subs, so judge accordingly. (‘Cause once you take a knife to a head of lettuce, any leftover will rot in about 24 hours.) Slice off very thin shreds of lettuce to fill your subs.

Similar for the pepper. Break off a piece big enough to feed the subs, then bring your knife to bear. I figure about two ¼” strips per sub, but your mileage may vary . . .

Onion? Well, yeah! I like paper thin strings of Red (Bermuda) onion, but you can slice, dice, chop or chunk, white, yellow, green, Vidalia, whatever. For my tastes, one thin slice (half round) of red is perfect for one sub.

The tomatoes should be halved and then gently squeezed to get rid of as much of the loose juice as possible. If you don’t ‘dry out’ the tomatoes, at least a little bit, your sub rolls will turn to soup. So squeeze them red things. And then chop them up into little cubes (1/4” or so). They need to be small enough that you can fit a goodly handful into each sub.

As for the olives, well, thin sliced rings, thin sliced strips, coarse chopped chunks, hey, stuff ‘em with anchovies and throw ‘em in whole if you like!

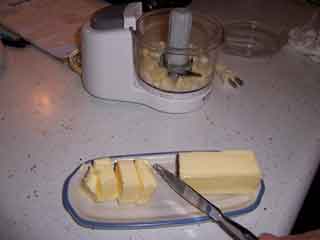
Now, chunk up your cheese sticks, roll up the Swiss, break the Mozz into half-slice strips, and get ready to assemble your creations.

First, lather a little condiment into the sub roll. I like mustard, Guldens or Poupon or maybe even a good Dusseldorf if there’s one around – just none of that yellow stuff Please! If you prefer, mayo is good or even a snappy spiced oil if that’s what you like. The major flavor of the sub is in the meats, cheeses and veggies. The condi is just an enhancement, a base on which to pile the other flavors, so use it, but sparingly.

To assemble the subs, I like to start with the ‘stick’ cheese in the bottom of the sub roll cavity. I always figure that some melted cheese in the bottom will glue the sub roll together and prevent it from falling apart through my fingers. On top of that cheese, spread the lettuce, then the meat rolls (one roast beef at the left end then a ham to reach the right end, then beef at the right end and a ham to reach the left end – let ‘em pile up in the middle!). Top the meat with the green peppers, the tomatoes, and the onions. Next, add the rolled up Swiss, then the olives, and a few shakes of celery seeds. Finally, lay the strips of Mozzarella (at least two, three if you like) diagonally across the top of the whole sub.

Now stick that sheet in the oven for 10 minutes. While you’re waiting, toss all the leftover salad stuff into a bowl (and call it a salad!), burn up a batch of French Fries and prepare to pig out!

Not exactly rocket science, or Escoffier either for that matter, but they sure taste good . . .

Tip: Pay Attention

Hi again. The yams survived, but I hate that mess of boiled over froth on the stove. So maybe I'll start with the obvious:

Pay attention while you're cooking. Every time I've sliced off a body part, impaled myself with a sharp instrument, raised blisters on exposed skin (or unexposed, for that matter!), or otherwise damaged myself in the kitchen, it's been because I wasn't paying attention. At least at that one instant. It may have been a hummingbird at the feeder outside the kitchen window, or suddenly realizing that I never paid that bill, or thinking three steps ahead (especially if I have no idea what I'm cooking!), or just glancing over toward the skillet while pouring the hot stuff through the strainer. Whatever the distraction, for an instant the tired old mind wanders, and KaWhammo, we've got some other damage to body or soul or kitchen, or worse yet, dinner!

So hey. Remind yourself from time to time: Pay Attention.

It's one of those little habits, like always deciding where you're going to put that hot thing down BEFORE you pick it up. Or making sure that the bottom of the sink is clean and soap-free before tossing the food in. Or putting the oven rack in the right slot before you preheat. Or . . .

You know the kind, the ones you keep telling yourself you should get in the habit of, over and over and over . . .

Anyway, enough preaching for one day. How about some food?


Sunday, August 08, 2004

The first post . . .

Hello World.

When I googled 'cooking blog,' I got only 206,000 hits. So, hey, why not one more . . .

I don't know where this effort will lead, but without that proverbial first step, it won't get anywhere. So here goes . . .

I've got no creds, no training, no 'professional experience.' I've just been foolin' around in the kitchen for 30 years. For the past 28, I've done all the cooking for family and friends and guests from around the globe. Nobody's died, and generally, the feedback's been pretty good. So I wrote a cookbook. . . .

But the consensus among literary agents seems to be, fuggheddaboudit. As one agent I queried quaintly put it: "To sell a cookbook these days you must either be a well-known expert in the field, have your own TV show or have a solid publishing record."

Well, I flunk on all those counts, but I'm still a pretty good cook. And I've got a penchant for teaching, so I'm going to give blogging a shot and see what kind of response you offer.

'Course, you're probably expecting a substantive post right now, a recipe maybe or a tip or technique description or . . . But here's rule number one. Don't try to write your blog WHILE you're cooking dinner. My yams just boiled over! I'm done for the day! More tomorrow . . .

Tommy J