I know, I know, it’s been way too long. . . And, contrary to some rumors, no, I have not died, retired (well, I did try that, but now have graduated to the ranks of the unemployed) or left the country (Thank you, voters of America!). Nope. Just been very busy and very boring in the kitchen. But after the first of the year, keep an eye out for lots of new posts! Already in the works are, Surviving the Tomato Horribilus Season, Chicago Style Hot Dogs, Lentil Soup, Chili con Carne, Bolices, Pulled Pork Low Country Style, Fricassee of Chicken, and a slew of tips. So please check back . . .
In the meantime, I hope you and yours are having a wonderful holiday season.
Happy Holidays,
tommyj
Saturday, December 23, 2006
Tuesday, July 18, 2006
Recipe: Grilled Tuna & Pasta
The first few times I did this, I planned ahead. Well, except for the first time, which, of course, was an adventure on “what’ve we got? what’ll we do with it?” This time, I didn’t have any fresh spinach, only frozen. I didn’t have any fresh basil, only dried. And no pignolis at all. But you know what? It was still delicious
here's what you'll need . . .
tuna steaks (1/3 Lb. per serving)
1 medium lemon, juiced and zested
½ lime, juiced
sesame oil, 1 small sploosh per serving
red pepper flakes, ¼ to ½ tsp.
salt
freshly ground Tellicherry
garlic, 1 - 4 cloves (we use 1 per serving)
red onion, 1 small
tomatoes, 2 - 4 (we use 1 per serving plus 1 more)
olive oil, 1/3 cup plus some more
angel hair (or fettuccine or linguine or your favorite skinny noodle)
fresh basil, about 1/3 to ½ cup julienned
fresh spinach, one 10 oz. bag feeds 3
pignoli, a small handful
chicken stock, 1 cup or so
fresh grated Parmesan cheese
Here's how you do it.
Wash your tuna steaks thoroughly and pat them dry. Place in a glass or ceramic dish and make a marinade. Start with a small sploosh of sesame oil and rub it all over both sides of the steaks. Then add a sprinkle of red pepper flakes (just a few - you want a trace of flavor here, not a lot of hot) and a sprinkle of coarse salt (always after the oil, so it won't dissolve immediately). Next, add a goodly grind of black pepper and finally the juices (no seeds, please) from ½ lime and ½ the lemon. Rub everything all over, turning the tuna a few times to coat thoroughly and to distribute all the ingredients throughout the marinade. Refrigerate for at least one hour. Two is fine, maybe even three, but any more and the tuna will ‘cook’ in the citrus. Turn the steaks every 20 minutes or so.

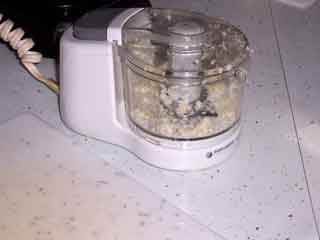
While the tuna marinates, make some garlic oil. Mince 1- 4 cloves in an electric thingy (food processor - we use a little 2 cup Black & Decker model that works just fine). When the garlic is minced, add the olive oil (1/3 cup or so) and whirl it till it's emulsified. Let the garlic oil sit at room temperature for an hour for the flavors to blend, stirring every now and then. And if you don't have an electric thingy, just mince the garlic, toss it in a bowl and whisk it with the oil until your arm gets tired. Voila! Garlic oil!
While the oil rests, wash the spinach and the basil leaves (remove the stems from both), and dry thoroughly.
Cut the basil leaves into a thin julienne. Take a leaf and roll it up from bottom to top into a thin cylinder. Slice hair-thin rings off the cylinder, let them unfurl - or give them a gentle 'fluff' with your fingertips to encourage them to unfurl - and then cut the strips in half. You should end up with a nice pile of julienne basil strips, each about 2" long.
Since I didn’t have any fresh basil, I put a healthy tablespoon of dried basil in a little bowl, stirred it up with three Tbsp. of cold water and let it reconstitute for an hour. Then I drained off the water, squeezing out any extra, added a drizzle of olive oil, and forked it all into a ‘definitely not pesto’ kind of paste.
Slice the spinach leaves into ½" wide strips. (Stack a few leaves, roll them up from one side to the other, and slice off ½" strips.)
Since all I had was frozen spinach, rolling and slicing nice strips was not going to happen. But hey, just let the spinach thaw, drain off any liquid, and whack it up into whatever size bits you like. The spinach and basil substitutions affect the texture of the final dish more than the taste (though the fresh ingredients do have a ‘brighter,’ ‘greener’ flavor.)

Dice the red onion into ¼" dice or ½" or chunks or . . .
Chop your tomatoes into ½" chunks. The Italian Plum tomatoes work best for this dish, but use any kind of fresh tomato you can find - even if it does resemble a tennis ball more than a tomato! And you want to get rid of most of the seeds and extra sloppy bits. (After cutting the tomatoes in half before chopping them up, I usually just give them a gentle squeeze-roll in the hand. A quick flip of the wrist, and whatever flings out into the garbage disposal is gone. Tomato deseeded!)

Now, somewhere along the line here, you want to cook your angel hair pasta. Since angel hair takes only about 3 minutes to cook, the time constraint is bringing the water to a boil! So, whenever it's convenient (and when you can pay attention - 'cause angel hair turns to glue after the 4th minute!), cook up the pasta. And underdone is by far better than over done! You are going to 'cook' the pasta again, after all. So, cook it up, drain it as dry as you can, and oil it thoroughly. (And there's no way to achieve 'thoroughly' without getting your hands in the pot for at least 2 - 3 minutes! Use enough of your best olive oil to make every strand glisten and slip through your fingers with ease.)
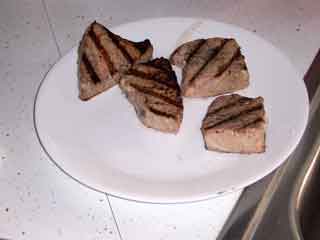
Paint the tuna steaks with garlic oil and grill them about 2 - 3 minutes per side over a pretty high flame. You want some distinct and noticeable brown on the outside but you don't want to cook them all the way through. They'll finish on their own while waiting to take their place in the skillet.
Finally, get that skillet out and heat it up. You're about to put this all together and serve a feast of ambrosia!

If you’ve got some pignoli, toast them in the fry pan as it warms up. Be sure you keep them moving constantly so they don’t burn. After about 2 minutes, declare done and pour the nuts out onto a plate to wait.
In the rest of the garlic oil, sauté the onions until they are tender (don't let them brown, just get them translucent). Then toss in the tomatoes. Sauté for about 1 minute (it really does help if you have a clock in view for this one, but if not, just do the old counting trick!), and then add ½ the chicken stock. Stir it all up and let it cook for at least 2 - 3 minutes.

Next, add the pasta (for this batch, I used linguine)

and cook it up in the pan mixture, tossing continuously until it's completely coated. Add the remaining lemon juice and the lemon zest; toss and cook, toss and cook. Now, add the basil; toss and cook. Add the spinach and a few pignoli. Toss a few more times and add some more chicken stock if you like (I do!). Stir, toss, and serve to plates. Top each plate with a tuna steak; pour ring of parmesan cheese all around the edge of each plate and put it all on the table with crunchy French bread and big salad.

here's what you'll need . . .
tuna steaks (1/3 Lb. per serving)
1 medium lemon, juiced and zested
½ lime, juiced
sesame oil, 1 small sploosh per serving
red pepper flakes, ¼ to ½ tsp.
salt
freshly ground Tellicherry
garlic, 1 - 4 cloves (we use 1 per serving)
red onion, 1 small
tomatoes, 2 - 4 (we use 1 per serving plus 1 more)
olive oil, 1/3 cup plus some more
angel hair (or fettuccine or linguine or your favorite skinny noodle)
fresh basil, about 1/3 to ½ cup julienned
fresh spinach, one 10 oz. bag feeds 3
pignoli, a small handful
chicken stock, 1 cup or so
fresh grated Parmesan cheese
Here's how you do it.
Wash your tuna steaks thoroughly and pat them dry. Place in a glass or ceramic dish and make a marinade. Start with a small sploosh of sesame oil and rub it all over both sides of the steaks. Then add a sprinkle of red pepper flakes (just a few - you want a trace of flavor here, not a lot of hot) and a sprinkle of coarse salt (always after the oil, so it won't dissolve immediately). Next, add a goodly grind of black pepper and finally the juices (no seeds, please) from ½ lime and ½ the lemon. Rub everything all over, turning the tuna a few times to coat thoroughly and to distribute all the ingredients throughout the marinade. Refrigerate for at least one hour. Two is fine, maybe even three, but any more and the tuna will ‘cook’ in the citrus. Turn the steaks every 20 minutes or so.
While the tuna marinates, make some garlic oil. Mince 1- 4 cloves in an electric thingy (food processor - we use a little 2 cup Black & Decker model that works just fine). When the garlic is minced, add the olive oil (1/3 cup or so) and whirl it till it's emulsified. Let the garlic oil sit at room temperature for an hour for the flavors to blend, stirring every now and then. And if you don't have an electric thingy, just mince the garlic, toss it in a bowl and whisk it with the oil until your arm gets tired. Voila! Garlic oil!
While the oil rests, wash the spinach and the basil leaves (remove the stems from both), and dry thoroughly.
Cut the basil leaves into a thin julienne. Take a leaf and roll it up from bottom to top into a thin cylinder. Slice hair-thin rings off the cylinder, let them unfurl - or give them a gentle 'fluff' with your fingertips to encourage them to unfurl - and then cut the strips in half. You should end up with a nice pile of julienne basil strips, each about 2" long.
Since I didn’t have any fresh basil, I put a healthy tablespoon of dried basil in a little bowl, stirred it up with three Tbsp. of cold water and let it reconstitute for an hour. Then I drained off the water, squeezing out any extra, added a drizzle of olive oil, and forked it all into a ‘definitely not pesto’ kind of paste.
Slice the spinach leaves into ½" wide strips. (Stack a few leaves, roll them up from one side to the other, and slice off ½" strips.)
Since all I had was frozen spinach, rolling and slicing nice strips was not going to happen. But hey, just let the spinach thaw, drain off any liquid, and whack it up into whatever size bits you like. The spinach and basil substitutions affect the texture of the final dish more than the taste (though the fresh ingredients do have a ‘brighter,’ ‘greener’ flavor.)
Dice the red onion into ¼" dice or ½" or chunks or . . .
Chop your tomatoes into ½" chunks. The Italian Plum tomatoes work best for this dish, but use any kind of fresh tomato you can find - even if it does resemble a tennis ball more than a tomato! And you want to get rid of most of the seeds and extra sloppy bits. (After cutting the tomatoes in half before chopping them up, I usually just give them a gentle squeeze-roll in the hand. A quick flip of the wrist, and whatever flings out into the garbage disposal is gone. Tomato deseeded!)
Now, somewhere along the line here, you want to cook your angel hair pasta. Since angel hair takes only about 3 minutes to cook, the time constraint is bringing the water to a boil! So, whenever it's convenient (and when you can pay attention - 'cause angel hair turns to glue after the 4th minute!), cook up the pasta. And underdone is by far better than over done! You are going to 'cook' the pasta again, after all. So, cook it up, drain it as dry as you can, and oil it thoroughly. (And there's no way to achieve 'thoroughly' without getting your hands in the pot for at least 2 - 3 minutes! Use enough of your best olive oil to make every strand glisten and slip through your fingers with ease.)
Paint the tuna steaks with garlic oil and grill them about 2 - 3 minutes per side over a pretty high flame. You want some distinct and noticeable brown on the outside but you don't want to cook them all the way through. They'll finish on their own while waiting to take their place in the skillet.
Finally, get that skillet out and heat it up. You're about to put this all together and serve a feast of ambrosia!
If you’ve got some pignoli, toast them in the fry pan as it warms up. Be sure you keep them moving constantly so they don’t burn. After about 2 minutes, declare done and pour the nuts out onto a plate to wait.
In the rest of the garlic oil, sauté the onions until they are tender (don't let them brown, just get them translucent). Then toss in the tomatoes. Sauté for about 1 minute (it really does help if you have a clock in view for this one, but if not, just do the old counting trick!), and then add ½ the chicken stock. Stir it all up and let it cook for at least 2 - 3 minutes.
Next, add the pasta (for this batch, I used linguine)
and cook it up in the pan mixture, tossing continuously until it's completely coated. Add the remaining lemon juice and the lemon zest; toss and cook, toss and cook. Now, add the basil; toss and cook. Add the spinach and a few pignoli. Toss a few more times and add some more chicken stock if you like (I do!). Stir, toss, and serve to plates. Top each plate with a tuna steak; pour ring of parmesan cheese all around the edge of each plate and put it all on the table with crunchy French bread and big salad.
Wednesday, July 05, 2006
Recipe: Orange Beef and Rice with Sausteamed Vegetable Medley
So here’s what I had last night. No photos – didn’t know it would be an instant classic. Next time, I’ll grab some pics and retrofit the post. (Tonight it’s hot dogs and baked beans!)
See, Cathy’s away, so what’s a good boy to do but try to eat down the freezer a bit. Seems we had this half a hunk of N.Y. Sirloin from a couple of months ago, and half a jug of orange juice from niece Jessica’s visit a couple of weeks ago; surely something good could come of it . . . And it did . . .
Here’s what you’ll need:
fresh thyme leaves ½ tsp. (if you don’t have fresh available, try a pinch of dried and a pinch of dried oregano – about ¼ tsp. total)
ground ginger ½ tsp. (if you have fresh, grate about 1 tsp.)
ground turmeric 1/3 tsp. (be careful with this stuff – it will dye the world indelibly yellow!)
anise seed ¼ tsp. (if you have fennel seed instead, use about 1/3 tsp. If you only have ground of either one, use half as much)
ground allspice 1/3 tsp.
Tellicherry (well, tons, of course and only freshly ground!)
Sriracha ½ tsp.
Worcestershire sauce 2 – 3 Tbsp.
soy sauce 2 – 3 Tbsp.
orange juice ½ cup (real, not from concentrate, squeeze your own if you can, pulpy or not as you like)
white wine 3 Tbsp.
sesame oil 1 tsp. for marinade, another for rice
N.Y. Sirloin steak (or your other favorite cut of grillable, ‘I can’t afford Filet Mignon anymore’ steak. This cut is also known as Shell Sirloin in some parts of the US.)
veggies for the medley – carrots, onions, baby bella mushrooms (or just the usual button ones), zucchini, summer squash, broccoli, tomato chunks (doused in Tiparos fish sauce) (and/or, whatever veggies you’ve got!)
white rice
Maggi sauce (it’s Italian, but you’ll find it at the Asian market near you)
corn starch 1 tsp. stirred into ½ cup water
Here’s how you do it.
Mix all that marinade stuff at the top of the list and let it sit for 15 or 20 minutes so all those tastes can get to know each other. You’ll have about 1 to 1 ¼ cups when you’re done
Now my steak was frozen, and I didn’t plan ahead, so I just poured the marinade right into the baggie with the frozen steak (about ½ lb.), zipped it up again and left the baggie in a bowl (in case it leaked) on the counter for about 2 ½ hours. If your steak is fresh, let it marinate for at least an hour at room temperature; more is better, overnight is probably a good idea – but for heaven’s sake, overnight it in the refrigerator!
Chop the veggies into bite sized chunks. Douse the tomatoes (on a separate plate, please) with Tiparos fish sauce. In fact, anytime you’re going to cook tomatoes to go with a tangy meal, give ‘em a good slug of Tiparos. Wonderful stuff. . .
And start the rice. Before you bring it to a boil, give the water about four or five shakes of Maggi sauce (through the bottle tip that you cleverly snipped off when you bought it) as well as a goodly squirt of sesame oil. Remember, 2 cups of water, 1 cup of rice, hey check out Recipe: Perfect Rice . . .
The rice will take 30 minutes (but will happily survive up to an hour). The veggies will need 10 minutes of ‘paying attention’ time and then another 7 – 10 minutes to finish. And the steak will take about 5 minutes on the ‘beauty side’ and another 4 or 5 on the other, and then it simply must sit for at least 5 minutes before you cut it – 10 would be better. To turn the marinade into table sauce will take about 10 minutes.
So here’s how I timed it.
Start the rice. When the water boils, dump in the rice.
Light the grill (for a 10 minute pre-heat).
When the grill is hot, put a saucepan on medium heat and add a tablespoon or four of olive oil.
Put the steak on the grill.
Add the carrots to the hot saucepan and cook, stirring often, for about 3 – 5 minutes. You’re looking for the beginnings of brown.
Pour the remaining marinade into a small skillet over medium low heat
Add the onions to the veggies, stir, toss reduce heat a bit.
After the steak has been on a total of 5 minutes, turn the steak.
After the onions have cooked for about 2 minutes (getting translucent), add the mushrooms, stir, toss frequently.
When the steak is done (about 4 minutes on second side), bring it in to rest.
Add remaining veggies to saucepan, splash with white wine if you wish, cover pan and reduce heat to low.
If marinade is not simmering seriously, raise heat. Reduce marinade by half.
Fluff rice into serving bowl.
Slice meat on an angle (to make your slices wider) into thin slices (across grain). If meat has cooled too much, or is not cooked quite enough, toss it into the sauce for 20 – 30 seconds (no more than a minute!!)
If meat is in sauce, remove it, then thicken sauce with cornstarch (1 tsp. at a time!)
Serve veggies to serving bowl.
Put it on the table, sit, eat. Go “Ahhhhhhh . . . “
Friday, June 30, 2006
Tip: The Antibacterial Soap Diatribe
Hey! It's still June for another few hours, and I refuse to let an entire month go by without any posts! But this is the only thing I've got already written (lots of photos, no descriptions - next month!!) So, for what it's worth, the diatribe . . .
Look, if you want to waste/spend the money on antibacterial ‘soaps,’ well, it’s your money. But if you do, learn to use them properly. If you do not, you’re asking for trouble.
First, antibacterial ‘soap’ is not soap. Soap is a type of ‘detergent.’ It works by messing about with the surface tension of water and other fluids so as to lift dirt and grease and bacteria up from the surface of your skin so you can rinse it all away with rushing water. Soap works by physically removing bacteria from your skin and floating it down the drain.
An antibacterial agent works by remaining in direct contact with the cell wall of a bacterium until it can infiltrate the cell and kill it. That process takes time. At least three minutes, for the strength of antibacterials that can be bought over the counter.
Unfortunately, if you were to put antibacterial agents into soap, the surface tension-float-it-away trick serves to keep the antibacterial away from the bacterium, just the way it lifts the bacterium from your skin. No contact, no kill, and therefore, no proper use of the term “antibacterial.” So, ‘antibacterial soaps’ use a different base emulsion to suspend the antibacterial agent and keep it in contact with the bacteria on the surface of your skin.
But if you don’t keep the goop in contact with your skin for the full three minutes (or maybe more, depending on product), you won’t kill anything. And when you rinse the goop off your hands, because it does not perform the same sort of detergent action that soap does, you leave all the live bacteria on your skin. You’ve wasted your money, your time, and you have not cleaned your hands!
So you choose. Three minutes of continuous rubbing (preferably with a brush) to give the antibacterial stuff time to do its job. Or, a quick scrub with soap, a quick rinse with water, and your hands are clean.
Thursday, May 04, 2006
Recipe: Half Sour Pickles
So I became an addict sometime around 1970. In Miami, on Collins Avenue, at the coffee shop lunch counter of the Eden Roc. It was a glorious day.
You see, in those days, all the class hotels along Millionaire’s Row served up all the half sour pickles you could eat, for free, 24 hours a day. Bowl after bowl after bowl, the entire length of the counter, on every table, at every booth. These wondrous, pale green inside, brilliant green outside, incredibly crunchy, manna from heaven, half sour pickles.
I’d grown up with dill pickles, and had met many a sour pickle, and even some sweet pickles were actually pretty good under some circumstances. But I had never before met a half sour. And when I did, I knew I had found pickle perfection.
Unfortunately, since Goldi’s Deli closed about 10 years ago, there has been no source of half sour pickles in this part of the world. Occasionally, a jar of BaTampte half sours would show up at the grocery store, but then months would pass without another. I suffered as long as I could. Now I make my own.
These are not yet pickle perfection; I’m still ‘in search of,’ on that journey. But they are certainly Pretty Good Pickles . . .
Here’s what you’ll need:
1/3 tsp. whole coriander seeds
1/3 tsp. brown mustard seeds
1 or 2 whole allspice
1/3 tsp. crushed red pepper flakes
1/3 tsp. black pepper corns
¼ tsp. dill seeds
1 – 2 Tbsp. dill weed
2 or 3 pieces broken dried bay leaf
4 – 6 cloves garlic
¼ cup pickling salt
4 cups water
8 or 9 pickling cukes
Here’s how you do it.
First, buy some pickling salt. Look for salt that specifically says “pickling salt.” That’s because pickling salt is simply plain, pure salt. No iodine, no additives to ‘ensure free flow,’ no nothing. Just salt, sodium chloride, NaCl, that’s all. Even Kosher salt, these days, usually has additives (presumably Kosher additives, but still . . .) For a pickling brine of any kind, just plain salt is best.
Second, a word about the Pickle Police (with thanks, or apologies, to Emeril). This is a cold, fresh-pack approach to pickles. No heat, no boiling, no sterilization in the autoclave, or canning in a boiling water bath, no antisepsis of any kind other than normal kitchen cleanliness. In other words, against all the rules promulgated by the FDA and every other official food agency. So if you want to stay out of the hospital, be scrupulous in your cleaning.
The process itself is pretty simple. Dissolve the salt in the water. Grind up all the dry ingredients except the dill weed and the bay leaf in a mortar. Chop the garlic. Wash the cukes and pack them in the jar. Dump in all the dry stuff, all the garlic, and pour in the salt water to cover everything. Wait. Chill. Pickles.
Too quick? Ok. One more time . . .
While you’re gathering and measuring and grinding and chopping, let your cukes soak in a sinkful of ice cold water. And be sure to snip off any little stem parts that are still attached. The stems are very bitter and can ruin an otherwise great batch of pickles.

The amount of salt, and the other ingredients, will, of course, depend on the size of your pickle jar. Mine holds about 8 or 9 cucumbers and takes nearly 4 cups of salt water to cover the pickles. So all my measurements are based on my jar. You’ll need to adjust based on your jar. Also, remember that even though I’ve offered specific amounts for the ingredients, I measure them all in the palm of my hand – well, except for the water and the salt . . .

When you grind up the dry ingredients, don’t turn it to dust. You just want to release some of the flavors and let them blend for a minute or two. I usually watch the brown mustard seeds, and as soon as I see them becoming a yellow powder, I’ll stop. The allspice are usually still whole at that point, as are the peppercorns. (In fact, I’ll often just add the peppercorns at the end, without even putting them in the mortar.)

The salt and garlic will be providing most of the noticeable flavor for your pickles, so getting the garlic quantity right is a critical step. Since I didn’t understand that at first, I erred on the side of caution. I urge you to err on the other side. And keep in mind that smaller cloves are often more strongly flavored than large ones. If your garlic cloves are the size of your thumb, use 6 (or 8 or . . .)

When you pack your cukes into your jar, try to leave an inch or two of headroom above the pickles. If the pickles are not completely covered in the brine, they’ll just rot, and you’ll be calling those Pickle Police. So push and shove a little to get them in with some room to spare.
When the pickles are packed, pour in the contents of the mortar, the chopped garlic, the dill weed, the bay leaf, and anything else you decided not to grind earlier. Then fill the jar with the salt water, right up to the top.

Now they get to sit for a few days, somewhere cool and dry (and clean!) Do not tighten the lid while the pickles are sitting. You want the natural airborne beasties to get into the jar and help the pickles start to ferment. Leave them at room temperature for at least 48 hours – I usually wait 72 hours – and then screw that cap on tight and put them in the refrigerator. Oh, and that little ‘diaper dish’ under the jar is a really good idea. Some of the brine is guaranteed to spill out as the fermentation gets going; catching it in the bucket is better than wiping it off the table!

(And, no, that line around the upper part of the jar is not the fluid level – it’s just some gum from the original label on the jar. My pickles are most definitely completely submerged!)
As I said, these are not yet Pickle Perfection, so if, in your experiments, you stumble across the path to perfection (or already know it), please share. Half sour pickle lovers across the globe will thank you for it . . . In the meantime, enjoy these . .
You see, in those days, all the class hotels along Millionaire’s Row served up all the half sour pickles you could eat, for free, 24 hours a day. Bowl after bowl after bowl, the entire length of the counter, on every table, at every booth. These wondrous, pale green inside, brilliant green outside, incredibly crunchy, manna from heaven, half sour pickles.
I’d grown up with dill pickles, and had met many a sour pickle, and even some sweet pickles were actually pretty good under some circumstances. But I had never before met a half sour. And when I did, I knew I had found pickle perfection.
Unfortunately, since Goldi’s Deli closed about 10 years ago, there has been no source of half sour pickles in this part of the world. Occasionally, a jar of BaTampte half sours would show up at the grocery store, but then months would pass without another. I suffered as long as I could. Now I make my own.
These are not yet pickle perfection; I’m still ‘in search of,’ on that journey. But they are certainly Pretty Good Pickles . . .
Here’s what you’ll need:
1/3 tsp. whole coriander seeds
1/3 tsp. brown mustard seeds
1 or 2 whole allspice
1/3 tsp. crushed red pepper flakes
1/3 tsp. black pepper corns
¼ tsp. dill seeds
1 – 2 Tbsp. dill weed
2 or 3 pieces broken dried bay leaf
4 – 6 cloves garlic
¼ cup pickling salt
4 cups water
8 or 9 pickling cukes
Here’s how you do it.
First, buy some pickling salt. Look for salt that specifically says “pickling salt.” That’s because pickling salt is simply plain, pure salt. No iodine, no additives to ‘ensure free flow,’ no nothing. Just salt, sodium chloride, NaCl, that’s all. Even Kosher salt, these days, usually has additives (presumably Kosher additives, but still . . .) For a pickling brine of any kind, just plain salt is best.
Second, a word about the Pickle Police (with thanks, or apologies, to Emeril). This is a cold, fresh-pack approach to pickles. No heat, no boiling, no sterilization in the autoclave, or canning in a boiling water bath, no antisepsis of any kind other than normal kitchen cleanliness. In other words, against all the rules promulgated by the FDA and every other official food agency. So if you want to stay out of the hospital, be scrupulous in your cleaning.
The process itself is pretty simple. Dissolve the salt in the water. Grind up all the dry ingredients except the dill weed and the bay leaf in a mortar. Chop the garlic. Wash the cukes and pack them in the jar. Dump in all the dry stuff, all the garlic, and pour in the salt water to cover everything. Wait. Chill. Pickles.
Too quick? Ok. One more time . . .
While you’re gathering and measuring and grinding and chopping, let your cukes soak in a sinkful of ice cold water. And be sure to snip off any little stem parts that are still attached. The stems are very bitter and can ruin an otherwise great batch of pickles.
The amount of salt, and the other ingredients, will, of course, depend on the size of your pickle jar. Mine holds about 8 or 9 cucumbers and takes nearly 4 cups of salt water to cover the pickles. So all my measurements are based on my jar. You’ll need to adjust based on your jar. Also, remember that even though I’ve offered specific amounts for the ingredients, I measure them all in the palm of my hand – well, except for the water and the salt . . .
When you grind up the dry ingredients, don’t turn it to dust. You just want to release some of the flavors and let them blend for a minute or two. I usually watch the brown mustard seeds, and as soon as I see them becoming a yellow powder, I’ll stop. The allspice are usually still whole at that point, as are the peppercorns. (In fact, I’ll often just add the peppercorns at the end, without even putting them in the mortar.)
The salt and garlic will be providing most of the noticeable flavor for your pickles, so getting the garlic quantity right is a critical step. Since I didn’t understand that at first, I erred on the side of caution. I urge you to err on the other side. And keep in mind that smaller cloves are often more strongly flavored than large ones. If your garlic cloves are the size of your thumb, use 6 (or 8 or . . .)
When you pack your cukes into your jar, try to leave an inch or two of headroom above the pickles. If the pickles are not completely covered in the brine, they’ll just rot, and you’ll be calling those Pickle Police. So push and shove a little to get them in with some room to spare.
When the pickles are packed, pour in the contents of the mortar, the chopped garlic, the dill weed, the bay leaf, and anything else you decided not to grind earlier. Then fill the jar with the salt water, right up to the top.
Now they get to sit for a few days, somewhere cool and dry (and clean!) Do not tighten the lid while the pickles are sitting. You want the natural airborne beasties to get into the jar and help the pickles start to ferment. Leave them at room temperature for at least 48 hours – I usually wait 72 hours – and then screw that cap on tight and put them in the refrigerator. Oh, and that little ‘diaper dish’ under the jar is a really good idea. Some of the brine is guaranteed to spill out as the fermentation gets going; catching it in the bucket is better than wiping it off the table!
(And, no, that line around the upper part of the jar is not the fluid level – it’s just some gum from the original label on the jar. My pickles are most definitely completely submerged!)
As I said, these are not yet Pickle Perfection, so if, in your experiments, you stumble across the path to perfection (or already know it), please share. Half sour pickle lovers across the globe will thank you for it . . . In the meantime, enjoy these . .
Tuesday, May 02, 2006
Ingredient: Miso
Sadly, I did not discover miso until I was in my 40s. Don’t wait! Run right out and buy a tub!
Miso is a fermented soybean paste that is a staple in Japanese kitchens, and ought to be one in yours as well. It is delicious, reputedly healthful and nutritious, lasts forever (well, a long time – keep it in the freezer), and can be used in soups, sauces, salad dressings, dips, as a flavoring, a condiment, and probably thousands of ways I’ve never dreamed of! Miso is, however, very salty, so if you are sodium restricted, be careful.
You can find miso in any Asian market, and maybe even in your local supermarket. I like the red (aka) miso best, but you’ll also see white and yellow misos. The white is sweeter and more delicately flavored, the yellow ones are richer but still mild, and the red are the strongest.

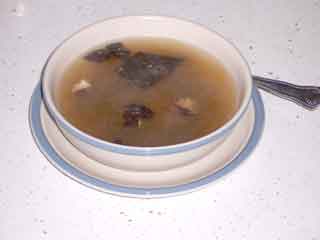
As we speak, I’m brewing up a cup of miso soup to cure my cold – you know, feed a cold . . . I boiled about 3 cups of water, tossed in about ½ - ¾ tsp. of miso, crumbled up a few pieces of dried seaweed and the cap of a dried shitake mushroom. I turned down the heat and will let it simmer slowly until about 1 cup of water evaporates. By that time (about 30 minutes) the seaweed and mushroom will have reconstituted and become tender, and I can call it soup!
(OK, soup’s on . . .)
If I’d had some vegetable stock kicking around, I could have used that instead of plain water, or some dashi (a soup stock made with dried bonita flakes), but water works just fine. Toss in other stuff as you see fit – a cube of tofu, a couple of shrimp, other vegetables, hey, make it up as you go along. It will be delicious.
Later when I feed my cold again (well . . .), I may mix up some miso vinaigrette for my salad dressing.

Fork a little miso into a bowl

add a dribble or three of oil (sesame, olive, whatever you have handy) and mash it all up.

Then stir in a tablespoon of three of vinegar and whisk it all up with your fork.

I like to use a mild rice wine vinegar for this dressing because the miso is such a strong flavor. But I’ve done it with cider vinegar, plain white vinegar, tarragon vinegar, balsamic vinegar, red wine vinegar, lemon juice, and various mixtures of all of the above. Play around, have fun with your food!
And experiment with miso . . .
Miso is a fermented soybean paste that is a staple in Japanese kitchens, and ought to be one in yours as well. It is delicious, reputedly healthful and nutritious, lasts forever (well, a long time – keep it in the freezer), and can be used in soups, sauces, salad dressings, dips, as a flavoring, a condiment, and probably thousands of ways I’ve never dreamed of! Miso is, however, very salty, so if you are sodium restricted, be careful.
You can find miso in any Asian market, and maybe even in your local supermarket. I like the red (aka) miso best, but you’ll also see white and yellow misos. The white is sweeter and more delicately flavored, the yellow ones are richer but still mild, and the red are the strongest.
As we speak, I’m brewing up a cup of miso soup to cure my cold – you know, feed a cold . . . I boiled about 3 cups of water, tossed in about ½ - ¾ tsp. of miso, crumbled up a few pieces of dried seaweed and the cap of a dried shitake mushroom. I turned down the heat and will let it simmer slowly until about 1 cup of water evaporates. By that time (about 30 minutes) the seaweed and mushroom will have reconstituted and become tender, and I can call it soup!
(OK, soup’s on . . .)
If I’d had some vegetable stock kicking around, I could have used that instead of plain water, or some dashi (a soup stock made with dried bonita flakes), but water works just fine. Toss in other stuff as you see fit – a cube of tofu, a couple of shrimp, other vegetables, hey, make it up as you go along. It will be delicious.
Later when I feed my cold again (well . . .), I may mix up some miso vinaigrette for my salad dressing.
Fork a little miso into a bowl
add a dribble or three of oil (sesame, olive, whatever you have handy) and mash it all up.
Then stir in a tablespoon of three of vinegar and whisk it all up with your fork.
I like to use a mild rice wine vinegar for this dressing because the miso is such a strong flavor. But I’ve done it with cider vinegar, plain white vinegar, tarragon vinegar, balsamic vinegar, red wine vinegar, lemon juice, and various mixtures of all of the above. Play around, have fun with your food!
And experiment with miso . . .
The Missing Photos
Sorry for the lack of photos. My friendly ISP has mucked up the server address, and I can't get them to tell me whether or when they might 'fix' it. Please bear with me for a bit longer before I have to resort to 'Plan B.'
Thanks . . .
Thanks . . .
Thursday, March 23, 2006
Recipe/Technique: Veggie Fried Rice
OK, so it’s not exactly culinary legerdemain, but it sure tastes good, and it’s a great way use up some of those baggies of leftover rice you’ve got lurking in the freezer!
Here’s what you need:
leftover rice
chopped up veggies
olive oil (or butter or both)
herbs & spices
maybe some liquid
Tellicherry
Here’s how you do it.
Gather up some leftover rice.

Chop up some veggies.
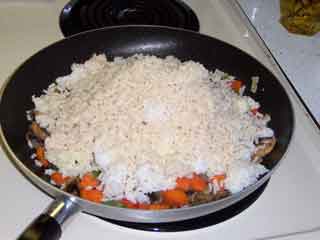
Heat a pan. Could be a skillet or a saucepan or a dutch oven or a wok or . . . Almost anything will work. Throw in the oil. Swirl. Throw in the veggies. Stir, cook for a while.

Add seasonings (no, not salt – try oregano, or cilantro, or rosemary, or thyme, or basil or . . .). Throw in the rice.
Stir. Cook for a while.

Eat.
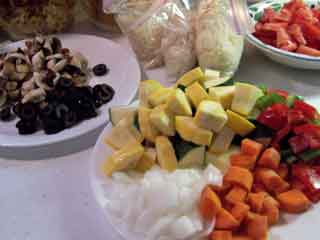
Now that you’ve got the hard part down, perhaps a comment or two. You may have noticed that the chopped veggies included some zucchini and summer squash, but the final skillet-full didn’t. Yup. Put in too much rice. Couldn’t fit the rest of the veggies. No worries. Just did them up on the side, in their own pan.

Could’ve tossed everything together to serve, but didn’t that night. Still delicious!

Recently, I’ve done a couple of batches in a big saucepan and experimented with changing the order of cooking and adding the rice.
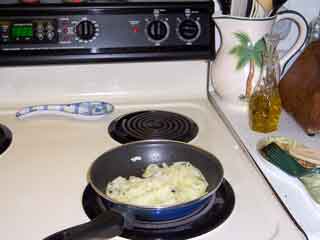
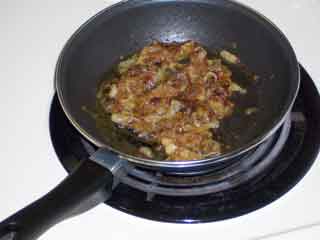
For example, start out with the pan over moderate heat, add the oil and quickly brown up some chopped onion. Turn the heat down at some point to keep the onion from burning, but do let it get crunchy brown.
Then toss in the rice and stir it all up. In all fried rice approaches, it is important to spend the time to get every kernel of rice coated with the hot oil. So take your time stirring around, turning over, moving from side to side, etc. When you’ve got a nice brown-flecked onion & rice mixture, turn the heat down a little more and let it cook for two or three minutes. You’re trying to let the rice give up the last of its trapped moisture, but to use that moisture as it escapes to tenderize the rice.
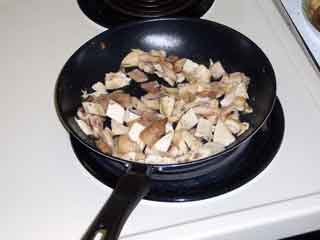
Now toss in some mushrooms and stir them around to coat with oil. Add in any long-cooking veggies, like carrots and/or green beans (fresh) and/or celery and/or bell peppers (not that bell peppers require a long time to cook, but they will hold up to it and that lets their flavors spread throughout the dish), and continue to stir around and cook until the mushrooms begin to take on some color.
When the mushrooms start to color, you know that they are about ready to ‘give up their water,’ as the saying goes. And they do contain quite a lot of liquid, which has now cooked enough to take on the delicious flavor of the mushrooms.
So before that liquid releases and evaporates, toss in the remaining quick cooking veggies you might be using – broccoli, summer squash, zucchini, snow peas, bean sprouts, etc. Stir around to coat, add a tiny splash of white wine, and put the lid on. In about five minutes, a 'head of steam’ will have risen under the lid, cooking the last few veggies to perfection and re-moisturizing the rice to tender delectability, and you’ll have created a masterpiece! (No, I don’t have any photos . . .)
Or . . . Start out on low heat, add your oil, and carmelize some carrots. Yup. Just like we did with the onions in the last post, only the carrots won’t take an hour – more like 15 or 20 minutes. But keep them low and slow and turn them over frequently so they don’t burn. Once they start to release their sugars, they become susceptible to burning.
About 10 minutes into the carrot time, toss in some chopped ( ½“ pieces) red and green bell peppers and let them start to carmelize also.
So, now you’re 20 – 25 minutes into the cooking, still low and slow. Toss in the rice and stir to coat with oil. Then add the remaining veggies (including some mushrooms, broccoli, and tomatoes!), hit the pot with a goodly splash or three of Tiparos fish sauce, a tiny splash of white wine, a goodly grind or five of Tellicherry, and slap the lid on.
Give it another 10 – 15 minutes to steam everything into submission, and, well, you’ve done it again!
Or . . .
Hey, you take it from here . . . and enjoy.
Here’s what you need:
leftover rice
chopped up veggies
olive oil (or butter or both)
herbs & spices
maybe some liquid
Tellicherry
Here’s how you do it.
Gather up some leftover rice.
Chop up some veggies.
Heat a pan. Could be a skillet or a saucepan or a dutch oven or a wok or . . . Almost anything will work. Throw in the oil. Swirl. Throw in the veggies. Stir, cook for a while.
Add seasonings (no, not salt – try oregano, or cilantro, or rosemary, or thyme, or basil or . . .). Throw in the rice.
Stir. Cook for a while.
Eat.
Now that you’ve got the hard part down, perhaps a comment or two. You may have noticed that the chopped veggies included some zucchini and summer squash, but the final skillet-full didn’t. Yup. Put in too much rice. Couldn’t fit the rest of the veggies. No worries. Just did them up on the side, in their own pan.
Could’ve tossed everything together to serve, but didn’t that night. Still delicious!
Recently, I’ve done a couple of batches in a big saucepan and experimented with changing the order of cooking and adding the rice.
For example, start out with the pan over moderate heat, add the oil and quickly brown up some chopped onion. Turn the heat down at some point to keep the onion from burning, but do let it get crunchy brown.
Then toss in the rice and stir it all up. In all fried rice approaches, it is important to spend the time to get every kernel of rice coated with the hot oil. So take your time stirring around, turning over, moving from side to side, etc. When you’ve got a nice brown-flecked onion & rice mixture, turn the heat down a little more and let it cook for two or three minutes. You’re trying to let the rice give up the last of its trapped moisture, but to use that moisture as it escapes to tenderize the rice.
Now toss in some mushrooms and stir them around to coat with oil. Add in any long-cooking veggies, like carrots and/or green beans (fresh) and/or celery and/or bell peppers (not that bell peppers require a long time to cook, but they will hold up to it and that lets their flavors spread throughout the dish), and continue to stir around and cook until the mushrooms begin to take on some color.
When the mushrooms start to color, you know that they are about ready to ‘give up their water,’ as the saying goes. And they do contain quite a lot of liquid, which has now cooked enough to take on the delicious flavor of the mushrooms.
So before that liquid releases and evaporates, toss in the remaining quick cooking veggies you might be using – broccoli, summer squash, zucchini, snow peas, bean sprouts, etc. Stir around to coat, add a tiny splash of white wine, and put the lid on. In about five minutes, a 'head of steam’ will have risen under the lid, cooking the last few veggies to perfection and re-moisturizing the rice to tender delectability, and you’ll have created a masterpiece! (No, I don’t have any photos . . .)
Or . . . Start out on low heat, add your oil, and carmelize some carrots. Yup. Just like we did with the onions in the last post, only the carrots won’t take an hour – more like 15 or 20 minutes. But keep them low and slow and turn them over frequently so they don’t burn. Once they start to release their sugars, they become susceptible to burning.
About 10 minutes into the carrot time, toss in some chopped ( ½“ pieces) red and green bell peppers and let them start to carmelize also.
So, now you’re 20 – 25 minutes into the cooking, still low and slow. Toss in the rice and stir to coat with oil. Then add the remaining veggies (including some mushrooms, broccoli, and tomatoes!), hit the pot with a goodly splash or three of Tiparos fish sauce, a tiny splash of white wine, a goodly grind or five of Tellicherry, and slap the lid on.
Give it another 10 – 15 minutes to steam everything into submission, and, well, you’ve done it again!
Or . . .
Hey, you take it from here . . . and enjoy.
Monday, March 20, 2006
Recipe/Technique: Carmelized Onions
Most of us don’t think of onions as ‘sweet.’ Oh, we buy Texas Sweets and Sweet Yellow onions, but sweet? Nahhh. Onions are sharp, pungent, biting, give you bad breath. Well, it all depends . . . On what you do with them. Like almost all other vegetables on the planet, onions are full of complex chemicals. And when you apply heat to those chemicals, you get reactions. Things change. Sugars are created, and we call that process carmelization. Onions become most definitely sweet.
Here’s what you need . . .
onion(s), sliced
butter
pinch of coarse (Kosher) salt, optional
Tellicherry, optional
time
Here’s how you do it.
The secret to carmelization is time, and low heat. There are no shortcuts. If you can’t wait at least an hour, maybe more, do something else with your onions. I’m usually working with one onion (or less if I’m cooking for just myself), and I plan on about 90 minutes from inspiration to plate. Depending on how many onions you’re dealing with and the size of your biggest skillet, you might need up to two hours.
Now only about 60 or 70 of those minutes are on the stove. The rest are consumed with deciding how the onions are to be incorporated into the meal (or maybe, what the rest of the meal is going to be in the first place!), getting out implements, peeling and slicing an onion, finding butter, warming the skillet, and generally futzing around.
So slice an onion (or 6). I like slices about ¼” wide, but anything from hair’s breadth to half an onion will work. Because you’ll be taking your own sweet time, the size of the slice doesn’t matter to the cooking time. So slice an onion (or 6 . . . )
And heat your skillet over moderate heat for a while (no more than a minute or two, if you’re using a nonstick skillet!), toss in a tablespoon or so of butter, and swirl once or twice.

Now dump in your onions

and turn the heat down.

Stir it all around to coat with butter. Then, add some more butter.

From here on in, it’s just a waiting game. After 3 more minutes, your butter is getting soft. After 8 minutes, it’s melted in

and you should turn the heat down again.
Now, just toss and stir every five or ten minutes for the rest of the hour. Here’s what you look like after 15 minutes . . .

If you’re going to add a pinch of salt and some pepper, somewhere around 20 minutes is a good time to do it. If you add the salt too early, you’ll alter the chemistry, and end up with crispy fried onions – tasty, but not carmelized. The salt draws the water out of the onion where it evaporates in the pan instead of helping to form sugars. But by 20 minutes into the process, most of the sugars have been formed and released by the onion, so your salt will have its flavor enhancing effect. And Tellicherry, well, hey I put it on ice cream . . . Here’s how your onions look after 35 minutes . . .

And after 60 . . .
I’d call ‘em done, but if you want to leave them on for a while longer, that’s fine – just turn the heat down again

Whenever you decide, serve ‘em up as a side dish on their own, or pour them on potatoes, or mix them up with green beans or your veggie of choice, or top a steak or piece of grilled fish with them, or serve ‘em on toast and call it dinner!
Here’s what you need . . .
onion(s), sliced
butter
pinch of coarse (Kosher) salt, optional
Tellicherry, optional
time
Here’s how you do it.
The secret to carmelization is time, and low heat. There are no shortcuts. If you can’t wait at least an hour, maybe more, do something else with your onions. I’m usually working with one onion (or less if I’m cooking for just myself), and I plan on about 90 minutes from inspiration to plate. Depending on how many onions you’re dealing with and the size of your biggest skillet, you might need up to two hours.
Now only about 60 or 70 of those minutes are on the stove. The rest are consumed with deciding how the onions are to be incorporated into the meal (or maybe, what the rest of the meal is going to be in the first place!), getting out implements, peeling and slicing an onion, finding butter, warming the skillet, and generally futzing around.
So slice an onion (or 6). I like slices about ¼” wide, but anything from hair’s breadth to half an onion will work. Because you’ll be taking your own sweet time, the size of the slice doesn’t matter to the cooking time. So slice an onion (or 6 . . . )
And heat your skillet over moderate heat for a while (no more than a minute or two, if you’re using a nonstick skillet!), toss in a tablespoon or so of butter, and swirl once or twice.
Now dump in your onions
and turn the heat down.
Stir it all around to coat with butter. Then, add some more butter.
From here on in, it’s just a waiting game. After 3 more minutes, your butter is getting soft. After 8 minutes, it’s melted in
and you should turn the heat down again.
Now, just toss and stir every five or ten minutes for the rest of the hour. Here’s what you look like after 15 minutes . . .
If you’re going to add a pinch of salt and some pepper, somewhere around 20 minutes is a good time to do it. If you add the salt too early, you’ll alter the chemistry, and end up with crispy fried onions – tasty, but not carmelized. The salt draws the water out of the onion where it evaporates in the pan instead of helping to form sugars. But by 20 minutes into the process, most of the sugars have been formed and released by the onion, so your salt will have its flavor enhancing effect. And Tellicherry, well, hey I put it on ice cream . . . Here’s how your onions look after 35 minutes . . .
And after 60 . . .
I’d call ‘em done, but if you want to leave them on for a while longer, that’s fine – just turn the heat down again
Whenever you decide, serve ‘em up as a side dish on their own, or pour them on potatoes, or mix them up with green beans or your veggie of choice, or top a steak or piece of grilled fish with them, or serve ‘em on toast and call it dinner!
Sunday, March 19, 2006
Recipe: Roast Chicken Leftovers
So, remember that chicken we roasted a while back? The question is, what do you do with the leftovers? Sure, you can just warm everything up again in the oven, heat the leftover gravy on the stove and repeat the original. Or you can heat up the gravy, toss in the cut up meat and serve it over toast. Or you can take it one step (or three) beyond . . .
here’s what you’ll need . . .
leftover roast chicken parts
leftover gravy (or, in a pinch, you can make fresh)
wide egg noodles
peas (fresh, canned, frozen . . .)
thyme (dried or fresh)
olive oil
sesame oil
SriRacha
coarse (Kosher) salt
ground cayenne pepper
Tellicherry
Here’s how you do it.
Carefully peel all the skin from your leftover chicken parts and cut it up into little ¼” squares. Put a small skillet over very low heat, and just coat the bottom with a drop or three of olive oil. As soon as the oil “comes to fragrance” (a state which I’m sure you’ll remember from an earlier sermon - with apologies to David Steinberg), toss in the skin bits, reduce the heat to barely there. Let the skin bits slowly render all their fat for about 30 –45 minutes, until they are nice and crispy.
About 15 minutes into the rendering time, add a sprinkle of coarse salt, and a dash of ground cayenne pepper to the skin. Swirl, toss and otherwise mix it all up. Not exactly ‘cracklins’ but a tasty sprinkle for the finished dish.

After you get the skin going, get out a couple of saucepans - gravy in one, water in the other. Heat the gravy slowly and crank the water to a boil for the noodles. (And if you scooped all the mushrooms out of your gravy during your original roast chicken dinner, well, for heavens sake, slice up another dozen and toss them into the gravy to cook!)
While the heat does its thing, get all the remaining chicken meat off the bones and cut it up into bite size pieces.

When the water boils, toss in your noodles (all right, you can add a pinch of salt to the water if you must), and cook them just barely al dente. Usually, we cook these wide egg noodles for about 5 minutes, but for this meal, three minutes works out just right. The noodles are going to continue to tenderize over a warm burner while you get the rest of the meal together, and then cook for another minute or so at the very end. So, barely al dente to start . . .
When they’re done, drain the noodles, and toss them with a goodly squirt of sesame oil and a squeeze of SriRacha. I usually do the oil first and when the noodles are well coated, then add about an inch long ribbon of SriRacha and stir again. That way, the spicy flavor ‘rides’ the oil rather than forming little hot spots in the pasta. Finally, toss the peas on top, sprinkle with a pinch of thyme and a few goodly grinds of Tellicherry.

Now cover that pan and put it back on the still-warm burner (electric stove). If you’re working with a gas stove (or your electric cools off too quickly), you could save a little pasta water and toss it back in, or add a little water from the can of peas. Then you can leave the burner on barely there heat until it’s time to put everything together.
Next, twiddle your thumbs (or make a salad or set the table or brew the coffee or . . .) until the chicken skin crispies are done. When they’ve reached perfection, scoop them out of the skillet and onto some paper towel to drain.

Then, toss your cut up chicken meat into the skillet and heat it up for 5 minutes or so. You can put some heat under it, but you don’t really want it to cook or brown very much – that will just make it tougher.
Finally, put it all together. Put the noodle pan over the still going skillet burner, dump the chicken on top of the peas, and pour some gravy over all (wet but not swimming). Using your gentlest ‘folding-in’ action combine everything. Add some more gravy (sloppy but not swimming), and stir some more.

Put the cover back on the pan, turn the burner off, and finish whatever else you need to do before eating. When it’s time, divide your creation onto plates, add as much more gravy as you like,

and chow down!

here’s what you’ll need . . .
leftover roast chicken parts
leftover gravy (or, in a pinch, you can make fresh)
wide egg noodles
peas (fresh, canned, frozen . . .)
thyme (dried or fresh)
olive oil
sesame oil
SriRacha
coarse (Kosher) salt
ground cayenne pepper
Tellicherry
Here’s how you do it.
Carefully peel all the skin from your leftover chicken parts and cut it up into little ¼” squares. Put a small skillet over very low heat, and just coat the bottom with a drop or three of olive oil. As soon as the oil “comes to fragrance” (a state which I’m sure you’ll remember from an earlier sermon - with apologies to David Steinberg), toss in the skin bits, reduce the heat to barely there. Let the skin bits slowly render all their fat for about 30 –45 minutes, until they are nice and crispy.
About 15 minutes into the rendering time, add a sprinkle of coarse salt, and a dash of ground cayenne pepper to the skin. Swirl, toss and otherwise mix it all up. Not exactly ‘cracklins’ but a tasty sprinkle for the finished dish.
After you get the skin going, get out a couple of saucepans - gravy in one, water in the other. Heat the gravy slowly and crank the water to a boil for the noodles. (And if you scooped all the mushrooms out of your gravy during your original roast chicken dinner, well, for heavens sake, slice up another dozen and toss them into the gravy to cook!)
While the heat does its thing, get all the remaining chicken meat off the bones and cut it up into bite size pieces.
When the water boils, toss in your noodles (all right, you can add a pinch of salt to the water if you must), and cook them just barely al dente. Usually, we cook these wide egg noodles for about 5 minutes, but for this meal, three minutes works out just right. The noodles are going to continue to tenderize over a warm burner while you get the rest of the meal together, and then cook for another minute or so at the very end. So, barely al dente to start . . .
When they’re done, drain the noodles, and toss them with a goodly squirt of sesame oil and a squeeze of SriRacha. I usually do the oil first and when the noodles are well coated, then add about an inch long ribbon of SriRacha and stir again. That way, the spicy flavor ‘rides’ the oil rather than forming little hot spots in the pasta. Finally, toss the peas on top, sprinkle with a pinch of thyme and a few goodly grinds of Tellicherry.
Now cover that pan and put it back on the still-warm burner (electric stove). If you’re working with a gas stove (or your electric cools off too quickly), you could save a little pasta water and toss it back in, or add a little water from the can of peas. Then you can leave the burner on barely there heat until it’s time to put everything together.
Next, twiddle your thumbs (or make a salad or set the table or brew the coffee or . . .) until the chicken skin crispies are done. When they’ve reached perfection, scoop them out of the skillet and onto some paper towel to drain.
Then, toss your cut up chicken meat into the skillet and heat it up for 5 minutes or so. You can put some heat under it, but you don’t really want it to cook or brown very much – that will just make it tougher.
Finally, put it all together. Put the noodle pan over the still going skillet burner, dump the chicken on top of the peas, and pour some gravy over all (wet but not swimming). Using your gentlest ‘folding-in’ action combine everything. Add some more gravy (sloppy but not swimming), and stir some more.
Put the cover back on the pan, turn the burner off, and finish whatever else you need to do before eating. When it’s time, divide your creation onto plates, add as much more gravy as you like,
and chow down!
Thursday, February 16, 2006
Tip: Hone that blade . . .
Every time you sharpen a knife, you remove some of the metal from the blade. Eventually, there’s nothing left. That’s why you only want to sharpen your blades a couple of times a year.
So how do you keep them sharp in between? Honing, m’dear, honing . . .
You see, each time you use a knife, you mangle the edge. It gets all bent and twisted out of shape. No. You can’t see it, not even with a magnifying glass. We’re talking microns here. But all it takes is one or two gentle strokes across your “sharpening steel” (which better be steel, but certainly is not sharpening) or ceramic rod to put your blade edge back into shape.

Those strokes straighten out all the bends and twists from the last time you used the knife, and put the edge of the blade back into ‘just sharpened’ shape, while removing little or no metal from the blade.
And you don’t need to spend a bundle on fancy pearl-studded, leather handled, diamond encrusted honers, either. There was probably a sharpening steel in that first knife set you ever bought, or one that someone gave you once. Go find it and bring it back to the kitchen. If not, check out the Internet. I found ceramic rods online for about $4.00 each a few years ago and bought three of them – probably last the rest of my life.

Now, the ceramic rods are usually harder than the steel of the blade you are honing, so you will remove a few molecules of metal each time, but it’s a tiny amount compared to grinding a new edge. Tiny amount or not, though, you’ll want to wet the rod before use (so the metal won’t ‘clog the pores’ of the ceramic as much) and give both the rod and the blade a quick rinse after honing. (When your ceramic rod gets too clogged, give it a good scrub in hot soapy water!) Since a steel rod is just about the same hardness as the blade, any metal loss is negligible.
And, if you can’t find a sharpening steel around the house, and you don’t want to spend any money at all, find an old dinner plate (Corelle if possible) or some broken piece of ceramic pottery and use that. It may be a little more awkward to hold than a ‘formal’ honer, but it will do the job just as well!
So make it a habit. Reach for a knife, reach for the honer at the same time. Since a dull knife is a dangerous knife, keep your kitchen safe and hone those blades . . .
So how do you keep them sharp in between? Honing, m’dear, honing . . .
You see, each time you use a knife, you mangle the edge. It gets all bent and twisted out of shape. No. You can’t see it, not even with a magnifying glass. We’re talking microns here. But all it takes is one or two gentle strokes across your “sharpening steel” (which better be steel, but certainly is not sharpening) or ceramic rod to put your blade edge back into shape.
Those strokes straighten out all the bends and twists from the last time you used the knife, and put the edge of the blade back into ‘just sharpened’ shape, while removing little or no metal from the blade.
And you don’t need to spend a bundle on fancy pearl-studded, leather handled, diamond encrusted honers, either. There was probably a sharpening steel in that first knife set you ever bought, or one that someone gave you once. Go find it and bring it back to the kitchen. If not, check out the Internet. I found ceramic rods online for about $4.00 each a few years ago and bought three of them – probably last the rest of my life.
Now, the ceramic rods are usually harder than the steel of the blade you are honing, so you will remove a few molecules of metal each time, but it’s a tiny amount compared to grinding a new edge. Tiny amount or not, though, you’ll want to wet the rod before use (so the metal won’t ‘clog the pores’ of the ceramic as much) and give both the rod and the blade a quick rinse after honing. (When your ceramic rod gets too clogged, give it a good scrub in hot soapy water!) Since a steel rod is just about the same hardness as the blade, any metal loss is negligible.
And, if you can’t find a sharpening steel around the house, and you don’t want to spend any money at all, find an old dinner plate (Corelle if possible) or some broken piece of ceramic pottery and use that. It may be a little more awkward to hold than a ‘formal’ honer, but it will do the job just as well!
So make it a habit. Reach for a knife, reach for the honer at the same time. Since a dull knife is a dangerous knife, keep your kitchen safe and hone those blades . . .
Sunday, January 22, 2006
Recipe: Simple Roast Chicken
Want a really simple, inexpensive, quick and easy, delicious meal? Hey, roast a chicken!
For years, roast chicken was a relatively rare meal in our house because we always had to do stuffing and gravy and three vegetables and cranberry sauce (the jellied kind, out of a can, but still, one more must-have item . . .) and turn the thing into a major feast.
In fact, I once saw a show on the Food Network about Roast Chicken. Tyler Florence (I think) had to travel the world over to figure out how to roast a chicken. Now don’t get me wrong: all the chickens he met were wondrous creations, worthy of at least 30 minutes (or maybe it was an hour – I don’t know) of airtime. But, really . . .
Then one day, an aberration struck. Those little pre-cooked rotisserie chickens in the hot case at the supermarket. Hmmmm. If they can do it, why can't I?
Well, you can . . .
here's what you'll need . . .
1 cheap chicken (don't go for the 'oven stuffer' or even a 'roaster;' go for the cheapest whole chicken in the case! A 3 lb. chicken serves two with serious leftovers or serves 4 with the bones picked clean)
1 carrot
1 small onion
salt
Tellicherry
other stuff if you wish
Here's how you do it.
Pre-heat your oven to 400° F.
Whack the ends off the carrot and trim the stem and tail off the onion. You don’t have to peel either one - they're just going to be thrown out later – though I usually take the skin off the onion (and we never peel carrots!). Cut them both up into chunks (and inch or so).

Give your chicken a thorough wash, and yank out any extra fat or other nasty bits the butcher may have left behind. Pat the bird dry with a paper towel.
Dust the interior with some finely ground Tellicherry. And/or, some other stuff. Here, I decided to use some poultry seasoning and some rubbed sage. Other times, I’ve used cumin or cayenne pepper or rosemary and thyme or oregano and basil or . . . Avoid the urge to salt the interior, though. It just draws out all the juices and adds nothing to the flavor.

Toss the carrot and onion chunks into the cavity and push, fold, prod, or otherwise try to get any loose skin over the opening. If you can’t, don’t worry about it. Who cares if a piece of carrot or onion falls out during roasting, won’t hurt a thing.

Fold the wing tips under the bird,

and toss it into the roasting pan. You can use a rack if you wish, or not. The smaller birds have much less of that ‘pumped-up’ fat that cooks out of the larger birds, so you don’t need to worry about your dinner ‘boiling in oil’ as it were. If you absolutely cannot cook a bird without salt, now’s the time. Rub some olive oil all over the top of the bird and judiciously sprinkle a little coarse (Kosher) salt on the skin. The oil will prevent the salt from dissolving (immediately) in the juices from the chicken, and if you baste gently (see below), you can avoid washing it off. (And, yes, I always toss an extra hunk of onion into the roasting pan for gravy flavor later.)

Into the oven for an hour or two depending on your oven, the size of the bird, how 'dried out' you prefer your chicken, the phase of the moon . . . After the first 15 minutes, baste the bird every 10 or 15 minutes until it's done.
Here’s my beast after 1 hour.

And here, after two hours (and declared done),

If you’re nervous about raw poultry, or a stickler for detail, or an engineer (and do check out that Cooking for Engineers blog; there’s a lot of good stuff over there!), poke your bird with a thermometer. If it’s around 175° F, you can yank the bird. Its temperature will continue to rise another 5° or more while it rests, which will bring it to the final temperature of about 180° F.
When the bird is done to your liking, pull it out, throw away the onion and carrot, and have a wonderful meal.

(Yeah, ok, so I did two veggies and gravy; it's still a simple meal . . .)
Now there are, of course, 3497 variations on this theme, all of which are wonderful. Some of them are equally simple, some are not; it’s all up to you. Go play . . .
For years, roast chicken was a relatively rare meal in our house because we always had to do stuffing and gravy and three vegetables and cranberry sauce (the jellied kind, out of a can, but still, one more must-have item . . .) and turn the thing into a major feast.
In fact, I once saw a show on the Food Network about Roast Chicken. Tyler Florence (I think) had to travel the world over to figure out how to roast a chicken. Now don’t get me wrong: all the chickens he met were wondrous creations, worthy of at least 30 minutes (or maybe it was an hour – I don’t know) of airtime. But, really . . .
Then one day, an aberration struck. Those little pre-cooked rotisserie chickens in the hot case at the supermarket. Hmmmm. If they can do it, why can't I?
Well, you can . . .
here's what you'll need . . .
1 cheap chicken (don't go for the 'oven stuffer' or even a 'roaster;' go for the cheapest whole chicken in the case! A 3 lb. chicken serves two with serious leftovers or serves 4 with the bones picked clean)
1 carrot
1 small onion
salt
Tellicherry
other stuff if you wish
Here's how you do it.
Pre-heat your oven to 400° F.
Whack the ends off the carrot and trim the stem and tail off the onion. You don’t have to peel either one - they're just going to be thrown out later – though I usually take the skin off the onion (and we never peel carrots!). Cut them both up into chunks (and inch or so).
Give your chicken a thorough wash, and yank out any extra fat or other nasty bits the butcher may have left behind. Pat the bird dry with a paper towel.
Dust the interior with some finely ground Tellicherry. And/or, some other stuff. Here, I decided to use some poultry seasoning and some rubbed sage. Other times, I’ve used cumin or cayenne pepper or rosemary and thyme or oregano and basil or . . . Avoid the urge to salt the interior, though. It just draws out all the juices and adds nothing to the flavor.
Toss the carrot and onion chunks into the cavity and push, fold, prod, or otherwise try to get any loose skin over the opening. If you can’t, don’t worry about it. Who cares if a piece of carrot or onion falls out during roasting, won’t hurt a thing.
Fold the wing tips under the bird,
and toss it into the roasting pan. You can use a rack if you wish, or not. The smaller birds have much less of that ‘pumped-up’ fat that cooks out of the larger birds, so you don’t need to worry about your dinner ‘boiling in oil’ as it were. If you absolutely cannot cook a bird without salt, now’s the time. Rub some olive oil all over the top of the bird and judiciously sprinkle a little coarse (Kosher) salt on the skin. The oil will prevent the salt from dissolving (immediately) in the juices from the chicken, and if you baste gently (see below), you can avoid washing it off. (And, yes, I always toss an extra hunk of onion into the roasting pan for gravy flavor later.)
Into the oven for an hour or two depending on your oven, the size of the bird, how 'dried out' you prefer your chicken, the phase of the moon . . . After the first 15 minutes, baste the bird every 10 or 15 minutes until it's done.
Here’s my beast after 1 hour.
And here, after two hours (and declared done),
If you’re nervous about raw poultry, or a stickler for detail, or an engineer (and do check out that Cooking for Engineers blog; there’s a lot of good stuff over there!), poke your bird with a thermometer. If it’s around 175° F, you can yank the bird. Its temperature will continue to rise another 5° or more while it rests, which will bring it to the final temperature of about 180° F.
When the bird is done to your liking, pull it out, throw away the onion and carrot, and have a wonderful meal.
(Yeah, ok, so I did two veggies and gravy; it's still a simple meal . . .)
Now there are, of course, 3497 variations on this theme, all of which are wonderful. Some of them are equally simple, some are not; it’s all up to you. Go play . . .
Subscribe to:
Posts (Atom)