Here’s what you’ll need.
Potatoes, 2 or more depending on the size of your pot
onion, ½ large
carrot, 1 small
celery, 1 rib
garlic, 2 small cloves
lean salt pork
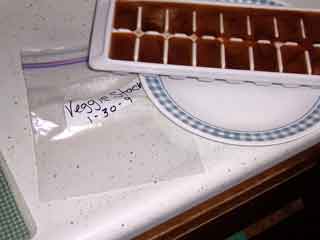
chicken stock, home made if you’ve got it, from a ‘chicken base’ if you don’t, canned if you have no ‘base,’ or if worst comes to worst, a couple of bullion cubes
milk
cream or Half & Half
crushed red pepper flakes
Tellicherry
coarse Kosher salt, but only if you are using home made (unsalted) chicken stock; the others all have plenty of salt for this entire dish
fresh ground nutmeg
crumbled tarragon leaf
patience
Here’s how you do it . . .
Pay special attention to that last ingredient. It’s the secret to all the best soups in the world. Yes, there are a lot of ways to make ‘quick soup.’ You can boil water, add spoon of Miso and make ‘soup’ in 5 minutes. You can heat a pot of chicken stock, toss in cooked leftover rice and chicken, and make ‘soup’ in 10 minutes. But if you really want Soup, you’ll need a goodly portion of patience.

You’ll need patience right from the beginning of this preparation, and that’s because you can’t rush salt pork cracklin’s. Oh, sure, you can crank the heat, add a little oil and fry your salt pork, but that ain’t cracklin’s. Cracklin’s come from slowly rendering the fat out of the lean salt pork and then slowly crisping the pork in its own fat. Allow at least 45 minutes. An hour is more likely.

So take a slice or two of your salt pork (you do always keep a hunk in the freezer, don’t you?) and cut it up into little cubelets. These are about ¼” cubes, which works well for this particular salt pork. Others may want to be a little larger, or a little smaller, depending on how they cook up. You want them to be crispy and crunchy, but not tooth-breaking boulders or BBs.

Toss the pork into a skillet, and set it over very low heat. Add patience. After 15 minutes, toss the pork around a bit. After 10 more minutes, toss some more. And every 5 minutes from now until your patience runs out, toss them some more. When they’re ‘done’ to your satisfaction, carefully scoop them onto a paper towel to drain, making sure to keep all the rendered fat in the skillet.

Now, while the pork renders, you can prep everything else, short of actually cutting the potatoes - you don’t want to have to keep them wet for an hour or two; that would make them end up mushy in the soup. So get your stock out. In this case, I used about enough chicken base to make two cups of rich stock.

Then, get your veggies out. You’ll use a little bit of each for the soup’s base and then the rest will go in after the base has developed for a while.

Here we have a classic mirepoix for the soup’s base - onion, carrot and celery, plus one of the garlic cloves chopped finely. The other veggies will go in later.

Before you start cooking the mirepoix, toss about ¼ tsp. of crushed red pepper flakes into the rendered pork fat and let them start to cook.

Then cook the mirepoix - hold the garlic. Crank the heat a bit when you first toss the mirepoix in so that it starts to cook immediately - not a hectic sauté, but maybe a jumpin’ simmer. Stir everything around from time to time and after about 5 minutes, toss in the garlic. Continue cooking for another 5 minutes or so.

When the mirepoix is soft and tender, carefully spatulate it into your soup pot, once again being careful to leave as much of the fat as possible in the skillet.
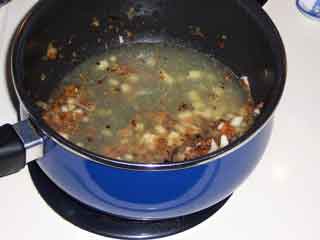
Now add about ½ cup of your chicken stock to the mirepoix in the soup pot and bring it to a serious simmer. This is your soup base. And, yes, more patience is required. Cook gently (a few bubbles, no froth) for at least 20 minutes; 30 would be better.

While that’s cooking, cut up a potato. I like little cubes, maybe 3/8” on a side. But whether you want them large or small, always take a thin slice off each side of the potato and mince it up to toss into your burgeoning soup base.

Toss your potato cubes into the skillet and sauté for about 8 - 10 minutes. Now, I used a baby skillet for my small batch of soup, so I did each potato separately. If you’re making a gallon or three, you can cook 2 or 3 potatoes at a time (though extend the cooking time to 15 minutes or so). When the (final) potato is about half done, toss in the minced-up second clove of garlic. You want the garlic to flavor the potato, but not to get browned. At the same time, add a dozen grinds or so of fresh Tellicherry black pepper.

While the potato sautés, cut up the rest of the veggies into soup-size bites. Please note that the ½ onion there did not go into the soup; it was saved for another day. Only the remainder of the ½ onion that was used for the mirepoix went into the soup.

When the potatoes are done, toss them in the soup pot and add the rest of the stock. Then toss the last of the veggies into the skillet and sauté them for 5 - 8 minutes or so, just to the point where they begin to get tender. Then, into the soup pot with ‘em.
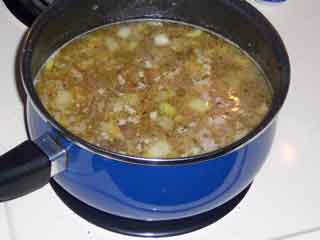
Now add another portion of patience. Cook the soup covered for at least 30 minutes. While it’s cooking, you can add some crushed tarragon leaves - no more than 1/3 tsp, and a few grates of fresh nutmeg (8 - 10 scrapes). If all you have is ground nutmeg, I’d say skip it. The flavor the nutmeg adds is very subtle, but with the off-the-shelf ground type, you run the risk of the flavor being bitter rather than nutty sweet.
This is also the time to make a cracklin' choice. I like to add mine in at this point so they add to the overall flavor of the soup. Some prefer to wait until the dairy goes in and add them then. Others will wait until the soup is served and use the cracklin's as a garnish. The choice is yours . . .

Finally, it’s time to add the dairy. Start with 1 cup of milk (your choice as to whole or other, but please, not skim!). When that has warmed up in the pot, add a cup of cream or Half & Half. Stir that in and cook slowly, for another 30 minutes.

Be sure to keep an eye on the pot until the soup gets up to its cooking temperature. You do want it to come just to a boil, but not to boil at all after that - just to simmer, bubbly gentle.

And when those final 30 minutes of patience have expired, well, then it’s soup. Enjoy!