Wednesday, September 14, 2005

Recipe: The (venerable) Western Omelet

A western omelet for two requires 5 eggs (you can use 6 if they're small or your skillet is more than 12"), about 1 or 2 tsp. each of fine chopped onion and green pepper, and a couple of Tbsp. of diced ham. Or more. Or less. Or . . . I like to notice the ham and green pepper while I'm chewing, but have the onion play only a flavorful supporting role. Others like to 'chaw' on everything. As long as you've included onion, green pepper and ham, you've got a Western.

Chopped onions

(‘Course, this time, I didn’t have enough ham. But there was some thin sliced roast beef kicking around, so what the heck. And as long as we’re taking liberties with the purity of the form, how about dicing up some ‘shrooms, and one of Woody’s home grown jalapenos. . . Look. It’s food. It’s supposed to be fun. So play with it!)

Western  ingredients

Ok, toss all your chopped up stuff into a mixing bowl and get ready to crack your eggs (which you did take out to warm up to room temperature, didn’t you . . .)

But instead of cracking the eggs straight into the bowl, where one rotten egg ruins everything, consider the plate method. Grab a bread plate or flat saucer and crack your egg onto it. If it’s OK, slide it into the bowl. Cracking the egg on a flat surface, rather then the edge of a bowl is much less likely to contribute eggshell to your recipe, and you won’t lose half the egg down the outside of the bowl!

Western eggs

When the eggs are in, grind on a frightening layer of Tellicherry, add a splash of milk, and whisk that mess into a froth. Now let it sit for 10 minutes or so while you warm your skillet, load up the toaster, flip the home fries, set the table, you get the idea . . .

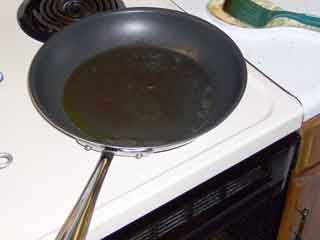
Coat the bottom of the hot skillet with a light sheen of olive oil (or a little butter if you wish). You don’t want any puddle of oil in the pan, just a thin coat to keep that first contact of egg mixture from sticking.

Slick pan

Give your western a final whisk or three and pour it into the pan.

Western into the  pan

Now turn the heat down, rinse out your bowl and whisk, and do whatever other cleanup chores will take about 2 - 3 minutes.

Western heat

By now, the edges of your western should have started to begin to show a little character. If the pan is still mainly soup, give it a very gentle tilt/roll/swirl to flow some of the egg a little farther up on the skillet wall.

Western 3 minutes old

You want to develop a sturdy enough outer edge that you can run a spatula all the way around the omelet without tearing or breaking any of it away. And you want to do this as soon as possible (after the first couple of minutes, that is).

When you can lift the edge of the omelet away from the edge of the pan, all the way around, check the clock. In about 15 minutes, you're going to flip your western. But every 5 minutes between now and then, you're going to slide that spatula all the way around the edge, slipping it closer to the center of the pan each time. On your final slide, the entire omelet should release easily from the surface of the skillet.

Western ready to flip

Five minutes later, it should be time to flip. If you're worried, you can lift the edges and peer underneath. The top of the omelet should be pretty well set, with little or no loose liquid. The bottom of the western should be a beautiful mottled brown, some parts dark, some light and some still a little yellow. If so, it's time to flip; if not, wait (but not too long . . .)

To flip the beast, make use of the back of a dinner plate (until you get the hang of flipping the entire thing in the pan, that is!) Just slide the omelet, cooked side down, out of the pan and onto the bottom side of a dinner plate.

Western slides out

Then, tilt the pan up as far as you dare, and in as close to one motion as you can manage, rotate that plate toward the skillet, slide the skillet under the plate, and dump the uncooked side of your western down onto the pan.

Western flips back

In about 2 minutes, start the edge separating again to make sure the bottom side doesn't stick to the pan (it's not likely to, but always worth checking!). In about 10 minutes, your dinner is ready!

Western perfect

Cut it in half, put it on plates, douse it heavily with ketchup (or not) and dive in!

Western, well done

(Okayokayokay, so I cooked this one a little too long on side one. Last one was a little pale; next one will be perfect; all are good!)

Thursday, September 08, 2005

Tip: Get the air out – of your ziplock baggies, that is . . .

If you’re like me, you have dozens of ziplock baggies lurking about the refrigerator, filled with bits of this and parts of that and pieces in progress and, well, heaven knows what all else! And if you cook for less than a horde, there will always be an endless supply of such odds and ends, not to mention the sale items that go in the freezer. To help them all stay fresh long enough for you to use them up, get the air out!

Get the air out of your chicken

It doesn’t take any special skill or effort, just an attitude. Squeeze, press (lightly), fold over, and squish while you slide your fingers across that zip lock top. The less air you leave in, the longer your food will last!

No air in my bags

Thursday, September 01, 2005

Recipe: Perfect Roast Beef

It couldn't be easier . . .

For years, I watched my mother fret and worry over roast beef. It was expensive, so we only had it a few times a year, and therefore each time was fraught with emotional turmoil - or so it seemed to me at the time. It couldn't be overcooked - no gray beef in our household! - but it couldn't be purple in the center either, and of course, half the time it was overdone and half the time it was underdone.

Well, there's at least one way to cook a perfect roast every time (there may be other ways, too, but this has been 100% consistent for 30 years, so . . .) The secret? Cook it for one hour. Period. Don't care if it's a 1 lb. eye of round or a 10 lb. rolled rump. One hour. That's it.

here's what you'll need . . .

roast beef (we like the lean eye of round, but have also done tenderloin, sirloin, round and rump.
Now, I've never done a bone-in prime rib . . . but that's no reason you shouldn't!See the comments below. This technique is best suited to boneless roasts.)
onion slices (optional)
gravy makings

Here's how you do it.

First, remember never to salt your raw meat, especially beef. You'll just dry it out. So season your roast with a generous portion of freshly ground Tellicherry. If you wish, use some toothpicks to secure an onion slice or three across the top of the roast, or onto either or both end faces. Or, as I’ve been doing lately, just toss two or three thick slices into the roasting pan.

Pre-heat your oven to 500 °F. Yup. 500 °F. And give it 10 minutes or so at that temperature before you put the roast in. Don't stick it in as soon as the pre-heated light goes on. But when the oven is hot, put the roast in (center rack), and let it cook at that temperature for at least 15 minutes. The length of time at 500 °F will determine which side of medium rare your roast will be when it's done. 15 minutes will give you a nice warm red center; 20 minutes will give you hot light pink center; 17 minutes yields a perfect medium rare.

After the 15-20 minutes, turn the oven down to 325 °F and let the roast cook for the remainder of the one hour total cooking time. Don't let the total time exceed one hour if you want your roast to be perfect.

At the end of the hour, remove the roast from the oven and let it stand before carving. It must sit for at least 5 minutes, but 15 is much better.

Perfect 1 hour roast beef

Besides, it will take you at least 15 minutes to make the gravy anyway. So let the meat rest. You can take some of the charred onion and toss it in the gravy if you like - I always do. But, if you used toothpicks, leave them in place until you're ready to carve. If you pull them out, you'll be leaving holes in the meat where flavor, heat and juices will escape.

When the gravy is ready, carve and enjoy. This was a 1.5 lb. bottom round (or actually, ½ of a 3 lb. piece), left at 500 ° F for 16 minutes, and then finished at 325 ° F. Once I found the right direction for slicing, it was delicious. And Ma KoTo, the red-eared slider who’s staying with us for a while thought so too!

 Perfect 1 hour roast beef sliced