Saturday, March 01, 2008

Recipe: Chicken with Mustard Sauce

Here’s a wonderful marriage of chicken and mustard. When I’m in a fancy mood, I call it Poulet de Moutarde en Croute, though the ‘in crust’ part is an exaggeration. But if you’re patient enough, you can certainly get a good crunch going! Sadly, this is one of those recipes that I can only cook while Cathy is away. Though I’ve managed to sneak mustard into loads of food that she’s eaten with delight, this one is still a little too up front mustardy for her tastes. But I’ll keep tryin’ . . .

The hardest part of this recipe is realizing at least 3 hours before dinner that this is what you want!

Here’s what you’ll need (per serving):

1 boneless, skinless breast of chicken
¼ - 1/3 tsp. sesame oil
1/3 – ½ tsp. liquid smoke
5 – 10 drops Tabasco Sauce
1/3 – ½ tsp. turmeric
1/3 – ½ tsp. cilantro
2 tsp. prepared mustard (brown or Dijon – not yellow, please . . .)
¼ - 1/3 cup White wine
2 – 3 Tbsp. flour
Tellicherry (fresh ground black pepper)
(veggie medley, whole ‘boiled’ potatoes, or other accompaniments of your choice)

Here’s how you do it:

Gather your ingredients, and start by building your chicken coating, which will also become your sauce.

Poulet de Moutarde ingredients

I included quantities in the ingredients list, but as you may know if you’ve explored this blog, I seldom actually measure anything. So, it’s a pinch of this, a sploosh of that, a shake of the other, and there you go. I start this with the oil, liquid smoke and Tabasco. Give them a whirl with a fork or a whisk, and then add the turmeric and cilantro, and whisk them in, too.

Whisk up everything except the mustard

Now add your mustard and whisk that in.

Poulet de Moutarde coating

Now let this mixture rest for 30 minutes to allow all the flavors to blend and meld completely.

After the half hour rest, rinse your chicken and pat it dry.

Get ready to coat

Give it a goodly grind or five of Tellicherry.

Pepper that chicken!

And slather first one side and then the other with your mustard coating. Depending on how aggressive you like your mustard, you could lightly pierce the chicken with a fork before (or even after) coating, to allow the flavors to reach deeply into the meat. Me, I prefer the physical layers of flavor, with the mustard coat on the outside of the chicken, but hey, you do it your way, please . . .

Poulet de Moutarde coated

Now, rest period again. At least another 30 minutes; an hour, if possible. No, you don’t have to put it in the refrigerator; there’s enough salt and vinegar in the mustard and Tabasco to at least inhibit, if not kill, any Salmonella lingering in your chicken. And since you rinsed it and patted it dry before coating, you got rid of any surface bacteria before you even started. But if you’re truly paranoid about food bugs, go ahead and put it in the fridge; just be sure to leave it for at least an hour; the cold really slows down the uptake of the flavors.

While your chicken rests (this time – there’s another rest hour coming later!), scrape any big piles of extra coating from the chicken plate back into the mixing bowl, and add the white wine. Whisk it all up and set it aside. This will become the base for the final mustard sauce.

Poulet de Moutarde sauce starter

Now is also the time to prep your veggies and starch for the meal. Tonight, I did up a medley of cauliflower, broccoli, carrots and onions, which I steamed in a little white wine. (I also put a tiny drizzle of olive oil in the bottom of the pan before I added the veggies.) Add a pinch of Kosher (or other coarse) salt and a few goodly grinds of Tellicherry, and then pour the splash of white wine on top. These will go on the heat about 30 minutes before serve time.

Poulet de Moutarde veg medley

And when I can, I prefer to ‘boil’ my potatoes with the skin on (give them a good scrub under running water, first). Of course, as I think I’ve mentioned elsewhere, boiled potatoes, in my book, should actually be intimidated potatoes. Put them in the pot of water; put the pot over high heat until you just begin to hear some ‘action’; turn the heat to low (salt if you must), and let the tubers evolve into perfectly tender, creamy textured spuds over the next hour or so.

Poulet de Moutarde taters

But before you put heat to potatoes, you’ll need to ‘en croute’ the chicken. And let it rest again.

I always use a strainer to sift my flour onto the chicken for a dish like this. You don’t have to, but if you just shake the unsifted flour, the texture of the final cooked coating will be much ‘thicker’ and lumpier – not necessarily bad things, but not what I prefer for this dish.

Poulet de Moutarde ready to crust

So, strainer in one hand, flour in the other, dump a little flour into the strainer and shake (gently, gently) the strainer across the surface of the chicken until you’ve completely coated the surface of the mustard.

Poulet de Moutarde top coated

Then, gently (hmm, lotsa gentlies in here!), turn the chicken over and coat the other side the same way. Turn the chicken back over, and put another light coat of flour on the top.

Poulet de Moutarde coated

Now let it rest for an hour. Over the hour, the flour will absorb moisture from the mustard coating and create a kind of delicate crust on the surface of the chicken. There will still be loose flour on the outer surface, but the interior will develop some ‘character’, which you’ll find when you eat the chicken.

When you’ve got your chicken resting, put some heat under those potatoes. You’ll be serving dinner in about 70-90 minutes.

So when the final chicken rest period is about done, get your skillet warmed up and put a Tbsp. or two of olive oil in the bottom. Swirl, twirl, shake and, when you’ve got heat, toss in the chicken. Oh, and put your veggies over medium high heat, too.

Poulet de Moutarde cook chicken

As soon as the chicken starts sizzling, turn down the heat and cook for about 10 – 12 minutes. You want the outside to turn a rich dark brown but stop well before burn or blacken. On my stove, that means the 8 o’clock spot on the heat dial; your mileage will be different.

A bit after you turn the heat down under the chicken, do the same under the veggies. You want to get a head of (wine) steam in the pot, but don’t want to let anything burn. After reducing the heat, the veggies will need about 10 – 15 minutes to reach perfection. Then they can come off the heat (still covered) and sit for up to 10 minutes more.

Turn the chicken after 12 minutes and cook the other side for another 10 or so. Once again, you are seeking dark, not burned.

Poulet de Moutarde chicken turned

When the chicken is done, take it out of the pan and let it rest,

Poulet de Moutarde chicken done

while you get your sauce started. Toss the white wine-rinsed left over mustard coating into the hot skillet. Swirl, scrape, and stir to get all the crunchy bits from the pan dissolved into the liquid.
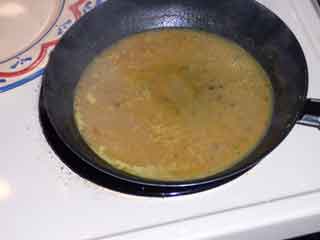
Poulet de Moutarde sauce

Drain in any lingering liquid from the steamed veggies and maybe a splash of two of water from the potatoes. Bring the pan sauce to a boil and let it reduce, reduce, reduce!

Poulet de Moutarde reduce that sauce

Poulet de Moutarde reduce that sauce more

Poulet de Moutarde reduce that sauce still more

When the sauce is right, put potato and vegetables onto the plate, pour the sauce,

Poulet de Moutarde sauce on plate

add the chicken, and enjoy!

Poulet de Moutarde served

Monday, February 18, 2008

Catching up . . .

OK. I'm gonna stop making comments about how time flies. Today, I've cleaned up and added a bunch of posts that have been kicking around for almost a year now. They've been published using their original 'first draft' dates. There are more, and I'll get them up here as time permits.

Thanks for all your notes and comments. Please keep them coming, and for sure, keep on cookin!

Friday, June 22, 2007

Tip: Choke That Blade

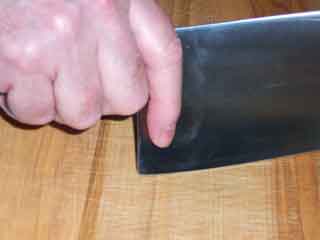
There are a million and three ‘knife work’ tips that should get written down. I’ll try to mention them as I think of them. The other day, I cut my finger. And that reminded me that I should take my own advice now and then . . .

You see, I had my index finger reaching out there along the top of the knife blade, and lo and behold, there was a new ingredient dribbling out into my onions.

Don’t. You cannot get a good grip on the handle of the knife, and you cannot control the motion or direction of the blade with that finger stuck out there like that.

Don’t do this!

‘Choke up’ on the blade. Get your thumb pointing toward the knife tip on one side of the steel,

Thumb down one side

and your index finger down toward the blade edge on the other side, and grip the handle with the rest of your fingers.

Index finger down the other

If you’re using one of those wimpy ‘little’ knives, where you don’t have room to keep your index finger down the side of the blade, well, then, tuck it under the handle, in that little nook that knife makers conveniently put right there, for just that purpose.

Thumb down one side, tuck the rest

Now, you’re ready to cut. And you won’t be slipping and sliding and adding extra bits of this and that to your dish.

Yeah. I know. It feels really strange at first. But just keep at it. In a year or 12, you’ll only have to think about it when old habits rear their ugly heads and you cut your finger half off . . .

Monday, May 07, 2007

Recipe/Technique: Perfect No-Lump Gravy

A while ago, someone left a comment on the Roast Beef page asking about gravy. I put up a quick 'how to' there, but decided that since good gravy makes a meal and is so simple to do 'right' (once you learn how), gravy should have its own post.

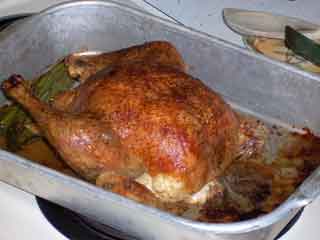
So, for perfect no-lump gravy every time you roast a chicken, duck, turkey, other kind of bird or a hunk of beef or any other kind of meat, just remember one word: roux (pronounced 'roo').

A roux is just flour cooked in the drippings of the roast pan until it is a nice lump of goop or paste. Once flour has been turned into a roux, it can’t cause lumps in the gravy. It’s as simple as that.

For any kind of gravy, the proportions are always the same. 1 Tbsp. of pan drippings (and yes, that means fat!) plus 1 Tbsp. flour makes enough roux for 1 cup of liquid (from potatoes, vegetables, stock, or even plain water). If you don’t have any pan drippings (shame on you!) or if you need to make gravy after the fact (for leftovers, for example), you can use butter or olive oil for the fat.

Let’s use a roast chicken for the example and walk through the whole process of making perfect gravy. The steps are the same for any kind of gravy.

here's what you'll need . . .
meat juices from cooking, or butter, and/or olive oil
flour
cooking water from veggies
(Gravy Master, optional)
fresh ground black pepper, Tellicherry, of course
optional additions include sliced mushrooms, chopped giblets (cooked!), crumbled bacon bits or other cracklin's, additional herbs and/or spices (thyme, oregano, caraway, fennel, . . .), zingy bits like jalapeños, or almost any other thing you can think of that would taste good to you!

Here's how you do it.

When the chicken (or other meat) is done, turn off the oven, remove the bird from the roasting pan, put it on a plate (or platter) and stick it back in the oven to keep warm.

Remove the beast . . .

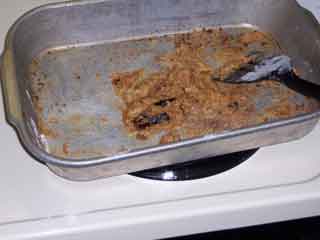
Put the roasting pan on a burner on the stove. With a spatula, scrape all the browned goodies loose from the bottom of the pan. Guesstimate the quantity of drippings (or, if you’re eternally compulsive, pour them out into a measuring cup to see how much you’ve got. Then pour it all back into the pan).

Turn the stove burner on to a medium heat setting. Sprinkle an equal amount of flour over the surface of the drippings. (You could just dump it all into the middle, but you’ll have to spend much longer mashing it around to make sure all the flour gets coated.)

Makin' the roux

Stir, chop, mix, scrape, fold and otherwise manipulate the flour, over the heat, until all the fat/liquid has been absorbed coating every last granule of flour. You should end up with a fairly dryish, yet still smooth, lump of roux that holds together in the pan. If the roux seems gooey or wet, sprinkle a little bit more flour on it; if it seems dry and flaky, add a drip more fat (olive oil is the easiest to work with unless you reserved some of the original pan drippings.) Keep chopping, stirring, mixing etc. for a while until the roux cooks for a few minutes and begins to take on the rich brown color of the pan scrapings. (4 or 5 minutes is usually about right; if it takes longer, the stove burner isn’t hot enough.)

And keep in mind, you can always make a roux in a skillet or saucepan using butter or olive oil. Same routine; same proportions; cook it until you like the color.

Roux in a skillet

When the roux is ready, pour in the liquid(s), and always include a good sized slug of white wine (or red wine, or Sherry or beer or . . .) For best results, the liquids should be hot, or at least room temperature, when added - cold water is not a good idea. Start small, adding just enough liquid to cover the bottom of the roasting pan for example. Mix it with the roux using the flat of the spatula to squish the roux into the liquid. When you’ve added enough liquid to make a smooth paste, pour in the rest. Turn the stove up to high (or medium high) and continue stirring, mashing and mixing until the gravy begins to boil gently.

Add liquids to the roux

If you have any chopped giblets or shredded neck meat or sliced mushrooms or other accoutrement you wish to add to your gravy, now is the time.

Add chopped giblets

This is also the time to adjust the seasonings for the gravy. For us, that means giving a dozen or so grinds of Tellicherry black pepper to the mixture.

Don’t be concerned if the gravy seems too thin after you’ve added all the liquids. Let it boil gently for a few minutes (10?) and it will thicken up for you. (If it gets too thick, add some more liquid!) After a few minutes of bubbling, add a few drops of Gravy Master, if you wish, to give the gravy a nice color (what’s “nice” is up to you).

Add mushrooms & cook it!

While the gravy is bubbling away (remember to stir occasionally), you should have plenty of time to mash the potatoes, serve the veggies, carve the beast and otherwise finish last minute chores before serving the feast with, of course, perfect gravy.

Thursday, April 12, 2007

Tip: Paper Towel the Produce

A while ago, we talked about getting the air out of your baggies to help your leftovers and in-progress foods last longer. This idea should probably have been mentioned then.

Certainly air is a crucial ingredient for spoiling food. The air is full of little buggers that love to eat your food and oxygen is a powerful contributor to chemical reactions. But if you really want to speed up the process, toss a little water into the mix. You’ll have slimy garbage to throw out in no time at all.

But lots of foods, particularly vegetables, need their moisture to stay fresh. So what to do, what to do. . . . Yup. Just toss a dry paper towel in the baggie with the half used veggie. It will absorb any loose liquid, but also help whatever air you’ve left in the baggie stay as humid as the veggie needs to keep fresh longer.

Paper towel the produce

And veggies aren’t the only ones to benefit. If you have to keep breads in the refrigerator, that dry paper towel can save the day. Cold things can’t hold as much moisture as warm things. So if your bread is very fresh and ‘light’ – like hot dog and hamburger rolls, for instance, it probably has a lot of moisture in it. Put that in the fridge, and all that moisture gets ‘chilled out’ making a lovely puddle in the bread wrapper. In addition, every time you take the bread out of the fridge and open it in the warm air of your kitchen, moisture will condense on the bread wrapper. When you toss the bread back in the fridge, it sits in all that water and after a day or three, you have a bag of bread soup. So, toss in a dry paper towel and save your bread, too.

Saturday, March 10, 2007

Recipe: Chicken Gismondo a la TJ

This chicken dish is guaranteed to leave your palette humming mellow airs from Tuscany while you sip a strong nutty flavored coffee after dinner. It is not really difficult to prepare, but does take some practice to get the timing down (and of course, everything must come to the table in one fell swoop). These photos show a batch of three servings. I've never been able to master more than four servings at a time (though I've tried 6, 8 and 12). Perhaps if you've got 8 burners on the stove and 16" or 20" skillets, you might be able to do it. In any case . . .

here's what you'll need . . .

boneless, skinless breast of chicken, one per serving
seasoned flour (see below)
breadcrumbs (toasted if you make your own)
grated Parmesan cheese (fine grate if you make your own; if you don't, do so!)
eggs, 1 per two servings, 2 for up to six, room temperature!
FRESH spinach, 1 ten oz. package per person (this dish will not work with canned, frozen, or otherwise mutilated spinach)
FRESH mushrooms, ½ pound per 2 servings (as above re mutilation)
FRESH lemon juice, ½ lemon per 2 servings (as above re mutilation)
ground nutmeg (fresh would be fantastic, but ordinary off-the-shelf will suffice)
butter, 1½ sticks (if you can't handle that, you can use olive oil flavored with some butter - see below. Don't use margarine; it will taste terrible.)
pasta, wide egg noodles, or your choice

Here's how you do it.

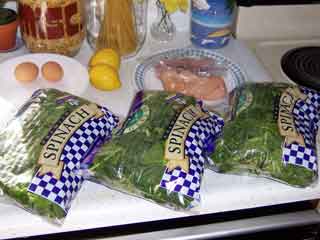
Start with the spinach. Now a 10 oz. bag may claim to serve 3, but that's simply hooey. By the time it's cooked, a 10 oz. bag of spinach yields a couple/three tablespoons of vegetable. If you want to minimize something on your plate, cut your protein serving size by half or your starch; not the vegetables!

Chicken Gismondo ingredients

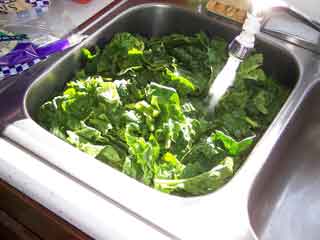
So, anyway, a couple hours before it's time to cook, soak the spinach in cold water. Even though the package may claim "washed," it's not. Drain and refill the water at least twice before it's time to cook.

Wash that spinach!

And while the spinach is soaking, pick it over removing any scummy leaves, and all the thick stems. You want to serve this dish on a bed of spinach leaves.

Pick out the naughty bits

Sometime before you're ready to cook, slice the mushrooms (relatively thinly, you want them to cook up quickly),

Slice them shrooms

squeeze (and de-seed) the lemon juice (use a fork – a strainer eliminates all the good pulp),

Lemon squeeze!

and prepare the seasoned flour and the bread crumb mixture.

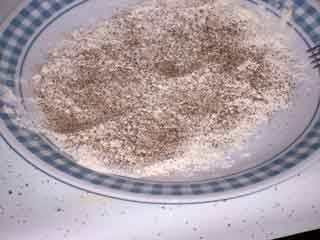
To make seasoned flour (about 1.5 Tbsp. needed per serving of chicken), spread the flour out in one pile about as big in area as all the chicken breasts. The idea is to get a level pile, not a peaked mountain. Sprinkle a little salt over the surface (think in terms of a layer of salt about 1 salt crystal deep covering the pile.)

Salty flour

Then pepper the surface of the flour until it is black - not occasional specks of black, but the whole surface is pretty black. (If you like an extra little bit of flavor in your foods, add a pinch of ground cayenne to the flour mixture – up to about 1/3 tsp. for this much flour.)

Pepper the salty flour

Mix it all together and you have seasoned flour appropriate for this recipe.

Now the flour is seasoned!

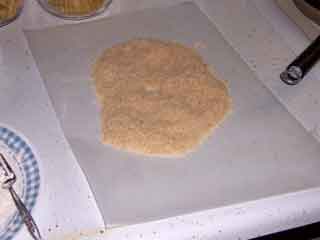
Mix the breadcrumbs

Used-to-be-bread

with the grated Parmesan cheese.

Pile on the cheese

The mixture should be about half and half, though you can adjust to taste if you must. Less cheese and the flavor tends to fade; more cheese tends to melt and burn when you sauté. Do not use the typical green can combo of Parmesan and Romano. The Romano tends to turn bitter in this recipe.

Now it's cheesy used-to-be-bread

By the way, if you’re like me, you’ll find it impossible not to end up with three times as much seasoned flour and/or breadcrumb mixture as you need. For years I cried each time I threw out an extra cup or two of either one. Then, one day, in flash of blinding insight unmatched since Galileo’s times, the solution appeared. Dump your mixtures into bowls! Pour, spoon, shimmer and shake from the bowl to the food and simply save the leftover mixtures! Only took me 30 years . . .

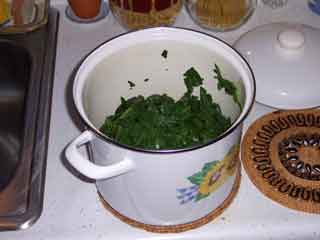
About 30 minutes before you want to serve, start the cooking. Put the spinach in a large covered saucepan. DO NOT add water. Just pick the spinach out of the soaking water by the handful, give it a good hard shake to remove excess water, and cram it into the pan.

Squish that spinach

You should be able to cram three or four 10 oz. pkgs. into a 4 qt. saucepan. Push it down hard enough so the lid fits tightly.

Don't you be lifting that lid

When it's time to cook the spinach, the water adhering to the leaves will provide plenty of moisture, and the tight fitting lid will keep the steam in the pan.

Start heating the pasta water.

Gently beat an egg or two with a Tbsp. or two of water till it's evenly lemon colored – no froth here, just mix it up. One egg will handle two servings, two eggs up to five, maybe six.

Lemony colored egg wash

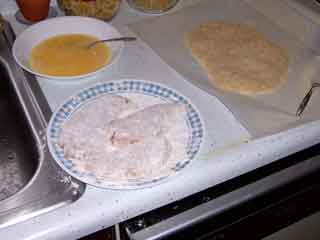
Dredge each chicken breast in seasoned flour. If you're doing a bunch, do them in groups of three or four. You don't want the chicken to sit around coated with flour for more than a few minutes. The flour will absorb moisture from the chicken and that will mess up the rest of the coating.

Assemble the beasts

Dip the floured chicken in the beaten eggs. Don't wash the flour off, but try to get a good coating of egg all over the chicken.

Dredge the eggy chicken in the mixture of breadcrumbs and grated Parmesan cheese. Press, push, pound, whatever to get a good even complete coating of the crumbs on the chicken. Waxed paper makes an excellent working surface for this step because you can lift and flip (gently! gently!) to get the crumbs all over, and press with the paper, reducing the goo build-up on your hands.

Toss the chicken immediately into the hot butter. (As above, you don't want to let the coated chicken sit around long.) What hot butter you ask?

Somewhere around the time you're ready to dip the chicken in the eggs, start heating a large skillet. Cut about ¾ stick of butter into little pats (so they'll melt quickly when you toss them into the pan.) Just before you're ready to sauté the first load of chicken, toss the pats of butter into the pan. They should jump and sizzle and melt instantly, but stop just short of turning brown (burned butter tastes terrible.)

Chicken Gismondo cooking

If you can't handle the butter, use olive oil. You'll need enough to cover the bottom of the skillet about 1/8" deep. Please add at least 1 Tbsp. of butter to the oil. The butter flavor is important to the overall effect of the dish. Again, be sure to get the pan good and hot before putting the oil in. Swirl the oil, then add the butter, and wait for the butter froth to subside a bit before adding the chicken.

Sauté the chicken in the butter over pretty high heat (just shy of burned butter) until golden brown. Golden brown is the color of a good pancake, or crunchy white toast. Don't worry if it tends toward brown. For this dish, it's better to err in the direction of over-browned than under-browned. Turn the chicken once. It should take about 5 minutes a side to brown it.

Chicken Gismondo browned

When you toss the chicken in, turn the spinach pan on high heat. The pasta water should be boiling, so toss in the pasta. Turn on a skillet for the mushrooms, toss another ½ stick of butter into the pan, swirl it till it melts and toss in the mushrooms. (Or use olive oil as above.)

By the time the chicken is done, everything else should be ready, too. But if not, you can keep the chicken warm in a 200° F oven for up to 10 minutes with no harm done.

To serve, drain the spinach,

Drain the spinach

toss in the remaining ¼ stick butter, the lemon juice and at least ¼ tsp. ground nutmeg. Or a little more if fresh.

Grate fresh nutmeg

More nutmeg is good to a point, but too much turns bitter. About ¼ tsp. per original 10 oz. pkg. of spinach is safe. Toss the spinach about to coat evenly with the lemon-butter-nutmeg sauce.

Mix with lemon butter and nutmeg

Drain the pasta. Make a ring of pasta around the edge of each plate. Fill the hole in the center with a serving of spinach. Top the spinach with a chicken breast. Slather mushrooms over it all.

Chicken Gismondo assembly

And eat immediately.

Chicken Gismondo served