Because you need to let the chicken 'rest' for an hour after coating it, you'll need to plan this meal in advance. All told, from taking the chicken out of the package to serving the meal you'll need something over 3 hours. Most of that time will be spent hanging around, conversing with friends, setting the table, petting the cat and so on. But don't expect to whip this one onto the table for unexpected guests. And the number of people you can serve depends on the size of your skillet(s) and/or the number of burners on your stove and/or doing two 'batches' part way and then finishing up all at once.
here's what you'll need . . .
1 or 2 chicken leg and thigh pieces per person (if your guests include a couple of 'hearty eaters', figure on one extra for every two 'hearty eaters.')
seasoned flour (about 2 - 3 Tbsp. per chicken piece; the 'seasoned' part is explained below)
ground black pepper (from that red and white can – use the Tellicherry at the table)
salt
milk (at least 2 cups, depending on how many you're trying to serve)
bacon grease (I know, it's not PC, but if you like to cook, you keep a can of drippings hidden in the back of the refrigerator somewhere. For each 12" skillet - which can handle a maximum of 4 pieces of chicken - you'll need at least 3 heaping Tbsp. of bacon grease. If you must, you can dilute the bacon drippings with olive oil; but the bacon flavor is a critical part of the taste of the final product - don't skimp.)
sliced mushrooms, about ½ lb per two servings (if you're going to serve a crowd, the idea is to have the gravy 'thick with mushrooms'. You'll have to figure out for yourself just how many that means.)
normal gravy accoutrements, namely potato water, vegetable water, white wine, Gravy Master, the unused flour and milk from coating the chicken, and, of course, etc.

Here's how you do it.
Get the chicken out, wash it, trim off all the 43 pounds of excess fat the store carefully packaged with your purchase, pat the chicken dry and set it aside.
Prepare the seasoned flour. As in some other recipes in this collection, don't let anyone see you do this or they'll never eat the finished product. For each chicken piece, toss about 2 or 3 Tbsp. of flour on a piece of waxed paper (you really do need to use waxed paper for this - paper bags, plastic wrap, or any old flat surface just won’t do). Spread the final amount of flour out into a thin layer (about 1/8 to ¼" deep).

Take your refill-can of ground black pepper and make the entire top surface of the flour black - not just "oh, there's some pepper on it" - BLACK.

Then take your refill-box of table salt and make the black surface white - not just "oh there's some salt on it" - WHITE.

Then take a fork and mix it all up. At this point, you can allow observers back into the kitchen if necessary; once it's all mixed up, nobody will be able to tell how much salt and pepper you put in.

Pour the milk into a shallow bowl (or two, depending on how many chicken pieces you're going to do.) Toss the chicken pieces in to soak. If you've got four pieces and one small bowl, put the chicken in two pieces at a time. Count to at least 60 to measure the minimum soaking time. Longer is OK, but less than a minute is really a ‘dip’ rather than a ‘soak’ and Maryland Fried requires a soak. I usually give it 10 minutes or so while I’m making the seasoned flour.
Lift a chicken piece up carefully by the tip of the leg and let the excess milk drain off. Toss the piece, top or skin side down, onto your seasoned flour and use the edges of the waxed paper to toss seasoned flour all over it. Turn the chicken piece over and again use the waxed paper to toss flour all over it. Use the waxed paper to pat even more flour onto all sides of the chicken until it is thoroughly and thickly coated with flour. Remove the chicken piece to a plate, and repeat the process with the remaining pieces of chicken. Use as many plates as you need so that the chicken pieces do not touch each other.

Save the remaining milk in a cup (or two) in the refrigerator; save the remaining flour in a dish until gravy time; let the chicken stand at room temperature for 1 hour.
In the meantime, peel (or don't, as you see fit) potatoes for mashing; prepare green beans & tomatoes (or other vegetables as you see fit); make the coffee; set the table; get out the gravy boat and serving dishes; and slice up all the mushrooms.
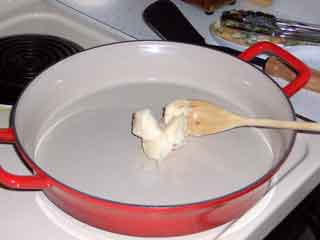
About 10 minutes before the hour is up, warm your skillet(s) over medium to medium-high heat. When they are beginning to get warm, scoop out the bacon grease into your skillet(s).

When it has melted and is hot enough (sprinkle a tiny pinch of flour onto the grease - if it sizzles and cooks vigorously, it's hot enough), carefully arrange 3 or 4 chicken pieces, skin (or top) side down into the pan. Don't crowd the pan!

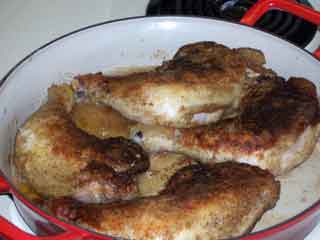
Fry the chicken for about 12 - 18 minutes (depending on stove, amount of chicken, phase of the moon, or whatever) until the down side is a rich dark golden brown. (Adjust the heat up or down as necessary; dark is important; burned black is to be avoided.) Then turn the chicken over and do the same to the other side.

Meanwhile, preheat the oven to 400° F.
When the chicken is thoroughly browned on all sides, remove each piece with a pair of tongs, letting most of any clinging bacon grease drain back into the skillet, and deposit the chicken in the bottom of a baking dish (one for which you still have a cover!) We find that a two-quart Corning Ware dish can handle up to four pieces of chicken (yes, you can stack them, but no more than two layers!). Or, if you’re lucky enough to have an Eric among your friends, who gifts you with incredible cookware like this, feel free to use it . . . (Just drain off all the bacon fat before putting in the oven.)
When all the chicken has been transferred to baking dishes, cover them and put them in the oven. Close the oven door and immediately turn the temperature down to 375° F. Do something else (like cooking potatoes and vegetables) for 35 minutes.
After 35 minutes in the oven, the chicken is done and it's time to start making gravy. Carefully tong the chicken out of the baking dish(es), letting any juices drain back into the baking dish(es), and put the chicken on a plate. Turn the oven to off and put the chicken plate(s) back into the oven to keep warm.

Use the leftover flour to make a roux in the baking dish(es). Just stir the flour, a little at a time, into the pan juices until you get a nice clump of goop. Keep the dish over medium heat and continue to stir the goop around. (If you use the Corning Ware and have an electric stove, remember to put the little wire grid on the burner before putting the baking dish on the burner, or you'll ruin the meal and have a hell of a time picking up all the little bits of exploded baking dish from the kitchen floor!).
When the roux starts to take on some color, add the potato water and the vegetable water and bring the incipient gravy to a boil.

As soon as it boils, add the mushrooms and return to a boil. Cook for a bit until the mushrooms start to show signs of coloring.

Now add the leftover milk, and stirring constantly, return to a gentle rolling boil. Add a drop or two (OK, a good sluice!) of Gravy Master (stirring) until the color of the gravy is pleasing to your eye, and let the whole mess simmer vigorously until it thickens or until everything else is ready to serve and you're not willing to wait any longer. (A thinnish gravy works quite well with this meal, so fear not...)

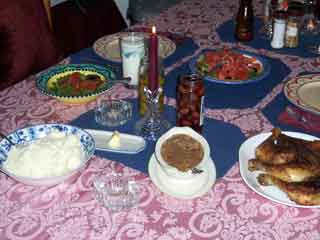
Toss, serve, fling, and/or pour everything into its appropriate table container and PIG OUT.
