Tuesday, September 28, 2004

Recipe: Butternut Squash

I hated squash growing up. But I was forced to eat it, at least at Thanksgiving and Christmas. It was always mashed to a fare-thee-well, and served without any seasoning (which, in part, explains my early penchant for over salting everything!) Somewhere in the mid-1970s, a butternut squash got left behind in my kitchen; I couldn't just throw it out, or let it rot, so . . .

here's what you'll need . . .
1 butternut squash
½ Tbsp. Butter (or more)
pinch of ground nutmeg
sprinkle of ground cinnamon
salt & freshly ground pepper

Here's how you do it.
Pre-heat your oven to 350° F.

Whack the bulbous end off the squash using your Chinese knife (or your Chef's knife, or a hatchet, or whatever . . .) If you aim properly, you'll end up with a solid stem-end of the squash, and the bulb end with all the seeds and pulp in it.

Butternut squash cut


Put the bulb end cut-side down and cut it in half. Use a teaspoon or tablespoon to scoop out all the pulp and seeds, scraping the surface until it's smooth. (If you're into making your own stock, toss the pulp and seeds into the stockpot, or you can bake the seeds for a crunchy snack, or you can just chuck 'em.) And, no, don't peel the squash!

 Butternut squash split

Now cube the squash (and trim off the hard brown root connection from the bottom of the bulb halves and the stem round from the top of the stem part). We like smallish cubes about ½ to 1" on a side, but feel free to make them larger if you like. They're going to be covered while they cook, so they'll steam thoroughly no matter what size you make them.

 Butternut squash cubed

Find a shallow baking dish that will hold the squash cubes in 1 or 2 layers (no more!) without peaking up over the edge of the dish (much). Depending on the level of your 'butter fear', either grease the baking dish with butter, or spread a few drops of olive oil in the bottom. Like most vegetables, the squash contains enough water to float an ark, but just in case, a little grease to keep anything from sticking to the dish is always a good idea.

Toss the squash cubes into the dish. Grind some Tellicherry across the top (add a pinch of salt, if you must). Sprinkle enough ground nutmeg over the surface so you can barely see it (nutmeg can become bitter when it cooks, so you want enough to flavor the dish, but not so much that you end up with a bitter taste), and then sprinkle a goodly dusting of cinnamon over everything. Dot the top of the dish with pats or daubs of butter or a goodly blob of butter substitute. Cover the baking dish or seal it with a tent of aluminum foil (just a little space above the squash), and put it in the oven for 25 - 35 minutes (longer for mushier, shorter for sturdier texture).

 Butternut squash ready to cook

Serve with beef, chicken, turkey, pork, swordfish, or . . .

Thursday, September 23, 2004

Recipe: That Shrimpy thing you do . . .

The idea was to do shrimp on pasta, some kind of garlicky lemony scampi like dish. But scampis tend to overpower the shrimp – you get shrimp texture but not much shrimp flavor. Shrimp cocktail gives you shrimp flavor, which you then enhance with a glob of cocktail sauce. So how to get the lemony garlicky thing with the full flavor of just poached shrimp?

The secret, of course, is: the sauce.

Sure. Poach the shrimp. Make a sauce. Toss pasta with sauce, add shrimp to top and serve. Simple, right? Not in my kitchen! . . .

Here’s what you’ll need . . .

1 lb. Poached shrimp
2, 4, 6, 23 . . . garlic cloves
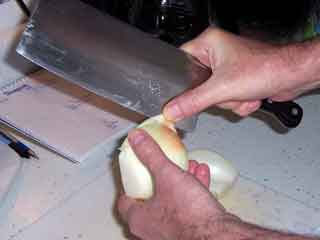
½ to 1 onion
½ green bell pepper
½ red bell pepper
¼ italian pepper (they look like pepperoncini on steroids)
2 – 4 mushrooms
1 – 2 tomatoes
8 – 12 black olives
zucchini (at least ½ of one, more if you like)
summer squash (as above with the zuke)
juice from ½ lemon
juice from ½ limes
½ tsp. sriracha (SE Asian chile sauce)
1 – 3 tsp. fish sauce (Tiparos)
sesame oil
olive oil
White wine
½ tsp. ground cumin
freshly ground Tellicherry (black pepper)
‘italian seasonings’
cilantro
linguine, fettuccini, vermicelli, and/or angel hair

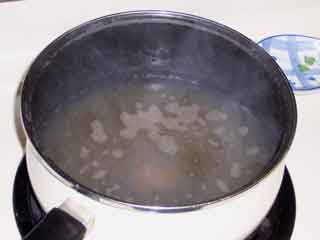
Gather all the ingredients before you start. Poach the shrimp as described in the Poached Shrimp(s) post from last week.

Shrimp thang ingredients

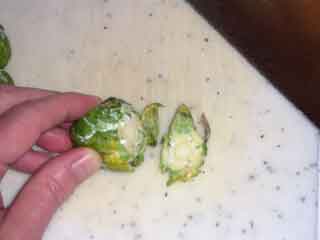
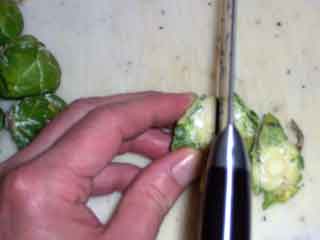
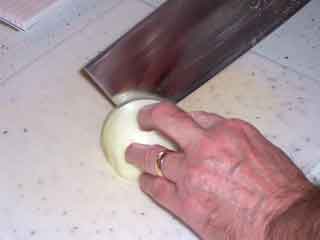
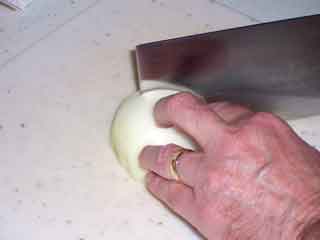
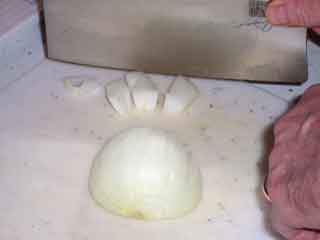
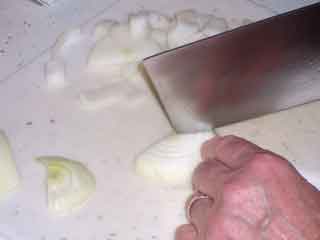
While your shrimp shells are cooking, chop up the veggies for the sauce (garlic, onions, tomatoes, peppers, and black olives).

When it comes time to poach the shrimp, stop whatever else you’re doing. Pay attention to the shrimp!

Ok. Set them aside and get some water going to boil your pasta.

Poached shrimp

While your water is heating up, chop up the rest of the veggies. I like to use pretty big chunks so they sit in the sauce instead of becoming part of it. The mushrooms can go either way. Some times I’ll whack them up into little bits and let them be sauce; sometimes, big chunks and they’re vegetables; and sometimes I can’t decide so they just get sliced!

Shrimp thang ingredients all

Cook your pasta. Leave it a little more al dente than you usually like it. It’s going to cook some more in the sauce – not much, but some, and you want the pasta in this dish to have some character, not to be all mushy.

So, while your pasta is cooking, mix up a marinade for your shrimp. I go back and forth about how much flavor to put on the shrimp while they sit and how much to put into the sauce as it cooks. At a minimum, give your shrimp a light coat of sesame oil and let ‘em sit in the lemon and lime juice. Next time you do this meal, try adding another ingredient (or 12) and see what happens.

By now, your pasta is certainly cooked. Before you dump it into the colander, though, pour off a couple of cups of the pasta water into a bowl or measuring cup. Like the shrimp broth, you’ll be adding (at least some of) this liquid to the sauce. Then, drain the pasta thoroughly, dump it back in the pot, give it a goodly squirt of sesame oil, and dig your hands in there! The idea is to coat every strand with oil.

Shrimp thang cooked pasta

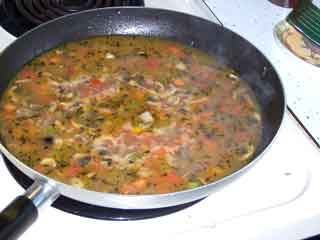
On to the sauce! Crank up the skillet, pour in some olive oil (at least a couple of tablespoons – it’s an ingredient as well as the cooking oil), swirl once or twice until, as they say, the oil comes to fragrance. Turns out, ‘they’re’ right. It actually does give off a beautiful fresh fragrance when it gets to just the right temperature.

And that’s just the moment to toss in the onions. Swirl them around, turn the heat back down to something civilized (about where you’d put the stove for a hearty simmer), and sauté the onions for about 2 minutes. (Sautee is a French verb, to jump. Don’t take it literally here. If your onion is jumping out of the pan, the stove is too hot!)

Add in some of the peppers, and give them about two minutes also. Now the garlic and the rest of the peppers. About a minute and toss in the mushrooms. Another minute or three and finally, the tomatoes and black olives. As soon as the temperature comes back up, but before any jumping starts, pour in a goodly slug of white wine. There are flavors in those tomatoes that will only come out in the presence of alcohol. So give ‘em a little (if you can – if you can’t, Don’t! Your dish will still taste great!)

So Ok. After about 5 more minutes, the mushrooms will have given up their juices, the tomatoes will be breaking down, the garlic will be filling your nostrils, it’s time to add some liquid. Start with every last drop of your shrimp broth. Then add pasta water to bring the liquid level to within about ½ inch of the top of the skillet. And stir it all around.

If you don’t have enough pasta water to get it that high, just add some plain water and or some more white wine. The measurements here are not critical. You just want a goodly bucketful so you can cook it down to about half that much. Should take about 10 minutes to reduce the volume by half.

Shrimp thang sauce

And during that time, add in whatever you haven’t added to the shrimp marinade. Start with the sriracha. That way, the heat will get gently distributed throughout the sauce as it reduces.

Then add the herbs and spices. Use whatever proportions you like, but some oregano and basil for sure, maybe some savory if you’ve got it, or even a tiny amount of rosemary and/or thyme if you don’t have any savory. As always, if you’ve got fresh herbs, use them; if not, the dried versions will be fine. And remember to crush dried herbs in the palm of your hand before tossing them in – it really does release a lot more flavor.

As you near the ‘right’ amount of sauce (about half the height of the pan), add the fish sauce (it’s salty and you don’t want to concentrate the salt – you want to season with it).

Finally, pour in the pasta and turn, stir, roll, separate, and otherwise mix it all about. As you did with the oil, try to get every strand individually coated with your incredible sauce. By the time you get this accomplished, at least 5 minutes will have passed, and it’s time to add the shrimp and every last drop of whatever marinade you’ve had them sitting in!

shrimp thang add pasta

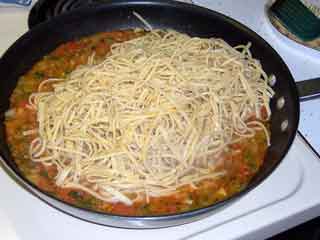
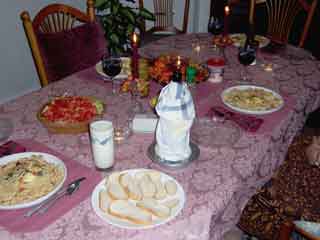
Stir them in gently, turning things over and under for about another 2 or 3 minutes. By then, the marinade flavors will have blended, the shrimp will have warmed, the sauce will have perfected, and it’s time to serve. Sprinkle some (more?) cilantro over the top of each plate, and . . .

Shrimp thang in skillet

Eat!!

Shriimp thang served

phew . . .

Saturday, September 18, 2004

Recipe/Ingredient: Poached Shrimp(s)

Around here, ‘fresh shrimp’ means the little Maine ‘popcorn’ shrimp that show up for a couple of weeks each year. The rest of the time, our shrimp come frozen, mostly from SE Asia. Even when you buy them out of the fresh fish case, they arrived frozen. And you know what? They’re still great. Especially since somebody figured out how to de-vein the little buggers before freezing them!

But shrimp have such a delicate flavor, and they cook so quickly that their taste often just disappears if they’re cooked with anything else. So when we do a shrimp dish, I’ll almost always poach the shrimp separately and add them to the rest of the dish at the last minute.

Now you could just boil some water and toss the shrimp in, but as long as you’re in the kitchen anyway . . .

Collect 1 lb. of uncooked shrimp, shell on.

Peel your shrimp

Peeled shrimp

and put all the peels in a saucepan. Add a few cups of water. And, hmmmm, how about a few whole black peppercorns? Yeah, that’s a good idea. Say, what about that coriander seed and . . .

Well, mix up your own favorites – just please stay away from all those pre-packaged ‘shrimp boil’ or ‘crab boil’ kinda things you find in the store. Make your own. It’s easy, and you get to control just how it tastes.

Last night, mine consisted of:

8 black peppercorns
1/3 tsp. whole coriander seed
¼ tsp. whole mustard seed
¼ tsp. dried dill weed
¼ tsp. dried savory leaves (or a little thyme and a couple of rosemary leaves if you don’t have savory)
1/3 tsp. coarse kosher salt
4 small bay leaves, broken into pieces
stalks from 4 sprigs of fresh parsley
1 fresh basil leaf

and a quart of water in a covered 3 qt. saucepan.

Bring it all up to a boil. Now be careful. It will froth up and boil over. I guarantee it . . . So be ready. Don’t go wandering off to check the score of the ballgame. Stand there. Wait. On my stove, over high heat, it takes a pot of liquid about 7 minutes to come to a boil. For this stuff, I start lifting the lid after about 5 minutes. And keep checking every 15 – 30 seconds. ‘Cause when it starts to go, it will overflow in about 3 seconds. As soon as you get a good head of froth, get it off the heat, stir the pot, turn the heat to low, stir again, re-cover, and put it back on the burner.

Shrimp broth cookin’

Let it bubble gently for a half hour or so. Now you can go check the score of that game . . .

When you come back, strain the liquid. Don’t spill a drop! Those shrimp shells and the herbs and spices have given their all for your poaching liquid. Don’t waste it!

Put the liquid back in the saucepan and put it back over medium high heat to reduce. Leave the lid cracked, or half on or something. You don’t want this to be a frothy boil, but a good rolling simmer will be perfect. You do want about half the liquid to evaporate. So get an eyeball on the pot when you start. Guesstimate half that height. And do whatever it is you do while you wait for things to get cooked . . .

Shrimp broth reduced


OK. Ya got two cups left? Now’s the time. Crank the heat to high. Cover the pan. Count to 32 (or whatever your favorite magic number might be today). Uncover, dump the peeled shrimp in, swirl with a spoon, cover, and turn off the heat. Check the time! In exactly 5 minutes your shrimp will be ready. Not 4, not 6, 5. Exactly.

Poached shrimp


So, at the end of 5 minutes, strain the liquid into a bowl, measuring cup, bucket, whatever, and dump the perfectly poached shrimp onto a plate. SAVE that liquid! If you can’t use it tonight, put it in a glass jar, seal it tight (while it’s still hot!) and park it in the fridge. That’s shrimp broth. It’s worth millions! Save it. Use it for soup(s), sauce(s), gravy(ies), ice cream topping, skin conditioner, I don’t know. But it’s good!

As for the shrimp, let them sit for at least 5 minutes. Then do something fun with them . . .
Poached shrimp finishing

Friday, September 17, 2004

And on some days . . .

The next right thing is simply to pay the pieman!

Pizza Pie, ready-to-eat!

Monday, September 13, 2004

Recipe: Rubbed pork with parsley potatoes & Brussels Sprouts

Hey! Remember the 11 secret herbs & spices? Well, it happened again . . .

Go ahead. Count ‘em . . . Yup. 11. And I didn’t even try this time. Just pulled ‘em out of the pantry and the spice rack, and there they were. 11. Turned out pretty good again, too.

Yup.  11

Here’s how it went . . . Wandering about the kitchen, as usual, “what have we got, what do we need to use up, what would taste good, what do I feel like playing with, . . .? Hmmmm, there’s that fresh parsley that Kim brought, what can I put parsley on? Haven’t done any potatoes in a while, how about boiled parsley potatoes and . . .

So we had a slab of pork sirloin, and Cathy had just bought a pile of Brussels sprouts and it wasn’t raining too hard too hard for grilling. Dinner is under way . . .

The rub: (and as always, quantities were by eye)

1 tsp. Ground cumin
1 tsp. Ground dry mustard
½ tsp. Ground cinnamon
½ tsp. Onion powder
½ tsp. Granulated garlic
½ tsp. Coarse (kosher) salt
½ tsp. Coarsely ground fresh Tellicherry pepper
¼ tsp. Paprika
¼ tsp. Ground cayenne pepper
1 Tbsp. Dried cilantro
1 – 2 Tbsp. Sesame oil

Yes. The brown stuff in the Sriracha bottle is sesame oil. I buy it by the quart and use the old Sriracha squirt bottles to ‘serve’ it. No drips, no mess, no extra cost for fancy cruets or cans that always dribble and splash.

And even though the garlic bottle says ‘powder,’ it’s really granulated – still dried, but a nice coarse texture, not that cornstarch consistency stuff that you get when you buy ‘powder.’ Once again, I buy a big tub of granulated and refill the smaller bottle for daily use.

Put all the dry stuff in a little bowl (that you can shake from with one hand!) and mix it all up. Pour a little oil on each side of the pork slab and rub it in a bit with one hand. Sprinkle a little (no more than 1/3rd) of the dry mixture onto the meat and rub it in, all over. Try to pick up any extra oil that puddled in the bottom of the plate and get a nice even ‘smear’ of coating all over the meat.

Then go back and sprinkle the rest of the dry mixture, a little at a time, patting it down and around to coat as evenly as you can. You do not want to rub this second coat in; you want it to sit as a dry seasoning on the outside of the meat. This way, the first batch that you did rub in will flavor the meat all the way through, and the second coat will give you a nice crusty outside.

Put the coated meat in the fridge and go do something useful for at least two hours. Then take it out and let it come up to room temperature for another hour (or less if you live in the tropics!). Warm up the grill, toss the meat way up on a warming rack, turn the flame as low as it will go, close the cover, and go fix the rest of the meal . . .

Rubbed pork ready to grill

Depending on your grill, figure a minimum of about 40 – 45 minutes, even for a piece that’s only a little over a pound. It takes a while to get started cooking, even if you do preheat the grill. For slabs bigger than 2 lbs., plan on around 20 – 30 minutes per pound for boneless pork, depending, of course, on the heat of your grill.

When it’s done, slice it into nice thick medallions, and serve it with . . .

Parsley potatoes. Peel ‘em. Cut ‘em into thirds (unevenly! More surface area, more evenly cooked.) Cover with cold water (1/2 tsp. salt, if you like). Put the covered pot over high heat until the water just begins to boil, then turn the heat to low and let them sit for at least 45 minutes. If lots of steam is still escaping from under the cover after 15 minutes, turn the heat down! Or off! You want to threaten your potatoes into submission, not turn them to gruel.

In the meantime, chop some fresh parsley.

potatoes ready to drain

When the spuds are done (about the same time that you bring the meat in to ‘rest’ for 5 minutes before cutting it!), drain the potatoes in a colander, put the pot back on the stove over medium heat, toss in a slab or three of butter and about half your chopped parsley. Stir it around while the butter melts, turn down the heat, grind a little Tellicherry into the pot, let it bubble for about 2 minutes, turn off the heat. Now dump the potatoes back in and coat with the butter.

And by now, your Brussels sprouts should be just about cooked. What Brussels sprouts, you ask? Well the ones you got started just after you chopped your parsley, of course . . .

Whack off the root end. Make a shallow cross cut and toss them in a pot of water. When you’ve got them all trimmed and cut, rinse them 4 or 5 times in cold water. And get your hands in there – roll ‘em around, give ‘em a squeeze. That way all the loose outer leaves will fall off. Throw the loose leaves away, dump out all but an inch or so of water (about ½ way up the tallest sprout), and add a little salt if you wish.

whack off the end
cut . . .
. . . a cross


About 20 minutes before serve time, turn a stove burner on high, wait for it to get hot (if your using an electric stove, as I am), and put the covered pot of sprouts on the heat. Check the time! In 5 minutes (or less!), you should have a good head of steam going in that pot, so turn the heat way down. All you need to do is keep the steam. You want to steam the sprouts (in a gentle bubble), not boil them.

ready to cook

So hey. Dump the potatoes in a bowl, add some more butter (or butter substitute) and sprinkle the rest of your parsley over the top. Drain the sprouts and serve them in separate little bowls (so the cognoscenti amongst the diners can use vinegar without getting it all over the meat and potatoes). Slice up your grilled rubbed pork, and pig out!

Sunday, September 12, 2004

Recipe: Perfect Rice . . .

Plain White Rice

Nothing could be simpler than cooking plain white rice from scratch. It takes 30 minutes.

Please throw away your Uncle Ben's, your Minute Rice, your Rice A Roni, and all other such stuff. Buy your local supermarket's store brand in 1, 2, or 5 pound bags (if you use more rice than that, what are you reading this for? Go to your local Asian purveyor, haul home a 50 Lb. bag and enjoy!) Long grain, medium grain, and short grain all cook to the same basic instructions. The variations are due more to the weather the rice was grown in, harvested in, how long its been stored, and the humidity when you cook it rather than the length of the grain.

here's what you'll need . . .
rice
water

Here's how you do it.

The secret is simple. Always use twice as much water as rice, and simply add the quantities to determine how much you'll end up with. 1 cup rice + 2 cups water = 3 cups cooked rice (just the right amount for a couple of rice lovers like Cathy and me - with some left over for tomorrow).

rice rocket science

Use a thick walled, heavy pan with a tight fitting lid (we use one of those enameled cast iron saucepans that you can get at a local discount store for about $5. I’ve had this one for 30 years.) Put the water in the pan, cover it and put it over high heat - no salt, no butter, no nothin'! Just the water. (If you want to get fancy, we'll talk about variations later . . .) Bring the water to a screaming boil. Toss in the rice, turn the heat to low, and cover the pan.

DO NOT UNCOVER THE PAN until you serve the rice.

rice done

Cook the rice over low heat for 20 minutes; then turn the heat off and let the pan sit on the burner for another 10 minutes (more is OK but less is not). Your rice is now done to perfection. Serve and enjoy.

rice ready to eat

If you like rice, buy as much as you can store conveniently. Each harvest is slightly different in the amount of natural moisture retained in the grain. You may find that one batch cooks best with a few tablespoons more or less water, or with a few minutes more or less time on the heat. The first batch you cook will seldom (if ever) be awful; but your second batch will almost always be better. If you have several more batches from the same bag of rice, you won't have to 'fine tune' as often.

Saturday, September 04, 2004

Technique: Chopping Onions

OK, OK. If you’ve graduated from your “How to boil water” course, then this is old hat to you. But hey, everybody’s got to learn it somewhere for the first time . . . Might as well be here!

Besides, I’m going to make a couple of suggestions that all the experts will argue with (including ending my sentence with a preposition, well, if you ignore the parenthetical anyway).

Two ways to avoid crying over your cut onions: First, keep them in your refrigerator. Or at least keep a week’s worth in your refrigerator (if you grow them by the acre or buy them 50 lbs. at a time). Second, cut the root end off first (that’s the one with all the little tendrils attached.).

Onion root end

Onions make you cry by turning your eye moisture into sulfuric acid. (It’s the same principle used by the brilliant engineers who ‘fixed’ automotive air pollution by making sulfuric acid instead of nitric acid out of our exhaust fumes.) Most soils where onions are grown have some sulfur in them, and as the onions grow, they concentrate the sulfur compounds that form down at the root end of the bulb, the part that sticks downward into the ground. When you cut open an onion those sulfur compounds mix with the air and form sulfur dioxide gas. And when that gas hits water, we get sulfuric acid. Which makes you tear. And now there’s even more water for the sulfur dioxide to turn to acid. And then you go and wipe your eyes with the back of your hand, and, well, you get the idea . . .

By keeping you onions cold, you reduce the rate at which the sulfur dioxide forms, and therefore have more time to chop before you start to cry.

Now all the experts say (just google ‘onion’ and you’ll see!) to cut the stem end off first thereby trying to avoid all that noxious sulfur in the root end. ‘Course, soon as you cut off the stem end, all those sulfur compounds start to permeate through the onion, so that every slice you make produces more and more sulfur dioxide, and you end up crying.

By cutting the root end off first, you get the outgassing all over with at once; all the sulfur dioxide (well, most of it anyway) leaves the onion instead of flavoring it, and since the gas is cold, it doesn’t rise as fast, giving it more time to mix with more air before reaching head height, and voila, you never know it’s there. If you’re really sensitive, as soon as you slice off the root end, cut out the little core piece there and chuck it down the disposal. Then rinse your knife and your hands and proceed to slice and dice tear free!

Onion root end up

The chopping process is really pretty simple. Slice off the root end.

Onion root end cut off

Slice off the stem end.

Onion stem end cut off

Cut your onion in half.

Onion half

Grab a corner and peel each half.

Onion peel

Slap each piece face down on your cutting board and make a series of vertical slices almost to the back end of your onion piece. If one end of your onion is wider than the other, slice from the pointy end toward the wider end. That way, your slices won’t all converge on the same point and the onion won’t fall apart.

Onion vertical slice


When you get to the last slice, be sure to remember to bring your thumb up above the knife edge. Onions are slippery devils, and I’ve chopped off many a finger part when the blade slid off the surface and right through my thumb!

Onion last vertical slice

Then, turn the onion 90 degrees, and slice across your cuts.

Onion slice across

When you get to the end part, where the vertical slices stopped short of the back end of the onion, just turn it around (so you can hang onto the bigger, wider part), cut one more slice, and then cut those last two pieces into wedges.

Onion final slice
Onion final slice

And there you have it: chopped onions, no tears, about 1 minute total elapsed time.

Onion chopped

You can control the ‘fineness’ of the chop by how many vertical slices you make and how wide you make your cross cuts. And if you want even finer control than that, before you make the vertical slices, put a slice parallel to the cutting surface about halfway up the onion, almost all the way through. Be careful! Put your hand on top of the onion to hold it! No fingers in line with the blade! And go slowly! If you goof and slice all the way through, you’ll have to finish the old fashioned way!

Onion horizontal slice
Onion horizontal slice slowly

(Yes, it’s a big knife. Yes, it says Martin Yan. Yes, we’ll talk about knives one of these days . . . For now, go chop some onions!)