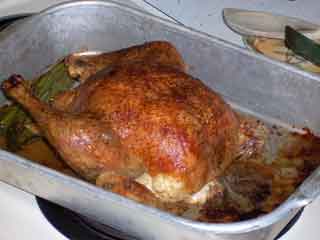
So, for perfect no-lump gravy every time you roast a chicken, duck, turkey, other kind of bird or a hunk of beef or any other kind of meat, just remember one word: roux (pronounced 'roo').
A roux is just flour cooked in the drippings of the roast pan until it is a nice lump of goop or paste. Once flour has been turned into a roux, it can’t cause lumps in the gravy. It’s as simple as that.
For any kind of gravy, the proportions are always the same. 1 Tbsp. of pan drippings (and yes, that means fat!) plus 1 Tbsp. flour makes enough roux for 1 cup of liquid (from potatoes, vegetables, stock, or even plain water). If you don’t have any pan drippings (shame on you!) or if you need to make gravy after the fact (for leftovers, for example), you can use butter or olive oil for the fat.
Let’s use a roast chicken for the example and walk through the whole process of making perfect gravy. The steps are the same for any kind of gravy.
here's what you'll need . . .
meat juices from cooking, or butter, and/or olive oil
flour
cooking water from veggies
(Gravy Master, optional)
fresh ground black pepper, Tellicherry, of course
optional additions include sliced mushrooms, chopped giblets (cooked!), crumbled bacon bits or other cracklin's, additional herbs and/or spices (thyme, oregano, caraway, fennel, . . .), zingy bits like jalapeños, or almost any other thing you can think of that would taste good to you!
Here's how you do it.
When the chicken (or other meat) is done, turn off the oven, remove the bird from the roasting pan, put it on a plate (or platter) and stick it back in the oven to keep warm.

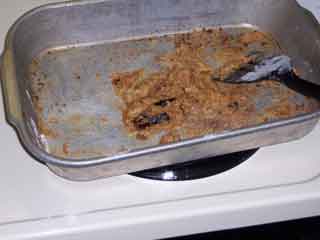
Put the roasting pan on a burner on the stove. With a spatula, scrape all the browned goodies loose from the bottom of the pan. Guesstimate the quantity of drippings (or, if you’re eternally compulsive, pour them out into a measuring cup to see how much you’ve got. Then pour it all back into the pan).
Turn the stove burner on to a medium heat setting. Sprinkle an equal amount of flour over the surface of the drippings. (You could just dump it all into the middle, but you’ll have to spend much longer mashing it around to make sure all the flour gets coated.)

Stir, chop, mix, scrape, fold and otherwise manipulate the flour, over the heat, until all the fat/liquid has been absorbed coating every last granule of flour. You should end up with a fairly dryish, yet still smooth, lump of roux that holds together in the pan. If the roux seems gooey or wet, sprinkle a little bit more flour on it; if it seems dry and flaky, add a drip more fat (olive oil is the easiest to work with unless you reserved some of the original pan drippings.) Keep chopping, stirring, mixing etc. for a while until the roux cooks for a few minutes and begins to take on the rich brown color of the pan scrapings. (4 or 5 minutes is usually about right; if it takes longer, the stove burner isn’t hot enough.)
And keep in mind, you can always make a roux in a skillet or saucepan using butter or olive oil. Same routine; same proportions; cook it until you like the color.

When the roux is ready, pour in the liquid(s), and always include a good sized slug of white wine (or red wine, or Sherry or beer or . . .) For best results, the liquids should be hot, or at least room temperature, when added - cold water is not a good idea. Start small, adding just enough liquid to cover the bottom of the roasting pan for example. Mix it with the roux using the flat of the spatula to squish the roux into the liquid. When you’ve added enough liquid to make a smooth paste, pour in the rest. Turn the stove up to high (or medium high) and continue stirring, mashing and mixing until the gravy begins to boil gently.

If you have any chopped giblets or shredded neck meat or sliced mushrooms or other accoutrement you wish to add to your gravy, now is the time.

This is also the time to adjust the seasonings for the gravy. For us, that means giving a dozen or so grinds of Tellicherry black pepper to the mixture.
Don’t be concerned if the gravy seems too thin after you’ve added all the liquids. Let it boil gently for a few minutes (10?) and it will thicken up for you. (If it gets too thick, add some more liquid!) After a few minutes of bubbling, add a few drops of Gravy Master, if you wish, to give the gravy a nice color (what’s “nice” is up to you).

While the gravy is bubbling away (remember to stir occasionally), you should have plenty of time to mash the potatoes, serve the veggies, carve the beast and otherwise finish last minute chores before serving the feast with, of course, perfect gravy.
No comments:
Post a Comment