Sunday, January 22, 2006

Recipe: Simple Roast Chicken

Want a really simple, inexpensive, quick and easy, delicious meal? Hey, roast a chicken!

For years, roast chicken was a relatively rare meal in our house because we always had to do stuffing and gravy and three vegetables and cranberry sauce (the jellied kind, out of a can, but still, one more must-have item . . .) and turn the thing into a major feast.

In fact, I once saw a show on the Food Network about Roast Chicken. Tyler Florence (I think) had to travel the world over to figure out how to roast a chicken. Now don’t get me wrong: all the chickens he met were wondrous creations, worthy of at least 30 minutes (or maybe it was an hour – I don’t know) of airtime. But, really . . .

Then one day, an aberration struck. Those little pre-cooked rotisserie chickens in the hot case at the supermarket. Hmmmm. If they can do it, why can't I?

Well, you can . . .

here's what you'll need . . .

1 cheap chicken (don't go for the 'oven stuffer' or even a 'roaster;' go for the cheapest whole chicken in the case! A 3 lb. chicken serves two with serious leftovers or serves 4 with the bones picked clean)
1 carrot
1 small onion
salt
Tellicherry
other stuff if you wish

Here's how you do it.

Pre-heat your oven to 400° F.

Whack the ends off the carrot and trim the stem and tail off the onion. You don’t have to peel either one - they're just going to be thrown out later – though I usually take the skin off the onion (and we never peel carrots!). Cut them both up into chunks (and inch or so).

Roast Chicken Veggies

Give your chicken a thorough wash, and yank out any extra fat or other nasty bits the butcher may have left behind. Pat the bird dry with a paper towel.

Dust the interior with some finely ground Tellicherry. And/or, some other stuff. Here, I decided to use some poultry seasoning and some rubbed sage. Other times, I’ve used cumin or cayenne pepper or rosemary and thyme or oregano and basil or . . . Avoid the urge to salt the interior, though. It just draws out all the juices and adds nothing to the flavor.

Roast Chicken Season Inside

Toss the carrot and onion chunks into the cavity and push, fold, prod, or otherwise try to get any loose skin over the opening. If you can’t, don’t worry about it. Who cares if a piece of carrot or onion falls out during roasting, won’t hurt a thing.

Cram in the veggies

Fold the wing tips under the bird,

Fold the wings under

and toss it into the roasting pan. You can use a rack if you wish, or not. The smaller birds have much less of that ‘pumped-up’ fat that cooks out of the larger birds, so you don’t need to worry about your dinner ‘boiling in oil’ as it were. If you absolutely cannot cook a bird without salt, now’s the time. Rub some olive oil all over the top of the bird and judiciously sprinkle a little coarse (Kosher) salt on the skin. The oil will prevent the salt from dissolving (immediately) in the juices from the chicken, and if you baste gently (see below), you can avoid washing it off. (And, yes, I always toss an extra hunk of onion into the roasting pan for gravy flavor later.)

Ready to Roast

Into the oven for an hour or two depending on your oven, the size of the bird, how 'dried out' you prefer your chicken, the phase of the moon . . . After the first 15 minutes, baste the bird every 10 or 15 minutes until it's done.

Here’s my beast after 1 hour.

Roast Chicken after 1 hour

And here, after two hours (and declared done),

Roast Chicken after 2 hours

If you’re nervous about raw poultry, or a stickler for detail, or an engineer (and do check out that Cooking for Engineers blog; there’s a lot of good stuff over there!), poke your bird with a thermometer. If it’s around 175° F, you can yank the bird. Its temperature will continue to rise another 5° or more while it rests, which will bring it to the final temperature of about 180° F.

When the bird is done to your liking, pull it out, throw away the onion and carrot, and have a wonderful meal.

Roast Chicken Served
(Yeah, ok, so I did two veggies and gravy; it's still a simple meal . . .)

Now there are, of course, 3497 variations on this theme, all of which are wonderful. Some of them are equally simple, some are not; it’s all up to you. Go play . . .

Tuesday, January 10, 2006

Tip: Cheese Graters

Mouli. That’s really the only name to remember. Electric graters just ‘boil’ your cheese; the other (6) hand graters I’ve tried all suffered from various shortcomings - too small, too big, awkward to hold, dull blades, impossible to clean . . . So save yourself some time and trouble; get a Mouli.

They make metal ones and they make plastic ones. I find the plastic one much gentler on my hand. My daughter (who gave me my first metal one, I think) likes the metal ones. Buy some of both; use the one you like and give the rest as gifts!

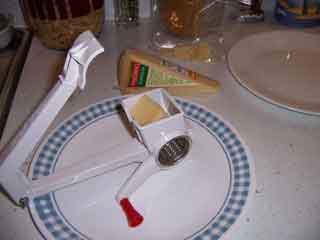
Mouli plastic cheese grater

But do look around. The first metal one I bought was from a ‘Kitchen’ store. It was a ‘discount’ Kitchen store, to be sure, but I still paid nearly twice what I would have had I thought to look in the cut-out bin at the local ‘dollar’ store. The first plastic one also came from a discount kitchen outlet – about $1 less than the metal one. Later, I found plastic ones on-line as a ‘discontinued’ item. I bought their last three for about half what I paid for the first metal one. That was four years ago and I just retired my first one!

If, however, you decide to like the plastic version, you will have to make a repair. The hinge pin that holds the handles together isn’t a pin at all – just two little nubs of plastic that are guaranteed to break off after about 8 uses. But the pin idea is the solution.

Just grab your electric drill. Zoom a tiny hole through the handle where the nubs used to be, and using metal washers on each side, slip a skinny machine screw through and tighten up with a nut. Like I said, four years of twice weekly service, and what finally broke was the arm, not the pivot.

Mouli plastic cheese grater, fixed

Tuesday, December 13, 2005

Recipe: Split Pea Soup

Dried legumes. Wonderful things. Do you remember Y2K? How many pounds of dried beans and peas and lentils and such did you store away, just in case . . .

Well, if you've got any split green peas left, this is the way to deal with them. First, cook a ham. Feed 23 people (friends, relatives, the local fireman's fund raisers, whatever). Save the ham bone (and all the little tidbits, or big tidbits, of ham meat that didn't get eaten). Freeze them. Wait a few months. Now you're ready to make split pea soup.

here's what you'll need . . .

1 lb (one bag) dried split green peas
1 leftover ham bone
leftover ham meat (or whatever you end up scraping off the bone, if that's all you have)
1 (or 2) smallish carrots, sliced or coarsely chopped
3 - 4 medium potatoes, peeled or not, cubed
1 medium onion, chopped
6 - 12 mushrooms, thick sliced or coarsely chopped (optional if you hate mushrooms)
Tellicherry
thyme
2, 4, 6 qts. water


Here's how you do it.

Get out that old huge Dutch oven, or your 12 (20?) qt. stockpot, or the biggest other bucket you can find to cook in. This is a soup that needs to be made in quantity. This recipe will make about 8 servings (or more, if you're not using it as a main dish!)

Like it says on the bag of peas - pick them over carefully. I've only found three pebbles in 30 years of soup making, but if I had bitten into any one of those three, my Dentist's children would all have gone to Harvard.

Used to be, I’d hang a strainer into a saucepan and slowly pour a few peas from the bag into my other hand. If I didn't see any rocks or other junk, dump into the strainer. Next few peas, and so on . . .

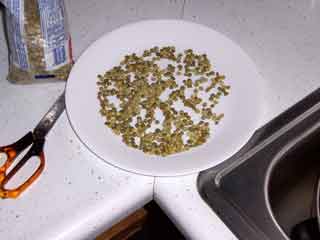
Recently, while picking over beans for a chili, it dawned on me that a white dinner plate would make the whole job a lot easier! So, pour out some legumes of whatever ilk onto the plate and take a good look. Sticks and stones really stand out (I didn’t find any in the peas, but I found several in the beans!)

Pick over your peas

When you’ve removed any detritus, into the strainer with the clean peas or beans or . . .

Dump ‘em in the strainer

Then give the strainer a swirl or five under cold running water. Drain, and toss the peas into the soup pot.

Rinse ‘em in the strainer

Cover the peas with water to a depth of about two inches, or a little less. Cover the pot and turn the heat to high. As soon as the peas come steamily close to a boil, turn the heat off (on an electric stove, or to barely a flame on a gas stove). You basically want to warm the peas for the next 30 minutes or so.

Add some water

If you peek, you’ll usually see a white froth on the surface of the water. Not to worry. It’s just loose, surface starch, ‘blooming’ in the hot water. Eventually, the peas will reabsorb some of it and the rest will dissolve in the water.

Starch

However, there is a choice to be made here. All starchy, dried legumes have one thing in common – gas, flatulence, the musical toots, you know . . . If you’re among good friends, well, hey, charge on. If someone’s boss is coming for dinner, might I suggest . . .

Add about ½ tsp. of baking soda to the water before it comes to a boil. When the 30 minute ‘warm time’ is done, discard the water and start with fresh water to make the rest of the soup. (Do the same thing with beans or lentils and nobody will be asking you to ‘pass the Beano’ at the dinner table.)

While the peas are tenderizing, whack up the onion, carrots, and mushrooms (if you're using them).

Veggies

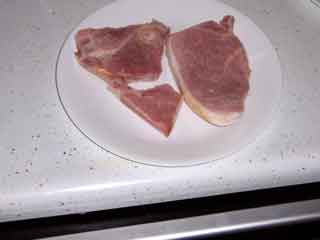
If you've got some separate ham meat leftovers, dice them up into ¼ bite size bits. In this case, you’ll notice that my ham bone is a tad on the tiny side. No matter. Whatever you’ve got is just what you need. This was leftover from a ham steak. I put it in frozen; took it out cooked, and then trimmed the fat off. Made a great soup!

Veggies

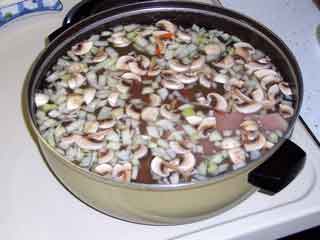
When the peas have been threatened for 30 minutes, add in the ham bone, toss in whatever you chopped up,

Toss it in the pot!

and fill the pot with water (well, put in at least 2 quarts; I usually go with 4, or maybe more, because I'd rather cook the soup 'down' to a good texture than have to try to thin it 'up' to a good texture). Crank up the heat, cover the pot, and wait for it to get nearly to a boil.

Add water

While waiting, wash your potatoes, and peel them if you must. Slice them in half lengthwise (so you end up with the thinnest halves, not the thickest).

Cut Potatoes

Slice each half lengthwise into three strips. Slice each strip crosswise into 4 or 5 bite sized cubes.

Cube Potatoes

By now (if you've got a really good stove), your soup is bubbling nicely, nearly at the boil. So cool it down again! By tossing in the potatoes. Grind a goodly layer of Tellicherry onto the top, and throw in about 1/3 tsp. of dried thyme (which you, of course, will crumble into the palm of your hand before tossing in!). Cover again. Get bubbling again. Turn down the heat to a bare simmer.

Pepper & Cook!

Cook for at least an hour. After 30 minutes, crack the lid to let some steam escape. After an hour, check the texture of your soup. It should be thickening, but still on the thin-ish side. If it reminds you of the LaBrea tar pits, ADD MORE WATER! If it's not sludge yet, taste it. Adjust the seasonings - is it salty enough? Peppery enough? Just that hint of thyme behind the peas? Anything else that your tongue just screams out for? Well, now's the time to add it.

And while you're at it, dredge out that ham bone. Put it on a plate and let it cool for 10 minutes or so. Then scrape every last speck of edible meat off the bone and return the meat to the soup pot. Toss the bone in the garbage.

Cook that soup until it's done - might be another 10 minutes, might be another hour. You want this to be a thick soup - it kind of sloozes out of the ladle, neither splashing, nor requiring a spoon to push it off the ladle. Sloozing, splooshing, you know . . .

Pea Soup Cooked!

Hey, serve it into bowls and dig in. Eat it with corn muffins or rye toast or oyster crackers or Pilot Crackers if you can get them, maybe a salad. Keeps for a month (if you cook it every week!), freezes for a year. Never let a good ham get away . . .!

Wednesday, December 07, 2005

Recipe/Technique: Classic Brown Stock

This one is such a pain in the, well, kitchen, that I only do it a few times a year. But sometimes, you just get a hankering for onion soup. And, I’m sorry but it’s true: you cannot make onion soup without home made brown stock. Oh, you can make a soup with onions, but it won’t be onion soup.

So herewith and forsooth and thusly, the classic brown stock.

Here’s what you’ll need:

bones, at least 5 lbs.
carrots
onions
celery
water
the patience of Job

Here’s how you do it.

Roast the bones. Well, get the bones first. And that can be tricky. You see, the supermarkets have seen us coming. What they used to give away, simply to avoid the cost of disposal, they have now discovered, we’ll pay for, and pay dearly. One local purveyor wants $1.50 a pound! And since they are still in business, I presume they get it.

Anyway. Shop around. Talk to small butcher shops. If any of your supermarkets are locally owned, talk to them as well. Cheap bones make stock just as good as expensive bones.

Since it takes as long to roast 2 lbs. of bones as it does to roast 5 or 10 lbs., you might as well go for the big bucket and make a few gallons of stock. Keep it in the freezer and use it over a few months until the next time you get crazed and decide to roast bones again.

I have not done this often enough to have any defensible advice on just what sort of bones you should roast. Oh, beef, for sure, but big ones, little ones, long ones, short ones, I don’t know. I’ve used them all and can’t tell the difference in the final stock. One time, I had just boned a chicken and threw those bones right in with the beef bones. Worked just fine. So I’d say, get whatever you can for as little cost as possible, and roast on . . .

Pre-heat your oven to around 400 - 425 ° F. Mine runs a little cool at those settings, so I use 425; if yours runs hot, go for 400 – you want to roast the bones, not char them.

Arrange the bones in one layer in a roasting pan and into the oven with them. Let ‘em cook for at least 1 ½ hours, two hours is ok, but no more at this point.

While the bones are in for the initial roasting, whack up some veggies. You don’t really need to trim them up, and be sure to leave the peel on the onions – it will add to the rich dark color of the final stock. Since celery has a very strong flavor, I use about 1 stalk of celery for every 4 carrots, and since my usual supply of onions are little ones, I use the same number of onions as carrots.

Brown Stock Veggies

In this case, I gave the veggies a little rub with some olive oil and then a light sprinkle of Tellicherry and coarse salt. But you don’t have to (and in a classic kitchen, might get yelled at for doing so – this is supposed to be a ‘base’ stock, with no distinct flavor of its own.)

So, after the bones have had their first roast:

Brown Stock Bones

toss in the veggies and stick the pan back in the oven for another hour. When they’re ‘done,’ you can begin the long part of this process . . .

Brown Stock Veggies & Bones

Transfer the roasted bones and veggies to your stockpot using a slotted spoon, so that any fat and drippings remain in the roasting pan.

Brown Stock Veggies & Bones in Stockpot

Next, pour all the liquid in the roasting pan into a cup to cool for a while. When you can handle it, store this ‘glace de viand’ (ok, rendered beef fat; ok, ok, ok, lard) in a glass jar in the refrigerator. Add sparingly to anything in a skillet for wonderful rich flavor.

Brown Stock glace de viand

Get the roasting pan, with all its beautiful brown bits back over some heat on the stove

Brown Stock Gramins

and pour in a cup or three of water to ‘deglaze’ the pan. Bring the liquid up to a boil, scraping all those goodies (‘gramins’ as Emeril would call them) off the bottom of the pan.

Brown Stock Pan Sauce

When you can ‘feel’ that the roasting pan is shiny clean under that pan sauce, add all that liquid gold to your stockpot, and then fill ‘er up with more water.

Brown Stock Cooking

By the way, always use cold water for cooking, especially for something like this. The cold water rule has much less to do with temperature than it does with purity. Running the water until it’s cold flushes out any of the soluble ‘crud’ lining your water pipes or lurking in your hot water tank, assuring that the water you’re using is as clean and pure as it can be in your house. Of course, if your tap water smells like a swimming pool, even after you’ve run it cold, consider cooking only with bottled water. The flavor of chlorine just does not enhance the flavor of anything else . . .

Now, bring that stockpot to a barely there simmer, and let it cook for at least 8 hours; 24 hours if you possibly can. This is where all your work so far becomes kitchen magic that will last for months (unless you’re feeding an army on a strict diet of vegetable beef soup or something!)

You can use high heat and a lid for the first 30 minutes or so, to overcome all that cold water, but don’t bring this to a boil. You’re trying to entice all the flavor out of the bones and veggies, not to scare it out of them! When you get a bare simmer going, make sure the lid stays cracked so that steam can gently waft away, concentrating the flavors as they are extracted. And do remember to check every now and then to make sure all the water hasn’t evaporated!

At some point, you’re going to declare ‘done!’ and remove all the bones and veggie remains from the stockpot. I usually do this with a slotted spoon, rather than trying to dump a 4 gallon pot of hot liquid and heavy thumping bones into a colander, but then, that’s just my approach to non-scalded body parts in the kitchen. You can make your own choice.

Once solid has been separated from liquid, strain the liquid through the finest mesh strainer you have. And then clean the strainer and strain again, pouring more slowly this time. You may be surprised at how much additional stuff you get on the second, slow, strain.

Now I usually split my stock into two portions. One will go into the refrigerator to cool overnight and eventually become classic brown stock for use in the next day or two. The other portion goes back on the stove to be reduced in volume by at least half, maybe two thirds, over the same barely there heat as before. This portion will become ‘demi glace,’ and will get frozen in ice cube trays for long term storage and use over the next few months.

When the classic stock has been chilled overnight, you’ll find a large mass of fat solidified on top.

Brown Stock Cooled

Use a thin knife or spreader or such to very gently cut around the edge of the fat and loosen it from the side of the pot. Then, slide a large spatula underneath, and using the knife or spreader to steady the top, lift the chilled fat out.

Brown Stock Fat Removed

I discard this slab. I won’t tell you what to do. . . Once the demi glace is reduced, it, too, will need to cool in the refrigerator, and have the fat removed. Then you can freeze the thick, jelly-like glace.

Brown Stock Demi Glace Cubes

Of course, if you have enough room in the refrigerator, you can cool the entire batch first, then remove the fat, and then separate the portions for various purposes.

When you’re done, you have a sizeable supply of wondrous basic stock to work with.

Tuesday, November 01, 2005

Recipe: Cream of Asparagus Soup with ham and potatoes

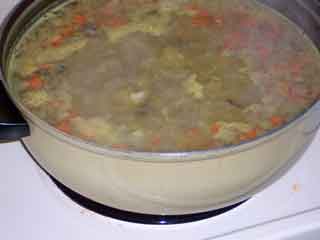
No photos of this one, except of the stock. Didn’t expect it to be as entirely wonderful as it was. If I ever do it again, I’ll try to take some snaps. But there are no major mysteries, no arcane secrets that only a photo would reveal, so hey, give it a try . . .

Here’s what you’ll need:

asparagus stock
fresh asparagus (4 to 6 stalks per serving)
ham cubes (leftover frozen ham steak)
red onion, flaked, ¼ onion per serving
carrot, thin sliced, ¼ carrot per serving
potato, cubed, 1 per serving
1 can of peas (small can for two servings)
chorizo, chopped and sliced, ½ per serving
light cream, 3 oz. per serving
fresh thyme, chopped, (I don’t know, the leaves from one stem per serving?)
fresh oregano, chopped (as above, just go for it!)
olive oil
Tellicherry (of course!)

Here’s how you do it.

It started out with the need to clear some freezer space. I still don’t know what half the stuff in there is, but something had to make way for new chicken, and the 4 bags of frozen asparagus stems were taking up a lot of space!

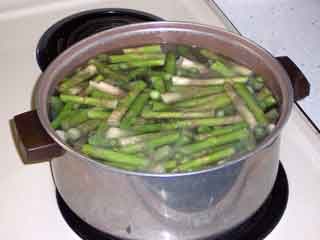
So into the bucket with them! Cover with a gallon or so of water and bring to a boil uncovered. Yes, you could get them hotter quicker with a lid on, but the slower approach lets them defrost more gently as the water warms, and I think, preserves more flavor.

Asparagus stalks

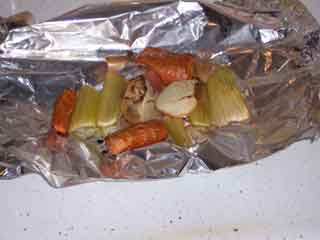
Besides, you need some time to roast some other stuff. So crank the oven to 425° F, whack up a couple of small onions (trim and toss the ends, but leave the peel on), a couple of carrots (again, trim and toss the ends) and a couple of stalks of celery. Grease ‘em up with a little olive oil, lay them out on a piece of foil, and into the oven for at least 30 minutes, an hour if you can. (And if you don’t care about being a stock purist, go ahead and sprinkle the oiled veggies with a little coarse salt, and maybe give ‘em a few good grinds of Tellicherry before you put them in the oven. I usually do . . .)

Roasties for stock

As soon as the asparagus water reaches a healthy bubble, turn the heat down to a gentle simmer. You want some bubbles, but not a raging sea. Ultimately, you’re looking to reduce the liquid by half, but you want the whole process to take at least a couple of hours. That way, if you manage to roast your ‘other stuff’ for an hour, everything will still have time to get friendly in the pot. If you’ve already reduced by half before you remember to toss in the roasties, well, just add water! Stock is really simple . . .

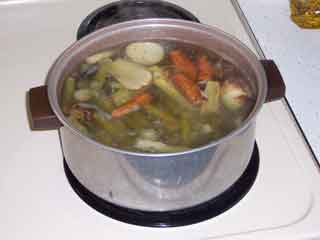
So, yeah. When you give up roasting, toss all the roasted stuff into the pot. Since it’s already hot, you shouldn’t have to adjust the heat to keep your perfect simmer going. And as above, if you’re already ‘reduced’ before the roasties have had at least an hour in the pot, well, just add water . . .

Asparagus stalks & roasties

When it’s ‘done,’ drain, strain, scoop and/or otherwise separate all the solid stuff from the liquid. Dump the solids; save the liquid.

Now. While all that’s goin’ on, get the meal prep under way.

Cut your red onion into 1/3 inch wide slices; then cut the slices into ¼ inch wide wedges; and call it flaked. Heat your skillet and toss in some olive oil while you slice your carrot into paper thin half rounds. By now the pan and oil are hot, so cook up your onions.

After you toss them around to get them coated with oil, cube up your (fresh, frozen, last night’s leftovers, whatever . . .) ham. Small. ¼ to 1/3 inch cubes.
When the onions have been on for a couple of minutes, toss in the carrots. Keep ‘em moving; keep cutting ham, if need be.

After the carrots have been sizzling for about two minutes, turn down the heat to a bare sauté and wait for the first touch of color, as in browning, to appear on the onions. Probably take about 7 or 10 more minutes.

While the onions and carrots seek brown, take your favorite vegetable peeler and peel the skin off the bottom 3 to 4 inches of your fresh asparagus stalks. Then trim off the last ¼ inch or so of each stalk. Now, slice off thin 1/8 inch slices from the stalks until you’re left with about 3 inches of the asparagus tips. Toss all the little slices into the skillet as soon as you get them done, and cook, cook, cook.

As soon as there’s a little color on the onion, toss the ham into the skillet. Now, if your ham was frozen, it probably still is. No worries, just takes some time. As the ham thaws, it will releases water. Your skillet of goodies will get wet. And then it will steam. And then dry out. And that’s all just fine. Just keep the heat under it; stir it around from time to time; and get on with the rest . . .

Which includes getting your potatoes peeled (or not, your choice; Cathy likes peeled, and this is white on white, so what the heck, I peeled ‘em this time), and cubed, and tossed into the final soup pot. Cover them with water, toss in a spoonful of ‘chicken base’ (or cover them with your own very special, homemade chicken stock, instead of water and the base), and put a little heat under that pot.

Next, toss your chorizo into a(nother little) skillet with some olive oil and start cooking it.

And while that happens, chop up your fresh herbs.

PaPhew! Really. It’s easy. I promise . . .

OK. Remember that skillet of ham and onion and such? Well, dump your asparagus broth into that pan and bring it all up to a serious bubble. After it cooks together for about 10 minutes, toss the skillet contents into that final soup pot with the potatoes in it. Toss in the chopped herbs, pour in whatever quantity of cream you think you can sneak past your cardiologist, and adjust the heat to a barely there simmer. Let ‘er cook for 30 minutes or so.

And as soon as the chorizo is done, slit it lengthwise; slice one half into thin half-rounds and chop the other into little bits; and toss it into the pot.

Make some rye toast, and an arugula-romaine-tomato vinaigrette, and serve the soup!

Sunday, October 30, 2005

Whaddaya mean 6 weeks . . .!?!?!

I can't believe it . . .

Yes, October is traditionally filled with houseguests and family celebrations, and this year we can add hurricanes and memorials and floods and, good grief, the trick or treaters are about to pound on the door! But six weeks? . . . Sheesh . . .

Tomorrow there will be more!

In the meantime, a heartfelt thanks to those of you who have started to leave comments on the blog, and continued thanks to all who have sent emails. Your thoughts, reactions, suggestions, and requests are greatly appreciated. Please keep them coming . . .

And just so I can say, "I told you so!" here's the snap of the western after the last one . . .

A Perfect (?) Western

Wednesday, September 14, 2005

Recipe: The (venerable) Western Omelet

A western omelet for two requires 5 eggs (you can use 6 if they're small or your skillet is more than 12"), about 1 or 2 tsp. each of fine chopped onion and green pepper, and a couple of Tbsp. of diced ham. Or more. Or less. Or . . . I like to notice the ham and green pepper while I'm chewing, but have the onion play only a flavorful supporting role. Others like to 'chaw' on everything. As long as you've included onion, green pepper and ham, you've got a Western.

Chopped onions

(‘Course, this time, I didn’t have enough ham. But there was some thin sliced roast beef kicking around, so what the heck. And as long as we’re taking liberties with the purity of the form, how about dicing up some ‘shrooms, and one of Woody’s home grown jalapenos. . . Look. It’s food. It’s supposed to be fun. So play with it!)

Western  ingredients

Ok, toss all your chopped up stuff into a mixing bowl and get ready to crack your eggs (which you did take out to warm up to room temperature, didn’t you . . .)

But instead of cracking the eggs straight into the bowl, where one rotten egg ruins everything, consider the plate method. Grab a bread plate or flat saucer and crack your egg onto it. If it’s OK, slide it into the bowl. Cracking the egg on a flat surface, rather then the edge of a bowl is much less likely to contribute eggshell to your recipe, and you won’t lose half the egg down the outside of the bowl!

Western eggs

When the eggs are in, grind on a frightening layer of Tellicherry, add a splash of milk, and whisk that mess into a froth. Now let it sit for 10 minutes or so while you warm your skillet, load up the toaster, flip the home fries, set the table, you get the idea . . .

Coat the bottom of the hot skillet with a light sheen of olive oil (or a little butter if you wish). You don’t want any puddle of oil in the pan, just a thin coat to keep that first contact of egg mixture from sticking.

Slick pan

Give your western a final whisk or three and pour it into the pan.

Western into the  pan

Now turn the heat down, rinse out your bowl and whisk, and do whatever other cleanup chores will take about 2 - 3 minutes.

Western heat

By now, the edges of your western should have started to begin to show a little character. If the pan is still mainly soup, give it a very gentle tilt/roll/swirl to flow some of the egg a little farther up on the skillet wall.

Western 3 minutes old

You want to develop a sturdy enough outer edge that you can run a spatula all the way around the omelet without tearing or breaking any of it away. And you want to do this as soon as possible (after the first couple of minutes, that is).

When you can lift the edge of the omelet away from the edge of the pan, all the way around, check the clock. In about 15 minutes, you're going to flip your western. But every 5 minutes between now and then, you're going to slide that spatula all the way around the edge, slipping it closer to the center of the pan each time. On your final slide, the entire omelet should release easily from the surface of the skillet.

Western ready to flip

Five minutes later, it should be time to flip. If you're worried, you can lift the edges and peer underneath. The top of the omelet should be pretty well set, with little or no loose liquid. The bottom of the western should be a beautiful mottled brown, some parts dark, some light and some still a little yellow. If so, it's time to flip; if not, wait (but not too long . . .)

To flip the beast, make use of the back of a dinner plate (until you get the hang of flipping the entire thing in the pan, that is!) Just slide the omelet, cooked side down, out of the pan and onto the bottom side of a dinner plate.

Western slides out

Then, tilt the pan up as far as you dare, and in as close to one motion as you can manage, rotate that plate toward the skillet, slide the skillet under the plate, and dump the uncooked side of your western down onto the pan.

Western flips back

In about 2 minutes, start the edge separating again to make sure the bottom side doesn't stick to the pan (it's not likely to, but always worth checking!). In about 10 minutes, your dinner is ready!

Western perfect

Cut it in half, put it on plates, douse it heavily with ketchup (or not) and dive in!

Western, well done

(Okayokayokay, so I cooked this one a little too long on side one. Last one was a little pale; next one will be perfect; all are good!)