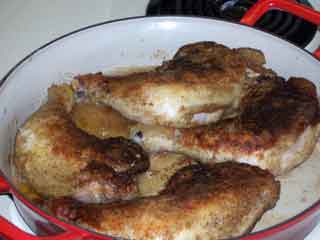
Monday, March 21, 2005

Recipe: Tommy J’s definitely not Hungarian Chicken Goulash

So I opened a can of peas by mistake. Couldn’t use them that night, so they sat in the fridge and stared at me every time I opened the door. Until they ended up sitting next to a tub of soured cream, and well, one thing led to another . . .

here's what you'll need for two big servings. . .

1 large boneless, skinless chicken breast or 4 to 6 chicken ‘tenders’
1 can peas
onion
red bell pepper
garlic
mushrooms
Louisiana Hot Sauce
dried thyme
dried rosemary
paprika
fresh ground Tellicherry
soured cream
wide egg noodles
butter
olive oil

Chicken Goulash ingredients

Here's how you do it.

Cube the chicken and massage it with the hot sauce. As I was making this up, I first planned on using SriRacha for the ‘heat’, but maybe that would have been a little too much or too ‘hard’ a heat. Then I thought about Tabasco, but that seemed too ‘pointy.’ sort of a needle-like heat. But then the old stand-by came to mind – Louisiana Hot Sauce – and it just seemed to work perfectly with the piquant pungency of the paprika. So rub it in and let the chicken sit until you get everything else ready (30 minutes or so).

Don’t drain the peas! Instead, season them with some dried thyme and rosemary. Crush about 1/3 tsp. of each in the palm of your hand and toss it into the liquid. Let the seasoned peas, like the chicken, sit for 30 minutes.

Put a pot of water on the stove and crank up the heat. By the time you get the rest of this stuff prepped, the water will be ready to cook your pasta.

I had some little bits of red onion leftover, so I chopped them up. But that didn’t look like enough, so I added about 2/3 of a yellow onion, sliced paper thin. Yeah, that’s about right . . Chop up the red bell pepper; I used about 1/3 of a large one. Chop the garlic. That’s two good-sized cloves, coarsely chopped. And, hey, mushrooms go with everything!

And to provide a cool, crunchy contrast to the goulash, toss together some iceberg lettuce and tomatoes to go with your favorite Ranch dressing.

Now that you can pay attention to the timing, your pot of water should be boiling, so cook up some wide egg noodles. Don’t let them cook for more than 5 minutes! Then drain them, give them a quick rinse under cold water, and back into the still warm pot. Add a Tbsp. or so of butter, stir to coat the noodles and then cover the pot to keep them warm.

Next, remove your skillet from its burner and turn the burner up to medium high (about 3 o’clock on my stove knobs). You don’t want to heat empty non-stick pans that hot – the heat will break down the coating and food will stick forevermore. But you will want to seal the chicken quickly so it will stay tender on the inside while you get it nicely browned on the outside.

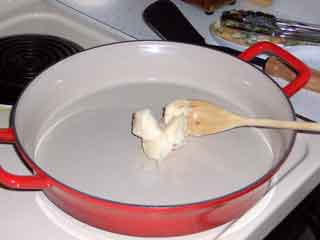
So, when the burner is nice and hot, put the skillet on, count to 3, add a couple Tbsp. of olive oil, turn on the exhaust fan, and toss in the chicken. Swirl, toss, flip, and otherwise keep your chicken moving until it’s all nicely sealed. If the heat is right, it should take less than 2 minutes.
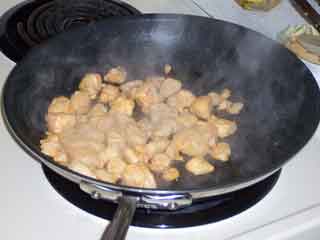
seal the chicken

As soon as the chicken is sealed, lift the pan off the burner, reduce the heat to medium low (about 7 o’clock), count to 17, put the skillet back on the burner and cook the chicken until it’s brown. Probably another 4 to 6 minutes.

brown the chicken

When the chicken is browned, remove it from the pan and set it aside until you get the sauce prepared. Try to leave all the oil in the skillet.

Now, put the skillet back on the burner, crank the heat up again (to about 4 o’clock this time), count to 5 and add the onions. Sauté for exactly one minute.

Add the peppers; sauté 1 minute.

Add the mushrooms; sauté 2 or 3 minutes, just until they begin to change color.

Add the garlic; sauté 1 minute.

Grind fresh Tellicherry all over everything. Stir it all around. Deglaze with white wine (that just means pour a goodly slug of wine into the hot skillet). Let it sizzle until half the wine is gone.

Add the peas and all the seasoned liquid, and swirl it all around until it comes back to a lively simmer.

Add about 3 Tbps. of soured cream and stir to mix thoroughly.

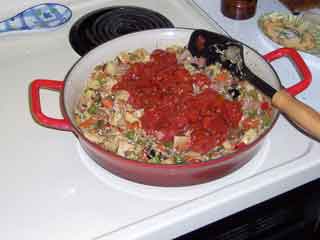
sauce underway

Return the sauce to a gentle simmer, reducing the heat to about 8 or even 9 o’clock on the knob. When the simmering has started, add the first dose of paprika. I just sprinkle my paprika on until it ‘looks right.’ In this case, I’d say I used about 2 Tbsp. It’s a pretty hefty dose.

And speaking of paprika, there are lots of different paprikas out there. Sweet, sour, half-sharp, and probably 27 others I’ve never heard of. I find I really like the flavor of the garden variety McCormick’s brand. Not too sharp, not too sweet, works well with other flavors but holds its own taste when cooked. So I buy it by the barrel and sprinkle it on everything. Your mileage may vary . . . But if you don’t like one brand, do try another and keep trying until you find the one(s) that work(s) for your taste.

add first paprika

OK. Keep that gentle simmer going until the volume of your sauce has been reduced by half. That may take from 5 to 7 or 8 minutes, so stir everything around every minute or two to help the sauce ‘become one.’ Don’t let it boil or your sauce will at least separate, maybe burn.

When the volume is down and the sauce is ‘one,’ add the chicken and more paprika. This time, I used less, maybe a couple of tsps. Once again, I just sprinkle until it looks right.

add chicken and more paprika

Cook a while. I don’t know. Until it’s ‘done.’ You want the chicken to get heated all the way through. You want the paprika flavors to have time to permeate the sauce. You want some of the ‘hot’ from the Louisiana Hot Sauce to wander through the dish. Give it 10 to 15 minutes or so; more than 20 or 25 would probably be a bad idea – too much liquid would evaporate.

cook for a while

When it’s ‘done,’ make noodle ring,

noodle ring

fill it with goulash,

Chicken Goulash

and enjoy! Serve it up with your lettuce and tomato salad and maybe some crispy rye toast or crunchy French bread . . .

Sunday, March 13, 2005

Recipe: Chicken Jambalaya

The secret to this dish is our old favorite, Louisiana Hot Sauce (manufactured by Bruce Foods Corporation, New Iberia, LA.) In fact, we discovered this hot sauce during my first experiments with jambalaya, many years ago. As I’ve said before, there are other hot sauces of this type on the market, but this is the only one with the 'right' flavor, and the only one you can use in large enough quantities to 'do' the dish without destroying the palette.

Jambalayas are just nice mixtures of rice, tomatoes, meat(s), and anything else you'd like to throw in to make it interesting. The traditional recipes call for chicken, ham, rice, onion, tomato and spices. I like to add some mushrooms, garlic, red and green sweet peppers, carrots, ripe olives, and, of course, anything else that's hanging around in the refrigerator that needs to be used up. My problem used to be finding a skillet large enough to hold it all, but now, thanks again to Eric, that’s no trouble at all!

Serve it with crunchy French bread and a tossed green salad with a cool, mild dressing.

To build a batch big enough to serve 4 (or to serve two twice),

here's what you'll need . . .

2 boneless, skinless chicken breasts
1 medium onion (bigger than a golf ball, smaller than a tennis ball)
1 cup uncooked long grain white rice
2 or 3 cans tomatoes
2 - 4 cups 'liquid' (water, chicken stock, juice from tomatoes, white wine, whatever you like)
¼ cup (or more or less) Louisiana Hot Sauce
olive oil
fresh, coarsely ground black pepper (Tellicherry, of course!)

Optional ingredients include:
cooked ham (about ½ cup cubed)
red and/or green peppers (about ½ cup total, chunked or chopped)
fresh mushrooms (about 6 medium sized, chunked or thick sliced or chopped or any combination of the above)
1 medium sized fresh carrot (thin sliced half-rounds or chopped any way you like)
1 stalk celery (chopped or sliced)
1 or 2 medium sized cloves of garlic (minced)
12 ripe olives (halved or quartered)
6 to 12 strands of spaghetti (broken into 1" pieces)
1 or 2 bay leaves
pinches of thyme, oregano, basil (today’s batch uses oregano and cilantro)
1 small jalapeno pepper (skinned and de-seeded, or canned), diced, sliced, or chopped

Jambalaya ingredients

Here's how you do it.

Cube the chicken into pretty good-sized hunks. We usually get about 25 - 30 pieces out of two breasts. (If you're adding ham, get it cut up now as well). Set aside on a plate (and grind some black pepper on the chicken cubes, if you like).

Chop the onion and any of the other vegetables you're planning to include. Set aside (in neat little piles, of course) on a plate. Mince the garlic, break the spaghetti, and set out the bay leaves and spices, if you're planning on using them.

(If you're stuck with an electric stove, as I am, now is a good time to start heating your skillet.)

Open the tomatoes and drain the liquid into a measuring cup. Add a slug of white wine or any of the other liquids you want to use to the measuring cup. Then fill it up to two or three cups (or so, different batches of rice require a little more or a little less liquid) with water.

You'll need a large deep skillet - at least 12" (14" or 16" would be better, but they don't seem to sell them at WalMart), or a fancy Le Creuset like the one Eric gave me, or a Dutch oven or a . . . Get the pan hot (about ‘4 o’clock’ on my stove's dial), add about 2 Tbsp. olive oil, swirl a couple of times till you can smell the oil's aroma and toss in the chicken. Shake, toss, flip, turn or otherwise keep the chicken in motion until it is sealed on all sides. You can either keep it moving until it's lightly browned or turn the heat down a notch so you can leave it for a minute or three to clean up the mess you've made so far. (Since the ham is already cooked, you can add it later.)
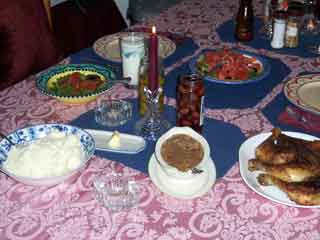
Sealing the chicken

Now, if you want your chicken 'hot' rather than only having the dish 'hot', this is the time to add the first slugs of Louisiana Hot Sauce. I don't usually measure out the hot sauce before cooking the dish. I just give the bottle a few judicious shakes from time to time. At this stage, add about 3 or 4 good solid shakes to make the chicken ‘hot’; otherwise, you can wait and add all the hot sauce later, after you get the liquid in.

Slightly browned, first sauce

When the chicken is about half way to lightly browned, toss in the vegetables (and if you turned the heat down above, turn it back up now - you'll need it.) Start with carrots, if you're using them; then onions; then mushrooms and peppers; then garlic, jalapenos, olives (and anything else you might have found lying around). The idea is to have all this stuff 'cooked' by the time the chicken is nicely browned.

Add the veggies

There should be plenty of oil/chicken grease left in the pan for the next part, but if not, you can add another Tbsp. of olive oil and you probably want to push the chicken and vegetable mix over to the sides of the pan to give yourself some room. If you're using spaghetti, it goes in next. You want to brown the pasta in the hot oil.

Brown the pasta

Then toss in the rice and stir it around for a minute or four until every last grain is thoroughly coated with oil. You don't want the rice to start browning, but you do want it to start cooking, so keep it moving. If you're a time-control freak, the rice should be stirred around continuously for at least 5 minutes, but no more than 8 minutes.

Add the rice

When you're sick of coating/cooking the rice, stir everything together until is is nicely mixed. Add the tomatoes and kind of chop them up with the edge of your spatula (you want chunks, not mush). When everything's nicely mixed, swirl, shake, jiggle, flip and/or stir the whole mess for about 3 or 4 minutes. On the last swirl, jiggle, or flip, add the bay leaf and move it around enough to get it moist.

Add tomatoes

If you're using the spices, they can be tossed in now. And, if you did not grind black pepper all over the chicken while it was sitting on the plate earlier, grind it all over everything now.

Add herbs and spices

Now, pour in the liquid and stir everything all around until it's thoroughly mixed. If you've kept the pan hot enough, the whole mess should be bubbling by the time you've got everything mixed up.

Add liquids

Now add the remaining hot sauce (or all of it if you didn't put any in earlier) and stir it in a couple of times. I usually add between 12 and 20 good 'splooshes' at this point (in addition to the 3 or 5 or 6 I added earlier). You'll have to experiment to find the right amount for your own taste. (If you like Old El Paso Thick and Chunky Salsa in the mild version, go for 12. If you like the medium version, go for 20. If you like the hot version, you're on your own!) When I started, this 12 oz. bottle of hot sauce was unopened . . .

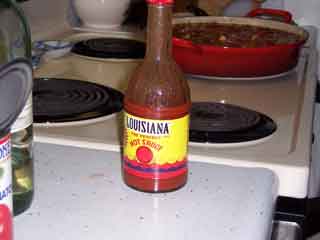
Hot sauce bottle after

Now reduce the heat to low and cook the mess for at least an hour. You want it to be bubbling gently, not frothing all over the stove and not just sitting there with a little steam rising. Depending on atmospheric pressure, barometric readings, humidity, the month of the year in which your rice was harvested and the phase of the moon, the cooking time in the skillet can range from 1 to 2 hours.

Jambalaya bubbling

When all the free liquid has been absorbed and the rice is tender (yes, you'll have to try a spoonful to tell), then it's time to preheat the oven to about 375° F or so, set the table, put out the salad and dressing and get ready to eat. You're about 10 minutes away (depending on how fast your oven preheats!)

Jambalaya ready for the oven

Stick the pan full of Jambalaya into the oven (uncovered) to 'dry out' for a few minutes. (Or, if your pan isn’t oven safe, put a little olive oil in the bottom of a baking dish to keep the Jambalaya from sticking, and transfer the contents of the skillet to the baking dish.) Stick the French bread in the oven at the same time. In about 5 to 10 minutes the Jambalaya should be ready for the table, the French bread should be crunchy, the salad and dressing should be at perfect serving temperature, and it's time to PIG OUT!

Jambalaya served!

Tuesday, March 08, 2005

Technique: Coring Iceberg Lettuce

Yeah, yeah, I know. Like chopping onions. Everybody already knows how to do this. Unless, of course, you don’t . . .

First, open the plastic wrapper. For years, I tried to figure out how to unwrap one of these things. But every time I got close to the secret, the lettuce barons changed their approach. So, don’t pull, or twist, or slide your fingers underneath. Just grab a pair of scissors, and whack off the top (bottom?) of that plastic. Remove the head of lettuce.

Save the wrapper!! If it’s dirty (on the inside), give it a rinse and a rub to get the dirt off, then let it drain. Then, line it with a paper towel.

Cut open the lettuce wrapper

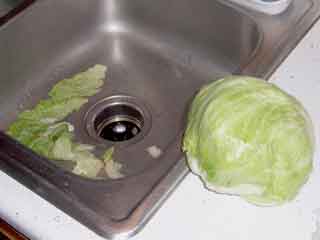
Now give that lettuce a good long rinse under cold running water. Maybe even gently rub your hands around the outer surface and let any loosely wrapped leaves just fall off. When your head is pristine, set it, core side down, in the sink or on the counter, to drain for five minutes or so.

Wash your head

While the head drains, seek out ‘the sturdy spot’ near your sink, or along your countertop. You want the place that is supported by an upright 2x4.

Got it?

OK. Pick up the lettuce, and smash it, core side down, onto that sturdy point.

Smash your head

Voila. The core has popped loose. Give it a twist, and yank it out.

Yank your core

Place your head (lettuce, that is) into the paper towel lined plastic wrapper and toss it in the fridge. You’re done!

Wrap your head

Cookin' again!

No, you haven't been abandoned! But between winter, some traveling, and eating a lot of our old favorites (which are already posted!), February managed to evaporate. Hopefully, the rate of new postings will increase with the approach of Spring!

Monday, February 07, 2005

Recipe: Maryland Fried Chicken

This is one of those marvelous dishes that you can't tell your cardiologist about. But if you only serve it once in a while, you'll probably outlive your cardiologist anyway! So cook it up and enjoy.

Because you need to let the chicken 'rest' for an hour after coating it, you'll need to plan this meal in advance. All told, from taking the chicken out of the package to serving the meal you'll need something over 3 hours. Most of that time will be spent hanging around, conversing with friends, setting the table, petting the cat and so on. But don't expect to whip this one onto the table for unexpected guests. And the number of people you can serve depends on the size of your skillet(s) and/or the number of burners on your stove and/or doing two 'batches' part way and then finishing up all at once.

here's what you'll need . . .
1 or 2 chicken leg and thigh pieces per person (if your guests include a couple of 'hearty eaters', figure on one extra for every two 'hearty eaters.')
seasoned flour (about 2 - 3 Tbsp. per chicken piece; the 'seasoned' part is explained below)
ground black pepper (from that red and white can – use the Tellicherry at the table)
salt
milk (at least 2 cups, depending on how many you're trying to serve)
bacon grease (I know, it's not PC, but if you like to cook, you keep a can of drippings hidden in the back of the refrigerator somewhere. For each 12" skillet - which can handle a maximum of 4 pieces of chicken - you'll need at least 3 heaping Tbsp. of bacon grease. If you must, you can dilute the bacon drippings with olive oil; but the bacon flavor is a critical part of the taste of the final product - don't skimp.)
sliced mushrooms, about ½ lb per two servings (if you're going to serve a crowd, the idea is to have the gravy 'thick with mushrooms'. You'll have to figure out for yourself just how many that means.)
normal gravy accoutrements, namely potato water, vegetable water, white wine, Gravy Master, the unused flour and milk from coating the chicken, and, of course, etc.

Maryland Fried Chicken ingredients

Here's how you do it.

Get the chicken out, wash it, trim off all the 43 pounds of excess fat the store carefully packaged with your purchase, pat the chicken dry and set it aside.

Prepare the seasoned flour. As in some other recipes in this collection, don't let anyone see you do this or they'll never eat the finished product. For each chicken piece, toss about 2 or 3 Tbsp. of flour on a piece of waxed paper (you really do need to use waxed paper for this - paper bags, plastic wrap, or any old flat surface just won’t do). Spread the final amount of flour out into a thin layer (about 1/8 to ¼" deep).

Seasoned Flour

Take your refill-can of ground black pepper and make the entire top surface of the flour black - not just "oh, there's some pepper on it" - BLACK.

Seasoned Flour black

Then take your refill-box of table salt and make the black surface white - not just "oh there's some salt on it" - WHITE.

Seasoned Flour white

Then take a fork and mix it all up. At this point, you can allow observers back into the kitchen if necessary; once it's all mixed up, nobody will be able to tell how much salt and pepper you put in.

Seasoned Flour mixed

Pour the milk into a shallow bowl (or two, depending on how many chicken pieces you're going to do.) Toss the chicken pieces in to soak. If you've got four pieces and one small bowl, put the chicken in two pieces at a time. Count to at least 60 to measure the minimum soaking time. Longer is OK, but less than a minute is really a ‘dip’ rather than a ‘soak’ and Maryland Fried requires a soak. I usually give it 10 minutes or so while I’m making the seasoned flour.

Lift a chicken piece up carefully by the tip of the leg and let the excess milk drain off. Toss the piece, top or skin side down, onto your seasoned flour and use the edges of the waxed paper to toss seasoned flour all over it. Turn the chicken piece over and again use the waxed paper to toss flour all over it. Use the waxed paper to pat even more flour onto all sides of the chicken until it is thoroughly and thickly coated with flour. Remove the chicken piece to a plate, and repeat the process with the remaining pieces of chicken. Use as many plates as you need so that the chicken pieces do not touch each other.

Maryland Fried Chicken coated

Save the remaining milk in a cup (or two) in the refrigerator; save the remaining flour in a dish until gravy time; let the chicken stand at room temperature for 1 hour.

In the meantime, peel (or don't, as you see fit) potatoes for mashing; prepare green beans & tomatoes (or other vegetables as you see fit); make the coffee; set the table; get out the gravy boat and serving dishes; and slice up all the mushrooms.

About 10 minutes before the hour is up, warm your skillet(s) over medium to medium-high heat. When they are beginning to get warm, scoop out the bacon grease into your skillet(s).

bacon fat

When it has melted and is hot enough (sprinkle a tiny pinch of flour onto the grease - if it sizzles and cooks vigorously, it's hot enough), carefully arrange 3 or 4 chicken pieces, skin (or top) side down into the pan. Don't crowd the pan!

Maryland Fried Chicken frying

Fry the chicken for about 12 - 18 minutes (depending on stove, amount of chicken, phase of the moon, or whatever) until the down side is a rich dark golden brown. (Adjust the heat up or down as necessary; dark is important; burned black is to be avoided.) Then turn the chicken over and do the same to the other side.

Maryland Fried Chicken turned

Meanwhile, preheat the oven to 400° F.

When the chicken is thoroughly browned on all sides, remove each piece with a pair of tongs, letting most of any clinging bacon grease drain back into the skillet, and deposit the chicken in the bottom of a baking dish (one for which you still have a cover!) We find that a two-quart Corning Ware dish can handle up to four pieces of chicken (yes, you can stack them, but no more than two layers!). Or, if you’re lucky enough to have an Eric among your friends, who gifts you with incredible cookware like this, feel free to use it . . . (Just drain off all the bacon fat before putting in the oven.)

When all the chicken has been transferred to baking dishes, cover them and put them in the oven. Close the oven door and immediately turn the temperature down to 375° F. Do something else (like cooking potatoes and vegetables) for 35 minutes.

After 35 minutes in the oven, the chicken is done and it's time to start making gravy. Carefully tong the chicken out of the baking dish(es), letting any juices drain back into the baking dish(es), and put the chicken on a plate. Turn the oven to off and put the chicken plate(s) back into the oven to keep warm.

Maryland Fried Chicken cooked

Use the leftover flour to make a roux in the baking dish(es). Just stir the flour, a little at a time, into the pan juices until you get a nice clump of goop. Keep the dish over medium heat and continue to stir the goop around. (If you use the Corning Ware and have an electric stove, remember to put the little wire grid on the burner before putting the baking dish on the burner, or you'll ruin the meal and have a hell of a time picking up all the little bits of exploded baking dish from the kitchen floor!).

When the roux starts to take on some color, add the potato water and the vegetable water and bring the incipient gravy to a boil.

Maryland Fried Chicken gravy start

As soon as it boils, add the mushrooms and return to a boil. Cook for a bit until the mushrooms start to show signs of coloring.

Maryland Fried Chicken gravy mushrooms

Now add the leftover milk, and stirring constantly, return to a gentle rolling boil. Add a drop or two (OK, a good sluice!) of Gravy Master (stirring) until the color of the gravy is pleasing to your eye, and let the whole mess simmer vigorously until it thickens or until everything else is ready to serve and you're not willing to wait any longer. (A thinnish gravy works quite well with this meal, so fear not...)

Maryland Fried Chicken gravy done

Toss, serve, fling, and/or pour everything into its appropriate table container and PIG OUT.

Maryland Fried Chicken served

Monday, January 31, 2005

Recipe: Cajun Asian Chicken stir-fry

This is an oft-requested, semi-weird variation on a basic chicken stir-fry, using our old favorite Louisiana Hot Sauce as a major ingredient. (Yes, that’s the same brand-name stuff you’ll remember from other postings.) Since you can stir-fry anything, creating any kind of flavor you wish, this is just a starting point. And, truth is, I don’t think I’ve ever done this exactly the same way twice. So have fun! Add, subtract, alter, adjust, and then eat very, very well . . .

here's what you'll need . . .
boneless skinless chicken breast, about 1 per person (2 big ones will serve three people, 3 big ones for four or five people . . . )
‘cheap’ peanut oil to cook with
sesame oil
soy sauce
Worcestershire sauce
Maggi seasoning sauce
fish sauce (Tiparos is great)
black bean paste (if you’ve got any)
Louisiana Hot Sauce
½ of a fresh lemon and/or lime
white wine
fresh coarse ground black pepper (Tellicherry, of course)
1 or 2 peeled garlic cloves
cornstarch
veggies et. al. (any combination of at least 5; 10 is even better).
We like carrots, yellow onions or green onions or vidalia onions or even red Spanish onions, red bell peppers, green bell peppers, yellow bell peppers, hot peppers of any ilk, snow peas, sweet peas, green beans, wax beans, zucchini, summer squash, broccoli, cauliflower, black olives, ordinary tomatoes, cherry tomatoes, sun dried tomatoes, plum tomatoes, water chestnuts, bamboo shoots, bean sprouts, ordinary mushrooms, shitake mushrooms, straw mushrooms, bok choy, cabbage, lettuce, previously cooked potatoes, and/or anything else you have hanging around that you’d like to get rid of . . . !

Here's how you do it.

The first secret of a successful stir-fry lies in the contrast and combination of the various ingredients in terms of color, flavor and texture. The meat or fish part of the meal is but an accent; artistry lives in the rest of the choices. I’m not sure where I heard it, but somebody once said a classic Chinese stir fry had to include at least 5 colors. Certainly sounds like a good idea to me . . .

The second secret is to chop, slice, and dice all the ingredients so they are bite sized. I’ve been told that in Chinese households, it is considered a great insult to serve food that cannot be picked up with chopsticks and eaten without any further cutting.

But there’s a practical side to the size of the whacked up tidbits too; cooking time can be controlled.

I happen to be a proponent of the ‘layered flavors’ approach to cooking most everything. I like to add one ingredient, then ‘layer on’ the flavor of the next and so on. But if circumstance (or just plain curiosity) requires, you can toss everything in at once – as long as you’ve sized your bits appropriately. Cut them up so the longer cooking items are the smaller pieces and the quicker cooking items are the larger pieces, and everything will finish in the same amount of time.

To prepare this meal my way, you need to have all the veggies cut up and distributed on a variety of plates (by cooking time) before you start. The chicken needs to sit in its marinade for at least 20 minutes (up to an hour or so is even better) before you cook it. And rice takes 30 minutes (after the water boils) to achieve perfection. If you’re cooking for two and you’re Zorro’s cousin with a blade, you can start the rice, cut the chicken, get the marinade built, cut all the veggies and be ready to cook before the rice is done. If you’re cooking for a crowd or you’re a little hesitant about whirling Chinese knife blades, take the slow road; do the marinade first, then chop the veggies, then start the rice.

Stir Fry ingredients

The marinade is very simple. Whack up the chicken and distribute it, one layer deep only, on as many plates as required.

Stir Fry chicken

Pour a Tbsp. or so (per chicken breast or two) of sesame oil on the chicken and massage it in so that all sides of every piece get well coated (your hands are going to stay messy throughout this procedure, so remember to uncap all the bottles before you start!) You’ll have to adjust the quantity of oil so that all the chicken gets a coating without leaving (much of) a puddle in the bottom of the plate.

Then sluice the coated chicken with the soy. Once again, massage it in. Then spritz the chicken with the Worcestershire suace and massage it in. If you’re going to add some citrus, squirt it on now and stir everything around. Same with the black bean paste – now’s the time. I like about ½ a lemon or lime and about ½ tsp. of bean paste.

Next, douse the plate with Louisiana Hot Sauce. For the first blast, coat the entire top surface of the chicken until it’s red. Massage it in. Then put another coat of hot sauce on, and just leave it sitting on the surface. Finally, grind some fresh black pepper on top and let the chicken stand - up to an hour at room temperature. If you want to prepare the chicken and marinade far in advance, let the chicken sit in the marinade for 30 minutes at room temperature, then refrigerate. Take it out and let it warm up to room temperature when you start the rice (about 30 minutes before cooking time).

Stir Fry marinade

For this meal, it’s generally better to cook the veggies first, then the chicken. The chicken marinade tends to burn and over-flavor the veggies if you do the chicken first. Depending on the quantity, it takes 5-15 minutes to cook the veggies; about the same for the chicken; and another 3 - 5 minutes to complete and thicken up the sauce.

Before you start wokking things, uncork the white wine (you’ll need it for the final sauce) and stir 1 tsp. of cornstarch into 3 or 4 ounces of cold water.

Now if you’re really paying attention, you may be wondering, “But what about that Maggi stuff and the Tiparos?” Good catch. Now why an Italian product, Maggi sauce, has become a staple in Asian cooking is beyond my ken. But it has. And the flavor is wonderful. But it is salty, just like the Tiparos is salty. So adding even more salt to the already salty (soy sauce) marinade doesn’t seem like the best idea.

Instead, I like to put about ½ tsp. of the Maggi sauce in the rice water. And I like to squirt the Tiparos all over the tomatoes on the veggies plate. And as long as we’re spritzing things, how about a blast of sesame oil on top of the mushrooms! There. Now we’re ready . . .

Here’s our routine. About 15 minutes into the rice cook time, put the wok over high heat. Count to 37.5 and pour 1-2 Tbsp. cheap peanut oil into the bottom of the wok and swirl it around. Toss in one peeled garlic clove and wok it around with your cooking spatula for about 60 seconds and then remove it (if it starts to burn, take it out sooner - all you want to do is flavor the oil.) Start tossing in veggies. If you use carrots, begin with them. Wok them around till they’re half done, and toss in the next veggies.

Stir Fry veggies

My usual sequence is carrots, onions, peppers, mushrooms, broccoli, water chestnuts, squash & zucchini, bean sprouts, tomatoes & black olives (I think I’ve got 5 colors in there . . .) When the veggies are done, scoop them out to a serving bowl and keep warm in a 150 - 200° F oven.

Stir Fry wok veggies

Replenish the cheap peanut oil in the wok; toss in another garlic clove and do the same thing to it that you did to the last one. As soon as you get the garlic clove out, start putting chicken in the hot oil (yes, your hands will get messy again!) Stir the chicken around as you slide each load in, and try to get it all into the wok within about 30-60 seconds (if you have three hands, the whole process works more smoothly; if you have only two hands, don’t worry about it, just do the best you can.)

Stir Fry chciken

Wok the chicken around until it’s done. We like our chicken pretty well done, so we keep wokking it until it begins to get ‘grainy’ (when you can see striations like wood grain on the surface of the cubes).

Stir Fry wok chicken

When the chicken is nearly done, scrape the rest of the marinade liquid into the wok, pour in a good sploosh of the white wine, wok it around for 30 seconds or so until you can smell the white wine and then start adding the cornstarch/water mixture.

Stir Fry wok sauce

Start small! 1 or 2 tsp. at a time. The idea is to get a nice shiny glaze to the chicken and the sauce, not to turn the sauce into dumplings. Wok the sauce around for at least 30 seconds between each addition of the cornstarch/water mixture, to see how thick it’s going to get. (If it starts getting too thick, thin it down with some more white wine or plain water or even more Hot Sauce.) When the sauce reaches your preferred thickness, turn the heat under the wok off; serve the rice; stir the sauce once more; scoop it all out into another serving bowl; get everything to the table as fast as you can. And eat. Very, very well.

 Asian Cajun stir fry served