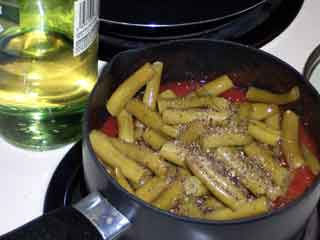
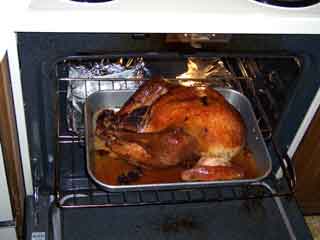
Monday, February 07, 2005

Recipe: Maryland Fried Chicken

This is one of those marvelous dishes that you can't tell your cardiologist about. But if you only serve it once in a while, you'll probably outlive your cardiologist anyway! So cook it up and enjoy.

Because you need to let the chicken 'rest' for an hour after coating it, you'll need to plan this meal in advance. All told, from taking the chicken out of the package to serving the meal you'll need something over 3 hours. Most of that time will be spent hanging around, conversing with friends, setting the table, petting the cat and so on. But don't expect to whip this one onto the table for unexpected guests. And the number of people you can serve depends on the size of your skillet(s) and/or the number of burners on your stove and/or doing two 'batches' part way and then finishing up all at once.

here's what you'll need . . .
1 or 2 chicken leg and thigh pieces per person (if your guests include a couple of 'hearty eaters', figure on one extra for every two 'hearty eaters.')
seasoned flour (about 2 - 3 Tbsp. per chicken piece; the 'seasoned' part is explained below)
ground black pepper (from that red and white can – use the Tellicherry at the table)
salt
milk (at least 2 cups, depending on how many you're trying to serve)
bacon grease (I know, it's not PC, but if you like to cook, you keep a can of drippings hidden in the back of the refrigerator somewhere. For each 12" skillet - which can handle a maximum of 4 pieces of chicken - you'll need at least 3 heaping Tbsp. of bacon grease. If you must, you can dilute the bacon drippings with olive oil; but the bacon flavor is a critical part of the taste of the final product - don't skimp.)
sliced mushrooms, about ½ lb per two servings (if you're going to serve a crowd, the idea is to have the gravy 'thick with mushrooms'. You'll have to figure out for yourself just how many that means.)
normal gravy accoutrements, namely potato water, vegetable water, white wine, Gravy Master, the unused flour and milk from coating the chicken, and, of course, etc.

Maryland Fried Chicken ingredients

Here's how you do it.

Get the chicken out, wash it, trim off all the 43 pounds of excess fat the store carefully packaged with your purchase, pat the chicken dry and set it aside.

Prepare the seasoned flour. As in some other recipes in this collection, don't let anyone see you do this or they'll never eat the finished product. For each chicken piece, toss about 2 or 3 Tbsp. of flour on a piece of waxed paper (you really do need to use waxed paper for this - paper bags, plastic wrap, or any old flat surface just won’t do). Spread the final amount of flour out into a thin layer (about 1/8 to ¼" deep).

Seasoned Flour

Take your refill-can of ground black pepper and make the entire top surface of the flour black - not just "oh, there's some pepper on it" - BLACK.

Seasoned Flour black

Then take your refill-box of table salt and make the black surface white - not just "oh there's some salt on it" - WHITE.

Seasoned Flour white

Then take a fork and mix it all up. At this point, you can allow observers back into the kitchen if necessary; once it's all mixed up, nobody will be able to tell how much salt and pepper you put in.

Seasoned Flour mixed

Pour the milk into a shallow bowl (or two, depending on how many chicken pieces you're going to do.) Toss the chicken pieces in to soak. If you've got four pieces and one small bowl, put the chicken in two pieces at a time. Count to at least 60 to measure the minimum soaking time. Longer is OK, but less than a minute is really a ‘dip’ rather than a ‘soak’ and Maryland Fried requires a soak. I usually give it 10 minutes or so while I’m making the seasoned flour.

Lift a chicken piece up carefully by the tip of the leg and let the excess milk drain off. Toss the piece, top or skin side down, onto your seasoned flour and use the edges of the waxed paper to toss seasoned flour all over it. Turn the chicken piece over and again use the waxed paper to toss flour all over it. Use the waxed paper to pat even more flour onto all sides of the chicken until it is thoroughly and thickly coated with flour. Remove the chicken piece to a plate, and repeat the process with the remaining pieces of chicken. Use as many plates as you need so that the chicken pieces do not touch each other.

Maryland Fried Chicken coated

Save the remaining milk in a cup (or two) in the refrigerator; save the remaining flour in a dish until gravy time; let the chicken stand at room temperature for 1 hour.

In the meantime, peel (or don't, as you see fit) potatoes for mashing; prepare green beans & tomatoes (or other vegetables as you see fit); make the coffee; set the table; get out the gravy boat and serving dishes; and slice up all the mushrooms.

About 10 minutes before the hour is up, warm your skillet(s) over medium to medium-high heat. When they are beginning to get warm, scoop out the bacon grease into your skillet(s).
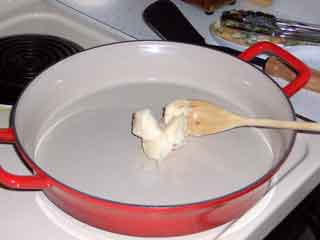
bacon fat

When it has melted and is hot enough (sprinkle a tiny pinch of flour onto the grease - if it sizzles and cooks vigorously, it's hot enough), carefully arrange 3 or 4 chicken pieces, skin (or top) side down into the pan. Don't crowd the pan!

Maryland Fried Chicken frying

Fry the chicken for about 12 - 18 minutes (depending on stove, amount of chicken, phase of the moon, or whatever) until the down side is a rich dark golden brown. (Adjust the heat up or down as necessary; dark is important; burned black is to be avoided.) Then turn the chicken over and do the same to the other side.
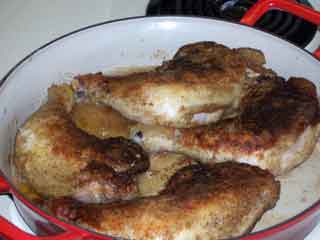
Maryland Fried Chicken turned

Meanwhile, preheat the oven to 400° F.

When the chicken is thoroughly browned on all sides, remove each piece with a pair of tongs, letting most of any clinging bacon grease drain back into the skillet, and deposit the chicken in the bottom of a baking dish (one for which you still have a cover!) We find that a two-quart Corning Ware dish can handle up to four pieces of chicken (yes, you can stack them, but no more than two layers!). Or, if you’re lucky enough to have an Eric among your friends, who gifts you with incredible cookware like this, feel free to use it . . . (Just drain off all the bacon fat before putting in the oven.)

When all the chicken has been transferred to baking dishes, cover them and put them in the oven. Close the oven door and immediately turn the temperature down to 375° F. Do something else (like cooking potatoes and vegetables) for 35 minutes.

After 35 minutes in the oven, the chicken is done and it's time to start making gravy. Carefully tong the chicken out of the baking dish(es), letting any juices drain back into the baking dish(es), and put the chicken on a plate. Turn the oven to off and put the chicken plate(s) back into the oven to keep warm.

Maryland Fried Chicken cooked

Use the leftover flour to make a roux in the baking dish(es). Just stir the flour, a little at a time, into the pan juices until you get a nice clump of goop. Keep the dish over medium heat and continue to stir the goop around. (If you use the Corning Ware and have an electric stove, remember to put the little wire grid on the burner before putting the baking dish on the burner, or you'll ruin the meal and have a hell of a time picking up all the little bits of exploded baking dish from the kitchen floor!).

When the roux starts to take on some color, add the potato water and the vegetable water and bring the incipient gravy to a boil.

Maryland Fried Chicken gravy start

As soon as it boils, add the mushrooms and return to a boil. Cook for a bit until the mushrooms start to show signs of coloring.

Maryland Fried Chicken gravy mushrooms

Now add the leftover milk, and stirring constantly, return to a gentle rolling boil. Add a drop or two (OK, a good sluice!) of Gravy Master (stirring) until the color of the gravy is pleasing to your eye, and let the whole mess simmer vigorously until it thickens or until everything else is ready to serve and you're not willing to wait any longer. (A thinnish gravy works quite well with this meal, so fear not...)

Maryland Fried Chicken gravy done

Toss, serve, fling, and/or pour everything into its appropriate table container and PIG OUT.
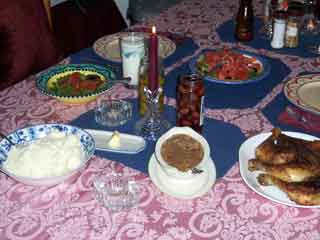
Maryland Fried Chicken served

Monday, January 31, 2005

Recipe: Cajun Asian Chicken stir-fry

This is an oft-requested, semi-weird variation on a basic chicken stir-fry, using our old favorite Louisiana Hot Sauce as a major ingredient. (Yes, that’s the same brand-name stuff you’ll remember from other postings.) Since you can stir-fry anything, creating any kind of flavor you wish, this is just a starting point. And, truth is, I don’t think I’ve ever done this exactly the same way twice. So have fun! Add, subtract, alter, adjust, and then eat very, very well . . .

here's what you'll need . . .
boneless skinless chicken breast, about 1 per person (2 big ones will serve three people, 3 big ones for four or five people . . . )
‘cheap’ peanut oil to cook with
sesame oil
soy sauce
Worcestershire sauce
Maggi seasoning sauce
fish sauce (Tiparos is great)
black bean paste (if you’ve got any)
Louisiana Hot Sauce
½ of a fresh lemon and/or lime
white wine
fresh coarse ground black pepper (Tellicherry, of course)
1 or 2 peeled garlic cloves
cornstarch
veggies et. al. (any combination of at least 5; 10 is even better).
We like carrots, yellow onions or green onions or vidalia onions or even red Spanish onions, red bell peppers, green bell peppers, yellow bell peppers, hot peppers of any ilk, snow peas, sweet peas, green beans, wax beans, zucchini, summer squash, broccoli, cauliflower, black olives, ordinary tomatoes, cherry tomatoes, sun dried tomatoes, plum tomatoes, water chestnuts, bamboo shoots, bean sprouts, ordinary mushrooms, shitake mushrooms, straw mushrooms, bok choy, cabbage, lettuce, previously cooked potatoes, and/or anything else you have hanging around that you’d like to get rid of . . . !

Here's how you do it.

The first secret of a successful stir-fry lies in the contrast and combination of the various ingredients in terms of color, flavor and texture. The meat or fish part of the meal is but an accent; artistry lives in the rest of the choices. I’m not sure where I heard it, but somebody once said a classic Chinese stir fry had to include at least 5 colors. Certainly sounds like a good idea to me . . .

The second secret is to chop, slice, and dice all the ingredients so they are bite sized. I’ve been told that in Chinese households, it is considered a great insult to serve food that cannot be picked up with chopsticks and eaten without any further cutting.

But there’s a practical side to the size of the whacked up tidbits too; cooking time can be controlled.

I happen to be a proponent of the ‘layered flavors’ approach to cooking most everything. I like to add one ingredient, then ‘layer on’ the flavor of the next and so on. But if circumstance (or just plain curiosity) requires, you can toss everything in at once – as long as you’ve sized your bits appropriately. Cut them up so the longer cooking items are the smaller pieces and the quicker cooking items are the larger pieces, and everything will finish in the same amount of time.

To prepare this meal my way, you need to have all the veggies cut up and distributed on a variety of plates (by cooking time) before you start. The chicken needs to sit in its marinade for at least 20 minutes (up to an hour or so is even better) before you cook it. And rice takes 30 minutes (after the water boils) to achieve perfection. If you’re cooking for two and you’re Zorro’s cousin with a blade, you can start the rice, cut the chicken, get the marinade built, cut all the veggies and be ready to cook before the rice is done. If you’re cooking for a crowd or you’re a little hesitant about whirling Chinese knife blades, take the slow road; do the marinade first, then chop the veggies, then start the rice.

Stir Fry ingredients

The marinade is very simple. Whack up the chicken and distribute it, one layer deep only, on as many plates as required.

Stir Fry chicken

Pour a Tbsp. or so (per chicken breast or two) of sesame oil on the chicken and massage it in so that all sides of every piece get well coated (your hands are going to stay messy throughout this procedure, so remember to uncap all the bottles before you start!) You’ll have to adjust the quantity of oil so that all the chicken gets a coating without leaving (much of) a puddle in the bottom of the plate.

Then sluice the coated chicken with the soy. Once again, massage it in. Then spritz the chicken with the Worcestershire suace and massage it in. If you’re going to add some citrus, squirt it on now and stir everything around. Same with the black bean paste – now’s the time. I like about ½ a lemon or lime and about ½ tsp. of bean paste.

Next, douse the plate with Louisiana Hot Sauce. For the first blast, coat the entire top surface of the chicken until it’s red. Massage it in. Then put another coat of hot sauce on, and just leave it sitting on the surface. Finally, grind some fresh black pepper on top and let the chicken stand - up to an hour at room temperature. If you want to prepare the chicken and marinade far in advance, let the chicken sit in the marinade for 30 minutes at room temperature, then refrigerate. Take it out and let it warm up to room temperature when you start the rice (about 30 minutes before cooking time).

Stir Fry marinade

For this meal, it’s generally better to cook the veggies first, then the chicken. The chicken marinade tends to burn and over-flavor the veggies if you do the chicken first. Depending on the quantity, it takes 5-15 minutes to cook the veggies; about the same for the chicken; and another 3 - 5 minutes to complete and thicken up the sauce.

Before you start wokking things, uncork the white wine (you’ll need it for the final sauce) and stir 1 tsp. of cornstarch into 3 or 4 ounces of cold water.

Now if you’re really paying attention, you may be wondering, “But what about that Maggi stuff and the Tiparos?” Good catch. Now why an Italian product, Maggi sauce, has become a staple in Asian cooking is beyond my ken. But it has. And the flavor is wonderful. But it is salty, just like the Tiparos is salty. So adding even more salt to the already salty (soy sauce) marinade doesn’t seem like the best idea.

Instead, I like to put about ½ tsp. of the Maggi sauce in the rice water. And I like to squirt the Tiparos all over the tomatoes on the veggies plate. And as long as we’re spritzing things, how about a blast of sesame oil on top of the mushrooms! There. Now we’re ready . . .

Here’s our routine. About 15 minutes into the rice cook time, put the wok over high heat. Count to 37.5 and pour 1-2 Tbsp. cheap peanut oil into the bottom of the wok and swirl it around. Toss in one peeled garlic clove and wok it around with your cooking spatula for about 60 seconds and then remove it (if it starts to burn, take it out sooner - all you want to do is flavor the oil.) Start tossing in veggies. If you use carrots, begin with them. Wok them around till they’re half done, and toss in the next veggies.

Stir Fry veggies

My usual sequence is carrots, onions, peppers, mushrooms, broccoli, water chestnuts, squash & zucchini, bean sprouts, tomatoes & black olives (I think I’ve got 5 colors in there . . .) When the veggies are done, scoop them out to a serving bowl and keep warm in a 150 - 200° F oven.

Stir Fry wok veggies

Replenish the cheap peanut oil in the wok; toss in another garlic clove and do the same thing to it that you did to the last one. As soon as you get the garlic clove out, start putting chicken in the hot oil (yes, your hands will get messy again!) Stir the chicken around as you slide each load in, and try to get it all into the wok within about 30-60 seconds (if you have three hands, the whole process works more smoothly; if you have only two hands, don’t worry about it, just do the best you can.)

Stir Fry chciken

Wok the chicken around until it’s done. We like our chicken pretty well done, so we keep wokking it until it begins to get ‘grainy’ (when you can see striations like wood grain on the surface of the cubes).

Stir Fry wok chicken

When the chicken is nearly done, scrape the rest of the marinade liquid into the wok, pour in a good sploosh of the white wine, wok it around for 30 seconds or so until you can smell the white wine and then start adding the cornstarch/water mixture.

Stir Fry wok sauce

Start small! 1 or 2 tsp. at a time. The idea is to get a nice shiny glaze to the chicken and the sauce, not to turn the sauce into dumplings. Wok the sauce around for at least 30 seconds between each addition of the cornstarch/water mixture, to see how thick it’s going to get. (If it starts getting too thick, thin it down with some more white wine or plain water or even more Hot Sauce.) When the sauce reaches your preferred thickness, turn the heat under the wok off; serve the rice; stir the sauce once more; scoop it all out into another serving bowl; get everything to the table as fast as you can. And eat. Very, very well.

 Asian Cajun stir fry served

Wednesday, January 12, 2005

Recipe: Chicken Cacciatore

An Italian classic, Chicken Cacciatore is great for weekends when you can devote the time to cooking it slowly and gently. But if the urge strikes for a Tuesday, what the heck, crank up the temperature and eat in about 90 minutes.

As you may note if you continue reading this site, we always have a good supply of Italian gravy in the refrigerator, but this is a dish that needs to create its own sauce. We've tried a couple of times to make it with the gravy ("It'll be quicker that way!"), but you end up with a tasty 'chicken legs in tomato sauce' dish, not with cacciatore. To make dinner for two . . .

here's what you'll need . . .
2 or 3 chicken leg and thigh pieces (often called leg quarters)
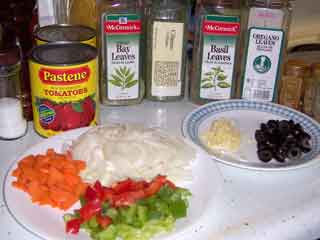
2 28 oz. (or 3 16 oz.) cans tomatoes (the Italian plum type works best, and Pastene are the best of the best!)
1 carrot (thinly sliced)
1 stalk celery (if Cathy isn't looking) chopped (1/8” pieces)
1 medium onion, thinly sliced
fresh mushrooms (anywhere from 8 to a pound, depending on taste)
8 - 16 ripe olives, thickly sliced (about 3 slices per olive)
1/3 cup each diced red and green peppers
1 or 2 (or 12 . . .) garlic cloves, minced
1 or 2 Tsp. dried oregano (if you have fresh, chop it coarsely and use 2 tsp.)
½ tsp. basil
(optional pinch thyme)
(optional pinch rosemary)
(optional 1/8 tsp. marjoram)
1/8 tsp. ground cayenne
1 or 2 bay leaves
freshly ground (big chunks) black pepper (Tellicherry, of course)
pinch of coarse (kosher) salt
white wine
olive oil
maybe some dried cilantro to garnish (fresh, if you’ve got it!)

Chicken cacciatore ingredients
(Okay, okay, so I hadn't sliced the mushrooms yet . . .)

Here's how you do it.

Wash the chicken legs and rip off all the excess fat. Heat a large skillet over high heat. (If you cram them in, you may be able to get 3 or even 4 leg quarters into a 12" pan; if you need to cook more than that, you'll need two skillets.)

When the pan is hot, pour in 1 Tbsp. per leg of olive oil, swirl, and toss in the legs, skin side down. Now slap a spatter shield over that sucker. Swirl, jiggle and otherwise agitate the pan until things calm down a bit. Turn the heat down to medium, or maybe even lower, and cook the chicken until the skin turns a rich golden brown (about 10 minutes?). Turn the chicken over and give it another 5 - 7 minutes. (If the pan smokes, turn down the heat! You want to crisp up the outside of the chicken to seal in the juices if you can, but not to let any of it burn or blacken.)

Chicken cacciatore splatter shield

When you declare the chicken ‘browned,’ do what you can to rearrange the legs so the center area (or some area) of the skillet is open - you'll need the room for all the veggies that are about to come.

Next, toss in the carrots. Swirl, shake, toss and etc. until the carrots begin to turn that lighter, almost translucent color. Then toss in the onions. When they start to turn translucent and pick up some of the carrot color, toss in the celery. Stir, swirl, shake, etc. until the celery just begins to soften, then add the peppers and mushrooms. Again, swirl, stir, toss etc. until the mushrooms begin to darken. The idea is to get all these items started cooking, so you'll need to keep everything moving during this period. You don't want anything to "cook" thoroughly at this point.

Chicken cacciatore veggied

As soon as the mushrooms show some color, toss in the garlic. As soon as you can smell the garlic aroma, toss in the olives. Count to about 30 (keeping everything moving as best you can) and pour in a good slug of white wine. The spitting should calm down quickly and the wine should start to bubble and froth.

Now add the tomatoes. And, yes, if you can get them in your area, use Pastene http://www.pastene.com . They are by far the best tasting, most consistently wonderful canned tomatoes available. In fact, check out all their products; I’ve yet to be disappointed in anything I’ve tried. Use the edge of your spatula to chop and dice and slice the tomatoes into chunks and pieces, and mix them up with all the other veggies in the pan.

Pastene tomatoes

Now, add all the herbs and spices (except the bay leaves) and mix everything up. Or don’t.

Chicken cacciatore sauce start

I keep going back and forth with this dish. If you want, try adding just the Tellicherry and the bay leaves. The salt is optional, too. Usually, canned tomatoes bring plenty of salt to any dish. But the Pastene seem pretty restrained, and this is a dish that wants a touch of an edge, so generally, I add a little salt. And sometimes, I put the whole spice rack in. Try it. All ways. It’s good no matter what . . .

OK. Whatever the state of your spicedness, rearrange the pan so the sauce-in-a-state-of-becoming mixture surrounds the chicken. Adjust the heat to a gentle simmer (if you were on medium, go to low or even less until everything settles down - you can always crank it up a bit later if you need to get it bubbling again.)

Chicken cacciatore simmers

When you've got a gentle simmer going, spoon the sauce over, atop, and around everything, stick the bay leaves in, and go relax. Every 15 - 20 minutes, spoon fresh sauce over everything and generally stir things up.

Chicken cacciatore cookin’

Continue to simmer the dish until "done," which could mean anywhere from 45 minutes to 2 hours from this point. The chicken should be nearly falling off the bone when done. Serve over wide egg noodles with a salad and some bread (and a ton of freshly grated Parmesan cheese, of course).

Tuesday, January 04, 2005

Recipe: Paprika fried potatoes

Hi again and welcome to 2005. Here's one that was referenced last year, but didn't make it in . . .

These were first created to accompany grilled salmon (back when we thought farm raised salmon was safe to eat!) Now, however, they find their way into many meals, with or without ‘extras,’ cubed small or cut into large chunks as in this version. They are utterly simple and simply delicious.

here's what you'll need . . .
1 potato per person
coarse (Kosher) salt
freshly ground Tellicherry
your favorite paprika(s) (I like to use a mixture of Hungarian half-sharp and ordinary supermarket which tends to be a sweetish paprika)
olive oil
extras – onions, sliced mushrooms, red or green bell peppers, . . .

Here’s how you do it.

Peel the potatoes, if you must. Cathy prefers peeled; I prefer skin on: so we compromise. I peel the potatoes (most of the time). Put a skillet on to heat up. Pick a ‘bite size,’ anything from ½ a potato to a ½” cube, and cut your potatoes. Put 2 – 3 Tbsps. olive oil into the hot pan, swirl to fragrance, and toss in the potatoes.

Potatoes in the pan

As with most things skillet, on my stove the pan gets heated with the dial set at about 4 o’clock; when the food goes in the temperature gets turned down to about 8 o’clock. And that’s the way we do the potatoes. It takes about 20 – 30 minutes to cook a skillet-full to tenderness, and to allow the flavors to develop.

When the potatoes first go in, roll them around to make sure every surface gets coating of oil. Then let them sit and sizzle for 5 minutes or so before moving them around again. You don’t want to completely brown one side before turning to the next, but you do want to end up with at least a couple of sides nicely browned when you’re through. So give them a few minutes on each side before you star turning them frequently to ensure that they cook evenly.

If adding ‘extras,’ toss them in after the fist side begins to show some color. Just push the potatoes around the edge, and pile the goodies in the center. Stir them round and turn them over in the center a few times until they start to cook. Then you can mix everything up for the rest of the cooking.

Potatoes in the pan with extras

After those first 5 minutes or so, and usually just before the extras go in, give the potatoes a goodly grinding or 12 of Tellicherry, and a very light sprinkle of the coarse salt. When you get ready to turn the potatoes the next time, add a hefty sprinkle of paprika. Then turn, pepper and paprika the next side. (If you’re a saltaholic, go ahead and add a little more – I prefer to finish the salting at the table, but hey . . .) And then just keep turning and cooking until you declare done!

Potatoes with extras seasoned

If you want, put a layer of paper towel on a plate and turn the finished potatoes out onto that before you put them in a serving bowl. We like the olive oil, so usually just dump them directly into the serving bowl and head for the table!

Potatoes served

Simple and delicious.

Monday, December 27, 2004

It's The Holiday Hiatus

Hope you're all having a Happy and a Merry and a Ho Ho Ho!

See you soon in 2005 . . .

Thursday, December 16, 2004

Recipe: Chicken wrapped Chorizos

The first few times I tried this, I had no idea what to expect, so I didn’t take any pictures. Having decided that it’s a keeper, this time I had to go and do it with Chistorra instead of Chorizos, but hey, it’s all in the family . . .

The Chistorra is a “breakfast sausage” (as it says on the package) that is slightly milder (to my taste), and slightly softer than the Chorizos. But the flavor is clearly similar, and both have worked well in this dish – a kind of ‘pigs in poultry blankets’ idea. We served it with green beans and tomatoes (see posting) and paprika fried potatoes (see posting) and a balsamic veggie vinaigrette.

here's what you'll need . . .
1 bonless skinless chicken breast per serving
1 Chorizos (or relative) per serving
flour
breadcrumbs, plain, lightly toasted
ground cumin
tarragon leaf, dried
coarse (Kosher) salt
fresh ground Tellicherry pepper
olive oil
butcher’s twine, poultry skewers, or toothpicks (sorry, duct tape will not work!)

Chicken Chorizos ingredients

The first step is to cook up your Chorizos, or in this case Chistorras. Get your pan hot, pour in a couple Tbsps. of olive oil, swirl til fragrance, and toss in the sausage. Turn Down The Heat. On my stove, ‘8 o’clock’ is about the right setting. You want to get the outside brown and crispy without turning the sausage into leather on the inside. I cook ‘em for about 10 minutes or so, just enough time to deal with the ‘hard part.’

The only ‘hard’ part of this dish is flattening out the chicken breasts. Well, actually, the hard part is getting an actual boneless, skinless chicken breast from your local supermarket (or at least, my local supermarket, where they generally get most of the skin off but that’s about it. But that’s another rant for another day . . .) So, back to breast beating.

I don’t have one of those neat little round, flat, hockey-puck-like pounders, but if you do, use it! Otherwise, try the flat side of your Chinese knife, the bottom of a heavy skillet, or just your bare hand. Do not use one of those pointy little hammer-like ‘tenderizer’ gizmos – you’ll just end up with chicken sludge.

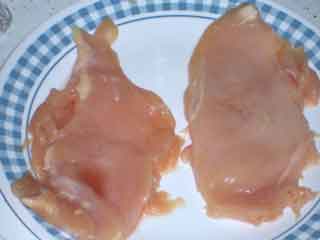
Whatever the weapon of choice, flatten out your chicken breasts a bit. You’re not making paper here, but an even thickness is important so that the chicken will cook evenly. I usually try to get the thick end of the breast down to about the same thickness as the thin end – maybe about ¼” or so? And do work carefully so you can avoid tearing the chicken. I’d rather have my chicken roll not quite all the way around the sausage than have to wrap it three times around to cover the holes I tore while flattening it out!

Chicken breasts beaten flat

By now, the sausage should be done, so pull it out and leave it on a plate to cool down for a while. Save the oil in the pan – you’ll be using that to cook the chicken in a few minutes!

Chorizos, well, Chistorras, cooked

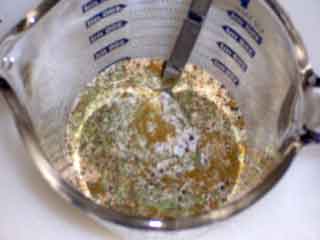
In a small bowl or big measuring cup, or, hey whatever you can find, add about 1 Tbsp. each of flour and of breadcrumbs per serving (chicken breast). Toss in some ground cumin, some hand crushed dried tarragon leaf and some coarse salt. I’d guess about 1/3 to ½ tsp. of cumin, about ½ to 1 tsp. of tarragon, and enough salt so you can see a sprinkle of white on top of the other stuff. Then give 6 or 8 good grinds of Tellicherry over the top.

Chicken chorizos breading

OK. Mix it up thoroughly and dump it out onto a plate or a piece of waxed paper.

Lay one now-cooled sausage, atop one chicken breast, well wait a minute. Let’s see, how to say this. Turn the chicken breasts ‘beauty side’ down. Beauty side? Well, that’s the side you’d have facing up on the plate, staring the diner in the face when you serve your creation – whatever it is. And, by the way, remember to always cook the beauty side first! Especially if you’re grilling or searing something, but even if you’re sautéing, beauty side first makes the best presentation.

So. Roll up a sausage in the middle of a chicken breast. Usually a slight angle works better than straight across or straight down the length. Use your string to tie your little package, or skewer the meeting edges of the chicken together.

Chicken chorizos rolled

Now, crank the heat back up on your stove burner, about 4 o’clock or so – but don’t put the pan on just yet.

Give each of your chicken wrapped chorizos and generous rub of olive oil and then roll them in your breading mixture. Get a good thick coating on them.

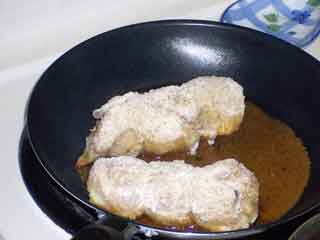
Now put the pan back on the burner. And go give your chickens another roll in the, uh, breading, and then right into the pan. If the timing was ‘right’ they should be sizzling nicely. Keep the heat up for maybe another 30 seconds, no more than 1 minute, and then turn it down – once again, about 8 o’clock on my stove.

Chicken chorizos in the pan

Leave ‘em alone. One of the hardest ‘lessons’ to learn in the kitchen – don’t mess with the food, give it time. After about 4 or 5 minutes, give the pan a gentle, sliding shake, just to make sure that the chicken has ‘released’ from the pan. Food will, you know. With practice, and patience, and yeah, the right temperatures, that slab of whatever sizzling and smoking and burning up on that hot pan will just suddenly, let go. If you’re there to give the pan a shake, it will stay released. Miss the shake and you’ll be needing Brillo (and a Pizza parlor nearby).

So. If the chicken released, give it another 2 or 3 minutes to develop a rich golden brown color and then roll it over. The second side will take another 10 - 15 minutes or so, and after a couple of minutes, turn the heat down a little more (half way to 9 o’clock). After a couple more, roll the chicken this way and that to get the ‘edges’ cooking also.

Chicken chorizos still in the pan

When they’re done, which means they’ve been on the second side at least 8 minutes to make sure the chicken is at least mostly cooked (I prefer the 'overcooked' of 12 - 15 minutes), and they’re a nice brownish color to your liking, turn ‘em out onto plates and serve up a wonderful meal!

Sunday, December 12, 2004

Recipe: Green Beans and Tomatoes

Here’s another in the crusade to make canned veggies a delicious and exciting addition to every meal. This is not George’s Greek Green Beans. That’s another story entirely, and one we’ll tell the next time I make a bucket of those incredible beans (so I can take some photos of the process). But for the rest of the time, this simple combination should show up on your table frequently. And with more holiday meals coming up . . .

here's what you'll need . . .
1 can kitchen cut green beans (they used to be 16 oz. cans; now they’re 14; next year 12?)
1 can whole peeled tomatoes (same story, ah well . . .)
6 whole fennel seeds
healthy pinch dried oregano
fresh ground Tellicherry pepper
splash of white wine

Here’s how you do it.

Dump the tomatoes into a saucepan. Use the blade of a spatula (or your favorite implement of destruction) to slice the whole tomatoes into pieces – at least quarters, more if you wish.

Break up tomatoes

Add precisely 6 fennel seeds. (Well, that’s what I told Cathy the first time I did these, and it was probably pretty close. Now that she’s comfortable with the flavor, a little more than 6 is common!) A touch of fennel will enhance the flavor of the tomato; but if your beans taste like licorice, you used way too much.

Add the oregano. As almost always with dried herbs, crush the oregano by rolling and rubbing it between thumb and forefinger before tossing it into the pan. Once again, the idea is to enhance, not to flavor, so be judicious with your pinch. I’d guess I typically use ½ tsp. for a single-can batch like we’re describing here.

Add spices

Now comes the hard part. Decision time. Do you include the packing liquid from the green beans? Or not.

Here’s the secret decoder ring: Are you making gravy?

If you’re serving these beans with anything that uses gravy (roast beef, roast fowl, roast pork, hey, Pizza if you like gravy on your pie!), then be sure to dump the entire can of beans, liquid and all into the pot! Your gravy will thank you when you drain the cooking liquid from your beans and tomatoes into your gravy-making pan!

If no gravy, then drain the liquid from the beans before tossing them in on top of the tomatoes.

But either way, toss in the beans. And grind some Tellicherry all over the top of them. (No, you don’t need to add any salt – there’s plenty in the tomatoes, and even more if you added the bean liquid!) Now spritz a small splash or two of white wine across the top to wash some of the pepper into the tomato layer (the alcohol releases some flavors in the tomatoes that would otherwise remain hidden). Finally, cover your creation and put it over barely-there-heat for at least an hour. Two is fine.

Beans and the pepper

Check on the pot after 30 minutes or so. You should find a good head of steam under the lid, but no serious bubbling on the surface. This is a dish you want to warm into submission. If you’re working with a gas stove where low temperatures are hard to maintain, try a double boiler. I mean, as long as you don’t actually burn (char) the tomatoes, you’ll be fine (so if you have to do a hurry-up-batch, go for it!) But sneaking up on the beans will leave them as ‘crunchy’ as a canned bean can get. Your goal here is to meld the flavors not to ‘cook’ the vegetables.

And there you have it; magic from a couple of cans.

Green beans & tomatoes served

If you need to serve more than two or three, use two cans of beans and one of tomatoes, and maybe 12 fennel seeds . . .

It’s endlessly scalable, so just cook ‘em up and enjoy!

Saturday, December 04, 2004

Ingredient: Chorizos

This stuff is spectacular, at least to my taste buds. A cousin in South Florida, who happens to be Cuban, introduced us to it. He made us a Cuban breakfast one time, and I’ve been trying to find the same brand of Chorizos up here in the Northeast ever since. I have found one other brand, but it just doesn’t measure up.

One day, inspiration struck. Duh! The Quijote brand is all over South Florida; we know people in South Florida; the product requires no refrigeration (until opened); and USPS parcel post is still pretty cheap . . . Hmmmmm.

Quijote brand Chorizos

Now we have Quijote brand Chorizos all the time!

I have no idea how widely this brand is available, but if you can find it, buy it. You can get it on the Net, but the shipping charges are pretty stiff. Of course, if you’ve got friends and/or relatives in Florida . . .

Cook it up in a little olive oil and use it in everything!

Wednesday, December 01, 2004

Friday, November 19, 2004

Recipe: Pork with Onions & Apples

This began as another of those "What'll we have for dinner?" creations. The old, when in doubt go scrounge around in the refrigerator and make something up out of what you find. It was October, so we found some apples; we always have onions on hand; and the late September weather had been so lousy, we had some frozen 'country style' pork ribs that hadn't gotten barbecued. Hmmm... Dinner for two.

Since then, the basic approach has become a staple on the menu, and has been done with pork roasts, chops and cutlets, as well as ribs. They all work fine. It’s simple, quick, and just plain good.

here's what you'll need . . .
pork, chops, ribs ('country style', thick, with or without bones, cheap), cutlets, roast, . . .
Tabasco Sauce
Worcestershire sauce (Lea & Perrins, of course)
1 medium yellow onion
1 nice red, medium sized Macintosh apple (or your favorite type)
fresh ground Tellicherry
olive oil
white wine

Here's how you do it.
Though the original creation was done with some frozen ribs, this dish works much better with fresh meat – mainly because marinating will let the meat develop a layer of flavor independent of the liquid in which it’s cooked.

Pork chops etc.

Start by giving both sides of the (in this case) chops a thorough rubbing with a liberal dose of Tabasco. Not so much that you end up with a pool on the plate, but enough to give a goodly reddish coat to both sides of the meat. Then take a fork and make three or four stabs into each side of the meat. Finally, douse the chops with Worcestershire sauce. You want a complete coat on the top of each chop (spread it around if you need to), and a good-sized puddle underneath. Let the meat marinate at room temperature for at least 30 minutes (but no more than an hour), turning every 10 minutes or so.

Pork chops marinating

Meanwhile, do all the other stuff (set the table, make the coffee, feed the cat, prepare potatoes and vegetables, ...). And, chop the onion and the apple. The onion, you know how (or if not, check the earlier post).

As for the apple, well, yank the stem. Then cut it in half and cut each half in half and maybe in half again (all vertically, along the stem line). Carve out the core and the seeds from each piece and then chop them up into ½ inch or so chunks.

Coring the apple

Coat the bottom of a baking dish with a generous layer of olive oil, and toss in the meat. Pour the marinade all over, sprinkle the onions around; sprinkle the apples on top; splash a little white wine over everything; and season with copious quantities of freshly ground (coarse, of course) Tellicherry black pepper.

In the dish

Cover the baking dish with aluminum foil (crimp the edges to seal), and bake at around 350 ºF for at least 45 minutes. If you want to, you can let it go for up to 2 hours; after that you’ll have pork jerky – very tasty pork jerky, but . . .

Covered and ready to cook

We like to serve these chops (in fact, most pork dishes) with boiled potatoes and Corn O’Catherine, Apple Sauce and probably a salad. If you want, you can turn the cooking liquid into a sauce - just cook it down to half its volume and serve it on the side.

Pork chops with apple and onions